Speed Up Your Workflow With Figma Plugins
One of the best ways to reduce time spent pushing pixels in Figma is to use some of the countless plugins that can do the work for you. Figma has added some amazing functionality recently to help with our workflows but plugins still fill in the gap for many tedious, repetitive daily tasks. This practical article is an attempt to highlight the most useful plugins that I use often to make my design process faster and more smooth.
Finding Figma Plugins
The amount of time we, as interface designers, spend clicking, selecting, renaming, moving, updating, and otherwise tweaking our designs in 2020 is surprising (and often frustrating). This is an unavoidable part of our jobs, even with all the AI design generating magic available today. However, any minutes or hours that we are able to save on moving pixels can be spent improving the design quality, growing as designers, or just enjoying life outside of design (I know, design is life, but...).
Enter Figma plugins! Members of the community have developed hundreds of plugins since their first introduction to Figma last year, many of which help us speed up design tasks (and some that will definitely slow you down). But, as the current Figma plugin search functionality is pretty basic, for me (and for many other plugin users) it means that we need to search Google first, find a detailed article or a blog post about a plugin that does something, read about it, then go to Figma to install and try it. This article will focus on a number of plugins for speeding up our workflows and it is also intended to contribute to the community and collective knowledge around what plugins to use for some tasks.
Hopefully one of the plugins listed below is what you are looking for, or maybe what you didn’t know you are looking for but still desperately need! (“There is nothing like looking, if you want to find something. You certainly usually find something, if you look, but it is not always quite the something you were after.”)
The plugins highlighted here aren’t necessarily the most flashy or exciting but they have improved my workflow drastically. Broadly speaking, I find that the most useful plugins:
- Generate placeholder content in bulk.
- Organize components and elements in bulk.
- Change elements and styles in bulk.
So without further ado, let’s dive into the five plugins that I use every day (and some bonus keyboard shortcuts at the end of the article).
Five Plugins To Help You Enhance Your Workflow
- Similayer
- Content Reel
- Change Text
- Lorem ipsum
- Design System Organizer
- Bonus: Plugin Shortcuts
1. Similayer
When To Use It
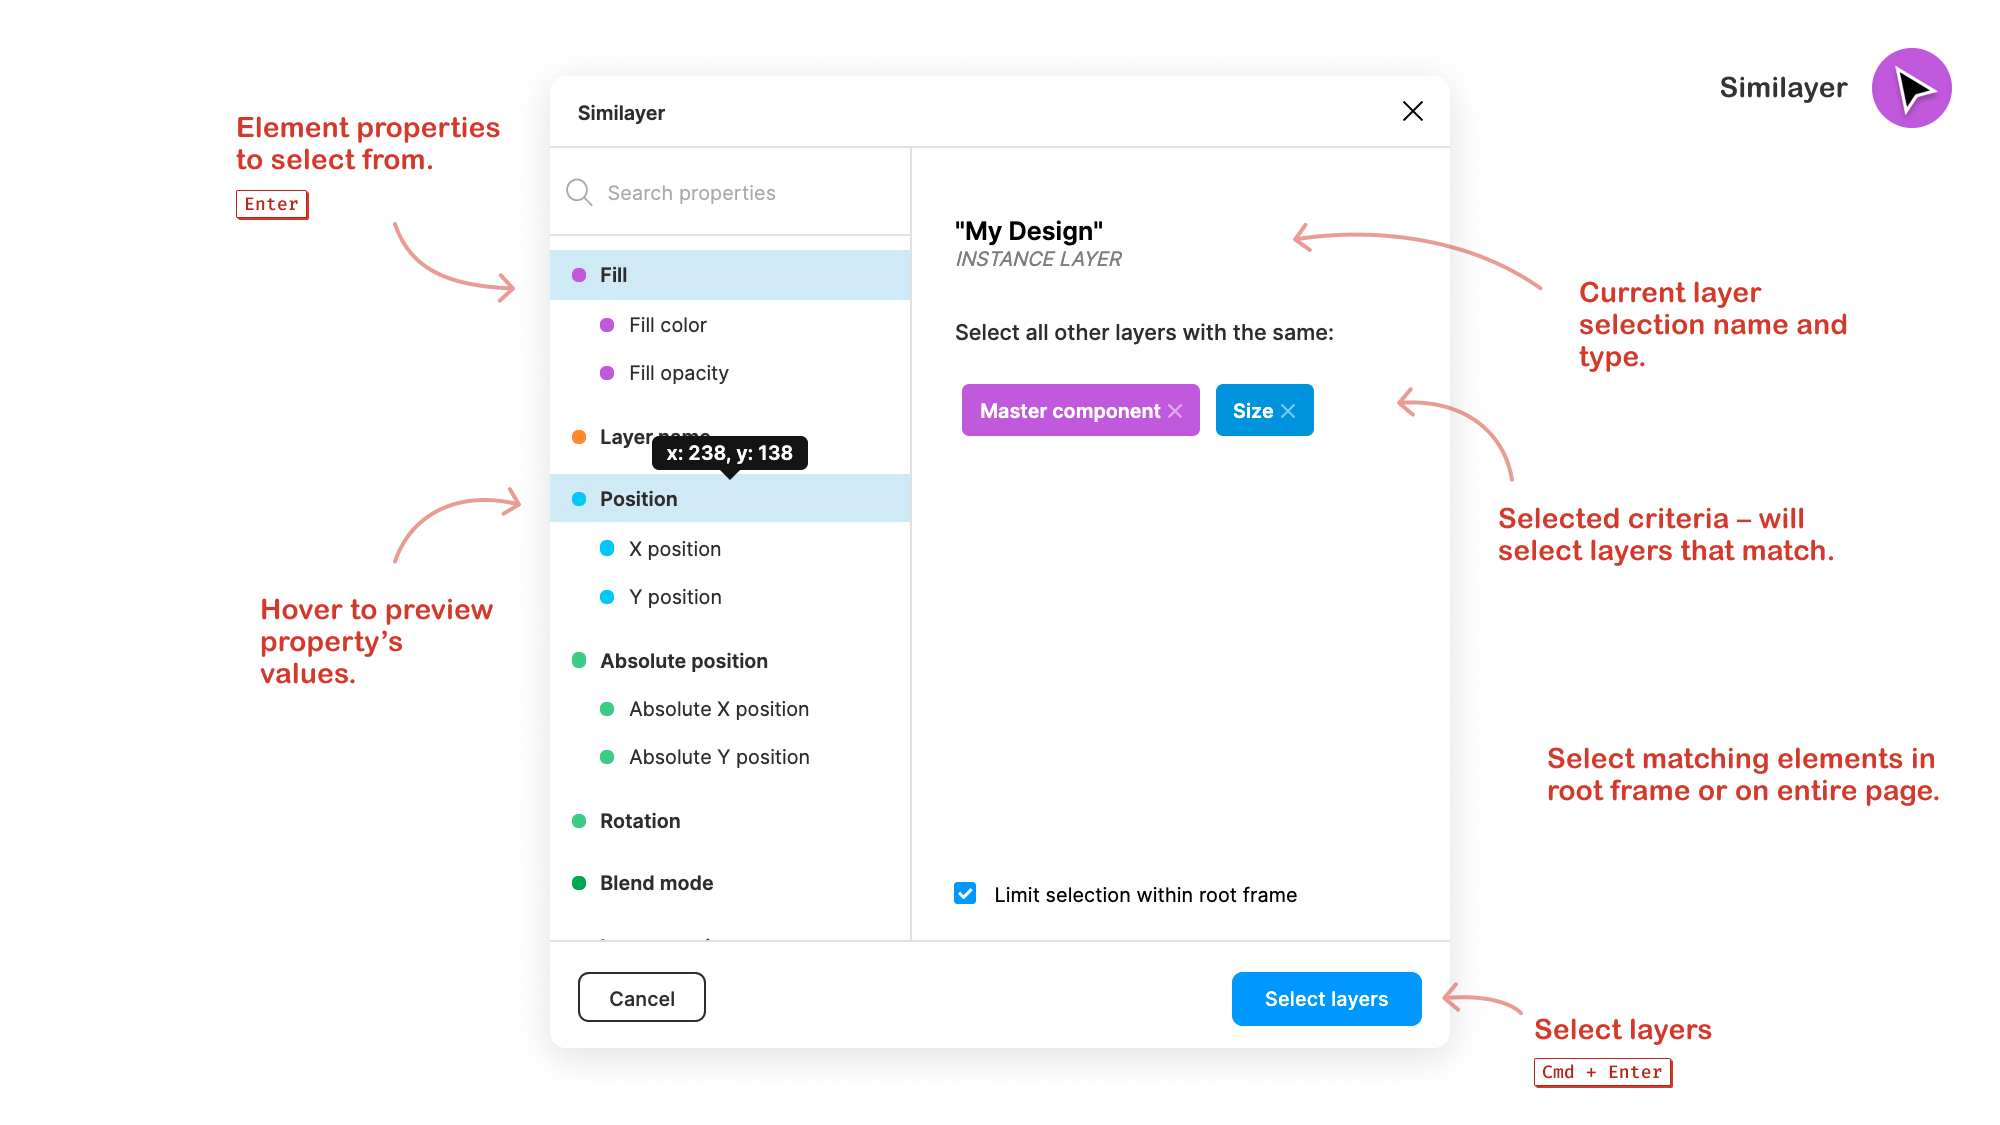
Use Similayer when you need to select more than four or five elements with the same styles (images, components, text, frames, and so on).
- View in Figma →
Highlights
- Select similar layers with a few clicks.
- Use extremely specific properties/conditions to define which elements to select.
- Select similar elements from only within a specific frame or the entire page.

The Details
Selecting multiple elements while holding Shift and double or triple-clicking into multiple groups is time-consuming and difficult. This is especially true when there are many nested layers or when trying to select elements from inside many groups. In such cases, your attempts to multi-select a few elements will more often be a miss, instead of a hit.
Selecting only a couple of elements can be quick enough when using Shift and the mouse cursor. If it takes more than five seconds to select the elements though, Similayer will save you time. Becoming familiar with this Similayer will expedite your workflows significantly and change how you work with Figma. During an average working day, I will use this plugin twice as often as all other plugins, combined. Of course, as with any plugin, Figma may add core functionality that eventually will make this plugin obsolete, but for the time being, it is a real life-saver.
I most often use Similayer to:
- Select all instances of a component within a frame;
- Select all text with a specific style (weight, family, size) within a frame;
- Select all layers with the same name on a page.


This is just a glimpse of what the plugin can do — the options are almost limitless! Similayer can select any elements with definitive granularity. Because of this I usually select elements with Similayer before running any of the next three plugins.
Tip
To select elements in multiple top-level frames (e.g., let’s say there are five designs on a page but you only want to select elements in Design One and Design Two), temporarily add a frame around all the top-level frames you want to select elements in. Then use the “Limit selection within root frame” option to select elements from those specific screens/frames but not the entire page.

2. Content Reel
When To Use It
Use Content Reel any time you need to generate more than a couple of items of placeholder content. It could be addresses, phone numbers, names, order numbers, profile images, or almost any type of text string or image.
- View in Figma →
Highlights
- Quickly generate structured placeholder content.
- Supports images and text strings.
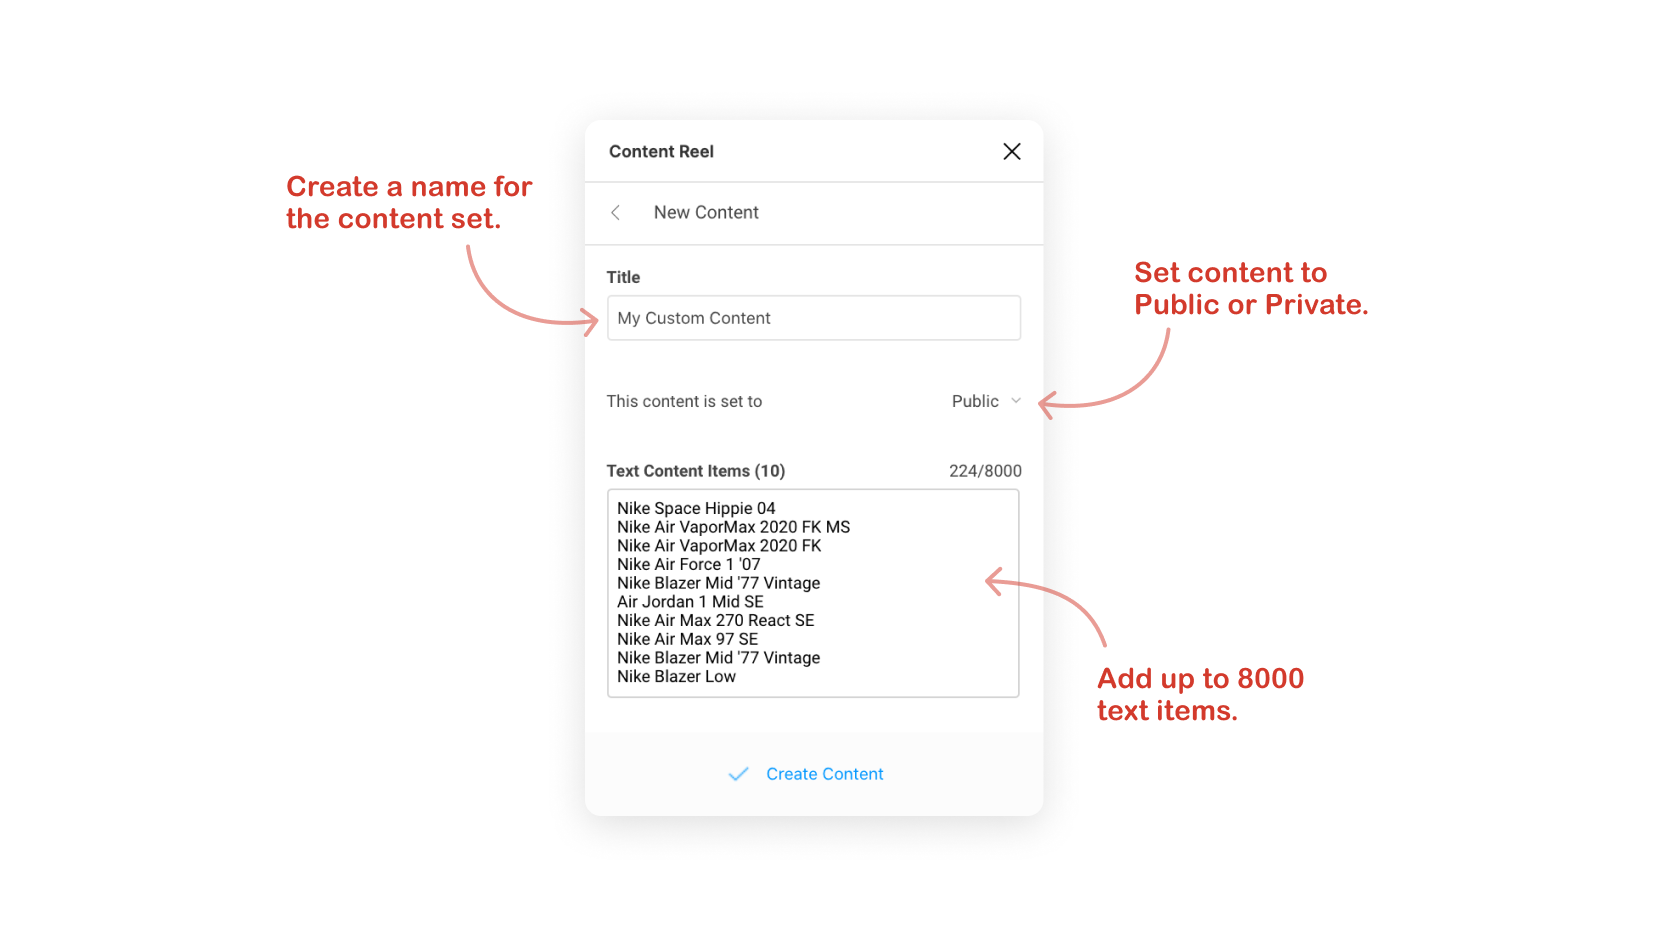
- Create your own content sets for personal use or publish them publicly.

The Details
If you are tired of making up names, avatars, phone numbers, emails, position titles, addresses, or any other type of text to make your designs look realistic, this plugin is for you. Content Reel inserts structured placeholder content from data sets into designs. A great use case for this plugin is filling out tables with realistic content. Using (555) 555-5555 down an entire column will cut it when you’re in a pinch but doesn’t look very realistic. Aside from creating visually realistic designs, this plugin can help test the constraints of a design by using realistically looking “dummy” content.
When opening the plugin for the first time, different content sets will be available on your “home” page that will cover most of the basic use cases. For more unique cases or customized content, try searching the Content Library for more existing options or creating your own content sets!
As a practical example, I recently helped design a conference room booking app. For that project, I ended up creating a set of Amenities (WiFi, TV, outlets, coffee maker, and so on) to insert at random into different room listings.
Image sets can also be useful for cases such as avatars. The plugin also provides a default avatar set which works great but I ended up adding a custom set of more “professional” images for avatars. (Unsplash.com is a great website where you can find fitting photos for this purpose.)

Tip
When you create your own content set in the plugin, there is an option to keep it private for personal use or publish them directly in the plugin for your team or other users to find and utilize later.
3. Change Text
When To Use It
Use Change Text anytime you need to find & replace a word in multiple places or update multiple text layers simultaneously.
- View in Figma →
Highlights
- Easily find and replace existing text from the current selection.
- Use $& to insert current text like the Figma native batch rename tool.
- Plugin only updates selected text layers (both a pro & con, depending on the use case).

The Details
This plugin makes fixing a typeo typo that was copy/pasted 25 times into a 5-second task. It’s similar to Figma’s native batch rename tool but for text! You can find and replace words or strings of text in multiple text layers simultaneously.
I love this plugin for client work. It’s a quick and thorough way to find and replace a company’s name in all existing designs or change everywhere a button label that says “Create” with a button label that says “Add”, based on a client’s request. There are so many more cases where this is useful though! The more you have a solid component architecture the less this plugin is needed but we all know how difficult it is to create components from the get-go.
Tip
First, use Similayer to quickly select all the text layers you want to change. Then, use Change Text to edit the text. If the text characters in all the target layers are all the same (e.g., all are “typeo”) you can easily select all the elements using the “Text characters” option in Similayer.
4. Lorem Ipsum
When To Use It
Use Lorem ipsum any time you need dummy text. Whether you need a quick 10-minute placeholder text or are waiting for a client to finish the final copy, lorem ipsum text is always handy.
- View in Figma →
Highlights
- Generate multiple text boxes at the same time.
- Content doesn’t have to begin with “Lorem ipsum” and will generate unique content for each instance.
- Auto-generate fills a text area perfectly based on its size.

The Details
Lorem ipsum is one of those not-so-flashy but really vital plugins. I think every designer can probably read Latin these days without realizing it! The entire purpose of this plugin is to save you time by not having to write “real” placeholder content. All the more reason to only spend a couple of seconds generating the dummy text.
There are plenty of Figma plugins specifically for generating dummy content with various settings. If you don’t use this one specifically, make sure to grab one of the other 5+ options (just search “lorem ipsum). With this plugin, @Dave found the perfect balance of flexibility and simplicity with the ability to quickly choose the number of words, sentences, or paragraphs to generate. The added ability to automatically fill a text layer with the perfect fit of content sets this plugin apart. Especially when working with auto layout components that will resize based on content (when you don’t necessarily want them to).
Tip
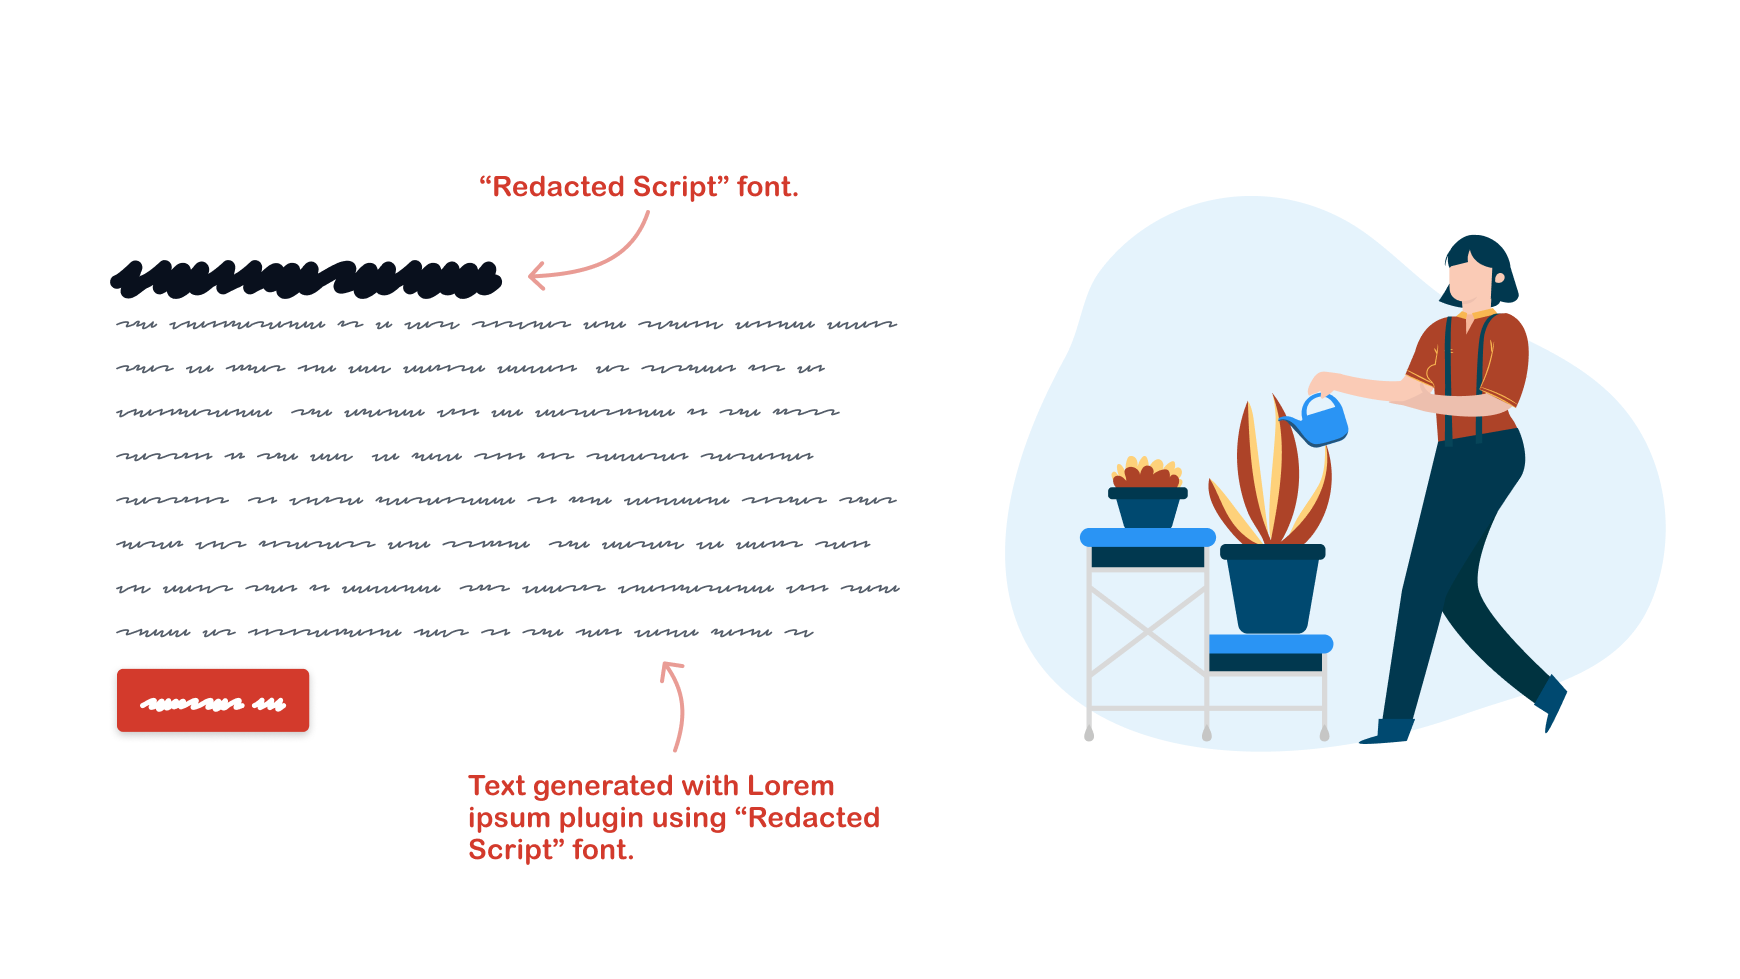
Use the auto-generate option to perfectly fill any text layer with the dummy text when you don’t want layers to resize. For more abstract dummy text, try using a font family like Redacted (download) in combination with the Lorem ipsum plugin.

5. Design System Organizer
When To Use It
Use Design System Organizer if you are creating a new component library! It can also be helpful with customizing copied component libraries or in files with a large number of local styles or components.
- View in Figma →
Highlights
- Rename, delete, reorganize components in bulk.
- Works with all styles (text, color, fill, effect, grid).
- Style names with multiple /’s are sorted into subfolders in the plugin.

The Details
This is one of those plugins that I don’t use every day (you probably won’t either) but it is still such a massive time saver that it needs to be included in the list. Depending on the task or file, this plugin can save hours of time that would be otherwise spent renaming and organizing. If you work with clients or new design systems often, this plugin will help you stay organized. The plugin costs $2.99 for a lifetime license (but there is a 30 day free trial for each file the plugin is used in). Even if you only set up a design system once it is well worth the cost, as the plugin will help you reorganize and clean up things as you go.
One great use for the Design System Organizer is to clean up or rename components in a library that you cloned from the Figma Community. Most community files are already well organized and easy to use out-of-the-box. Sometimes, if you’re like me, it can be more difficult to understand how new components are named than to just rename and re-categorize them in a method you are already familiar with.
Tip
This is a great plugin to use if you just need to delete styles in bulk. Unlike components, Figma doesn’t allow multi-selecting styles so deleting more than a few is time-consuming. Use this plugin to multi-select and remove styles from a file.
6. Bonus: Plugin Shortcuts
No matter which plugins you use or how often you use them, opening a plugin can be cumbersome. Plenty of right-clicks, nested dropdown menus, no thanks. Here are a couple of shortcuts to open Figma plugins.
Open A Plugin Fast
Use Cmd + / (or Ctrl + / on Windows) to open the Search menu. Quickly search a plugin by name and open it with Enter.
Open A Plugin Even Faster
Use Cmd + Opt + P (or Ctrl + Alt + P on Windows) to reopen the last used plugin. This is especially nice if you use the same plugin often (for me this shortcut will almost always open Similayer).

Open A Plugin The Fastest
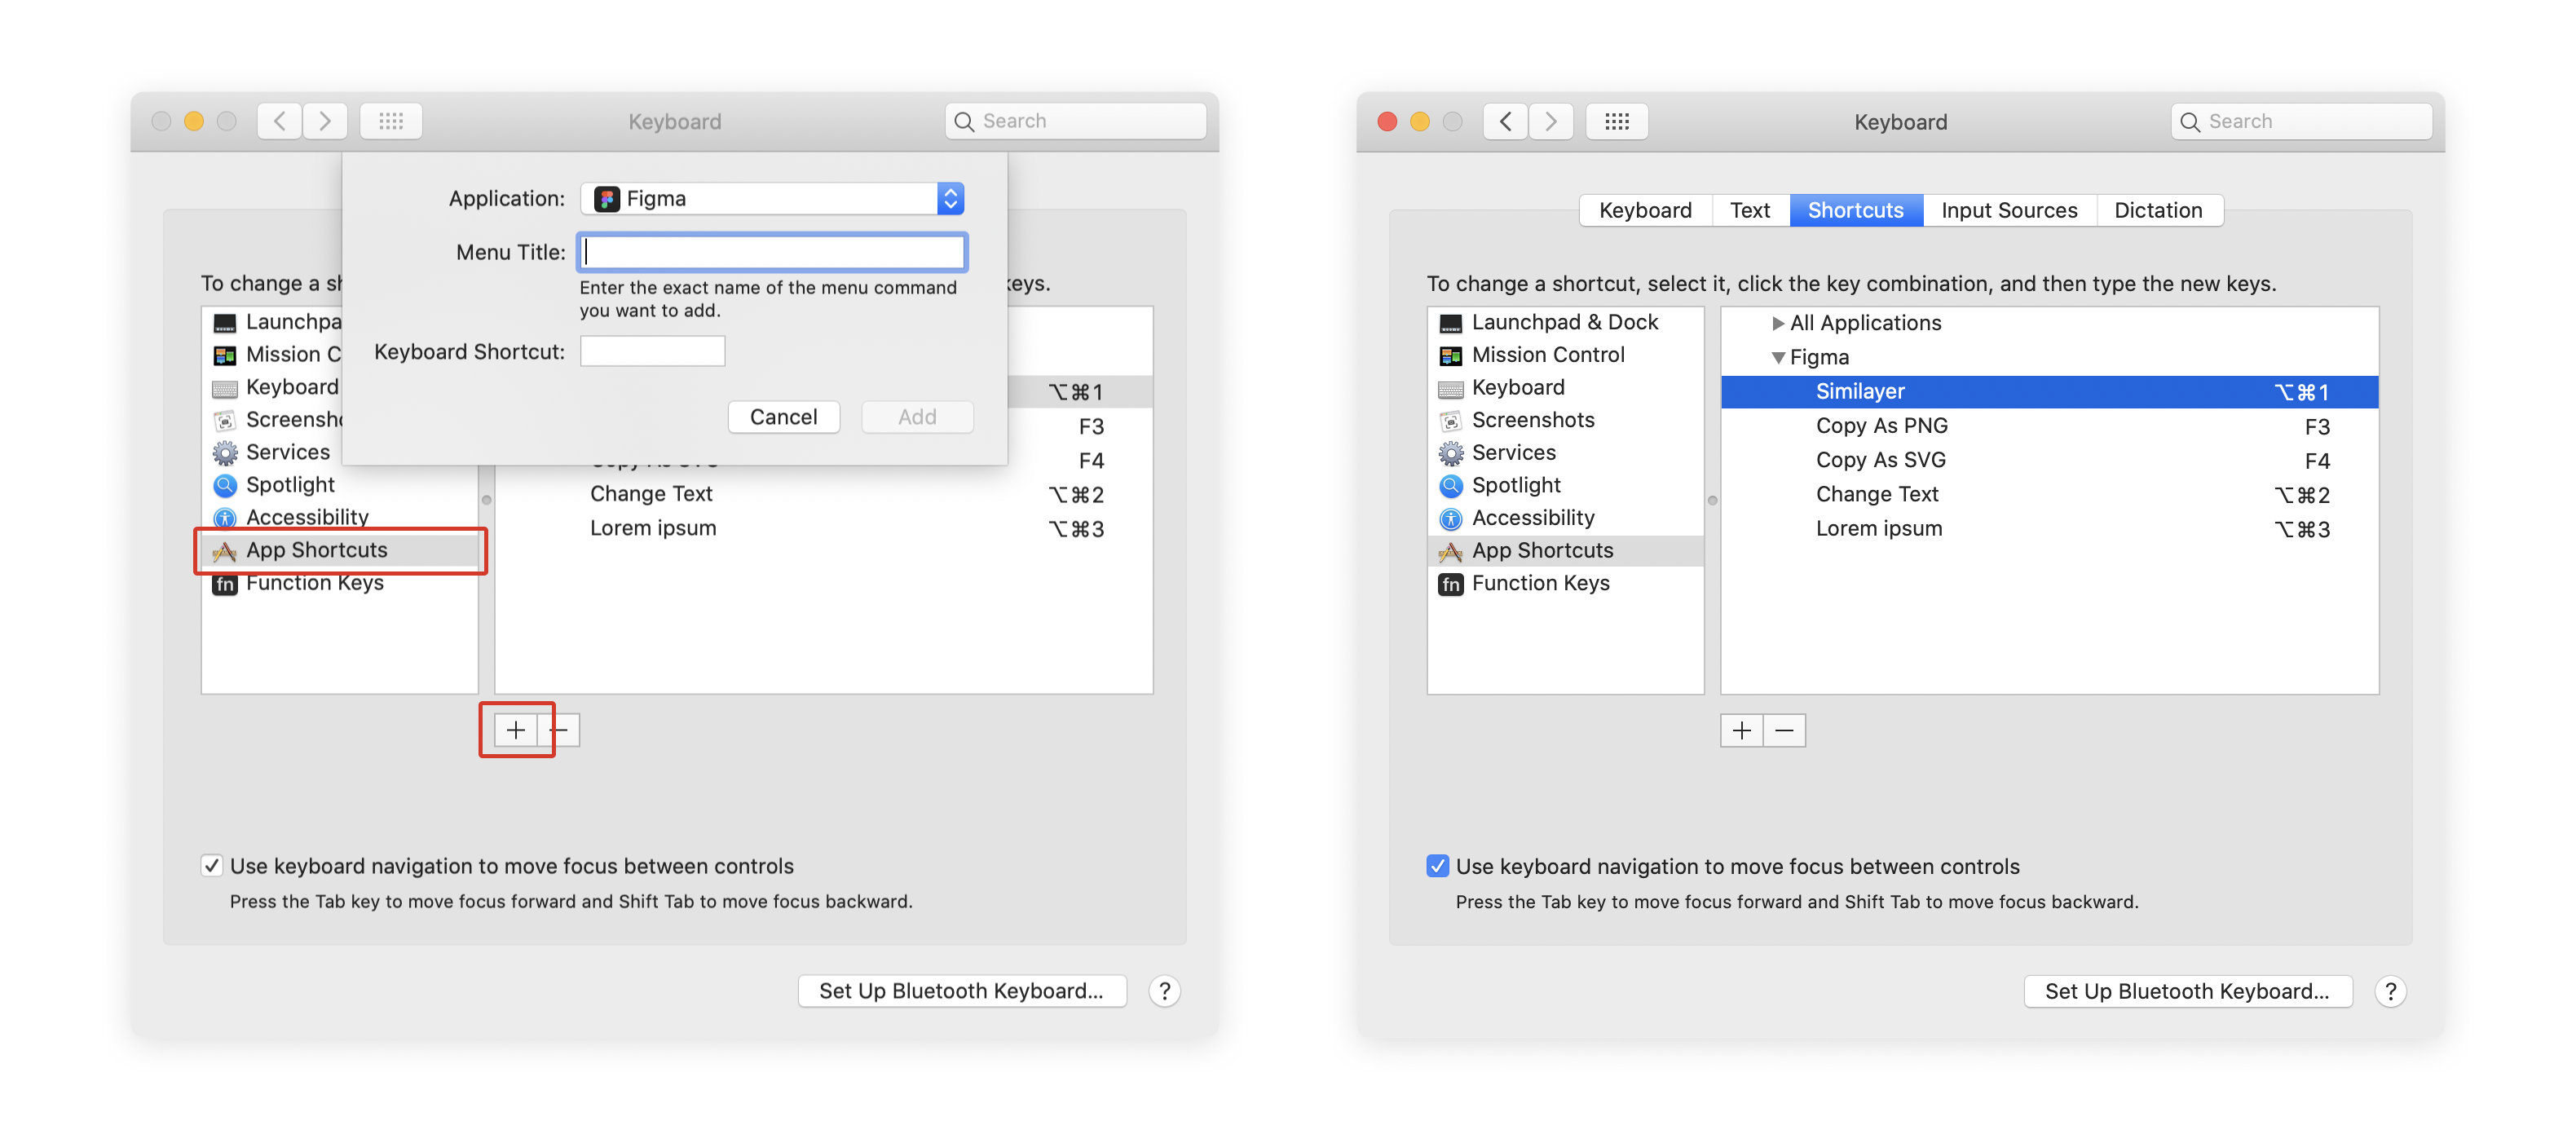
On a Mac, it’s easy to create custom keyboard shortcut(s) for the Figma plugin(s) that you use daily.
Note: There is probably a program for Windows that will allow you to achieve something similar, but, as I am a Mac user, I won’t be able to help you with that.
The following method can also be used for any menu item that you regularly use or for menu items with existing shortcuts that are difficult to remember. Here’s how to do it:
- Navigate to System Preferences → Keyboard → Shortcuts → App Shortcuts.
- Click the “+” at the bottom left of the list to create a new shortcut.
- Select Figma from the Applications dropdown.
- Add the name of the plugin or menu item exactly as it appears in Figma (e.g. Similayer).
- Create a keyboard shortcut and click “Add”.
- Run the plugin in Figma with your custom shortcut!

Conclusion
Figma has added some amazing native functionality lately to make repetitive actions less repetitive. At the Config Europe event they announced more features releasing in 2020 that will save designers significant effort but plugins still fill in the gap where native features fall short. There are countless useful and fun plugins available in the Figma Community! If you invest a bit of time learning to use these five (and any other workflow-related plugins), your Figma productivity will benefit from it.
Make sure to also browse the Figma Community Files if you haven’t already! There are new resources every day to jumpstart your next project, improve processes, or be inspired by.
Until next time, meet me in the Figma community.
Happy designing!