How To Build An E-Commerce Site With Angular 11, Commerce Layer And Paypal
Nowadays it’s essential to have an online presence when running a business. A lot more shopping is done online than in previous years. Having an e-commerce store allows shop owners to open up other streams of revenue they couldn't take advantage of with just a brick and mortar store. Other shop owners however, run their businesses online entirely without a physical presence. This makes having an online store crucial.
Sites such as Etsy, Shopify and Amazon make it easy to set up a store pretty quickly without having to worry about developing a site. However, there may be instances where shop owners may want a personalized experience or maybe save on the cost of owning a store on some of these platforms.
Headless e-commerce API platforms provide backends that store sites can interface with. They manage all processes and data related to the store like customer, orders, shipments, payments, and so on. All that’s needed is a frontend to interact with this information. This gives owners a lot of flexibility when it comes to deciding how their customers will experience their online store and how they choose to run it.
In this article, we will cover how to build an e-commerce store using Angular 11. We shall use Commerce Layer as our headless e-commerce API. Although there may be tonnes of ways to process payments, we’ll demonstrate how to use just one, Paypal.
- View source code on GitHub →
Prerequisites
Before building the app, you need to have Angular CLI installed. We shall use it to initialize and scaffold the app. If you don’t have it installed yet, you can get it through npm.
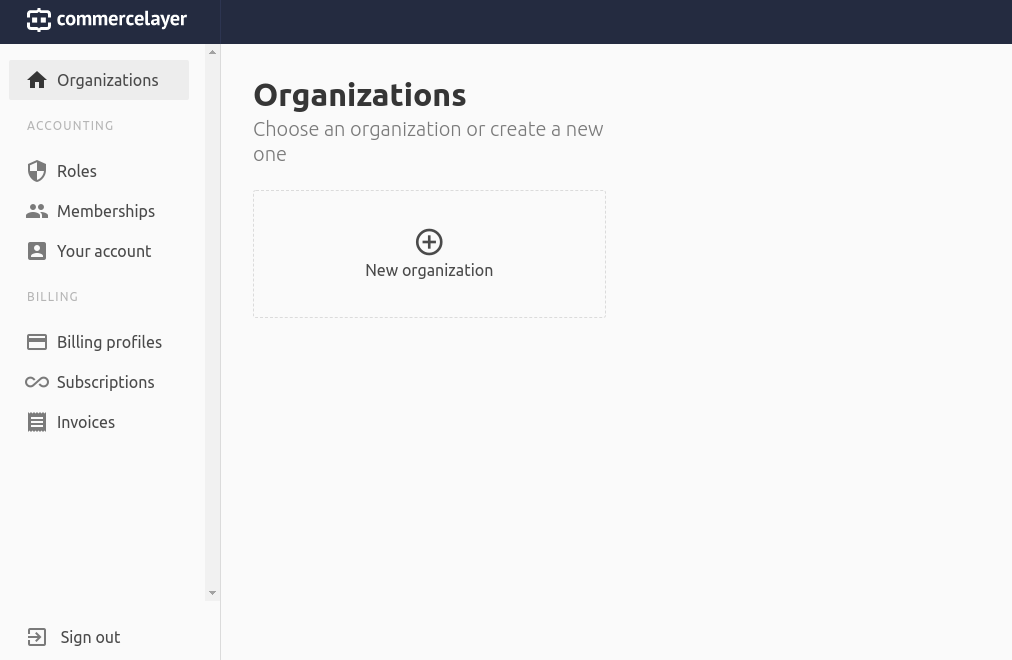
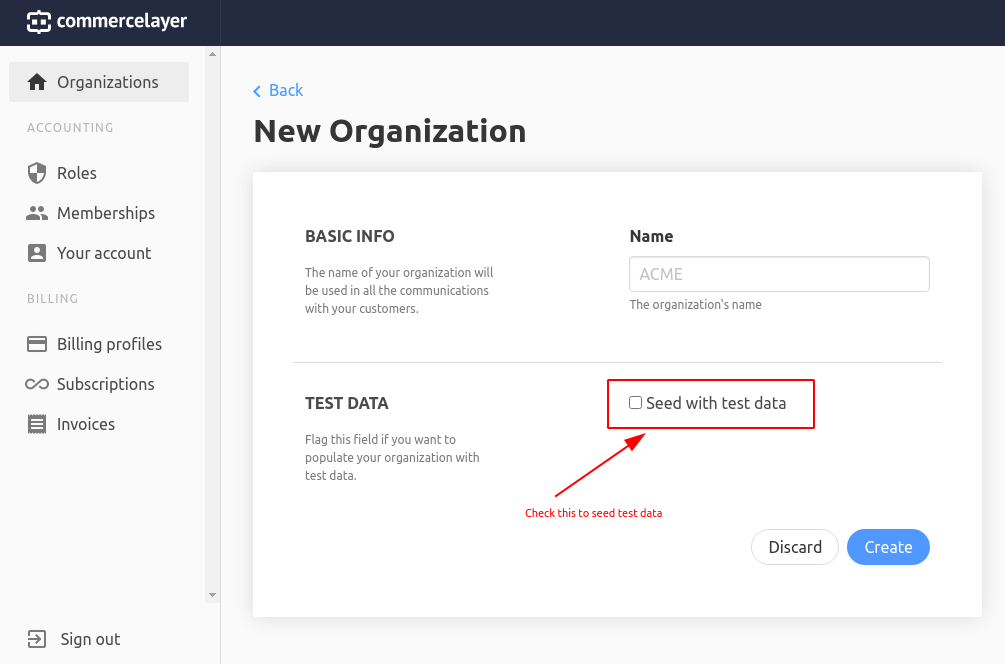
npm install -g @angular/cliYou’ll also need a Commerce Layer developer account. Using the developer account, you will need to create a test organization and seed it with test data. Seeding makes it easier to develop the app first without worrying about what data you’ll have to use. You can create an account at this link and an organization here.
Lastly, you will need a Paypal Sandbox account. Having this type of account will allow us to test transactions between businesses and users without risking actual money. You can create one here. A sandbox account has a test business and test personal account already created for it.
Commerce Layer And Paypal Config
To make Paypal Sandbox payments possible on Commerce Layer, you’ll need to set up API keys. Head on over to the accounts overview of your Paypal developer account. Select a business account and under the API credentials tab of the account details, you will find the Default Application under REST Apps.


To associate your Paypal business account with your Commerce Layer organization, go to your organization’s dashboard. Here you will add a Paypal payment gateway and a Paypal payment method for your various markets. Under Settings > Payments, select Payment Gateways > Paypal and add your Paypal client Id and secret.

After creating the gateway, you will need to create a Paypal payment method for each market you are targeting to make Paypal available as an option. You’ll do this under Settings > Payments > Payment Methods > New Payment Method.

A Note About Routes Used
Commerce Layer provides a route for authentication and another different set of routes for their API. Their /oauth/token authentication route exchanges credentials for a token. This token is required to access their API. The rest of the API routes take the pattern /api/:resource.
The scope of this article only covers the frontend portion of this app. I opted to store the tokens server side, use sessions to track ownership, and provide http-only cookies with a session id to the client. This will not be covered here as it is outside the scope of this article. However, the routes remain the same and exactly correspond to the Commerce Layer API. Although, there are a couple of custom routes not available from the Commerce Layer API that we’ll use. These mainly deal with session management. I’ll point these out as we get to them and describe how you can achieve a similar result.
Another inconsistency you may notice is that the request bodies differ from what the Commerce Layer API requires. Since the requests are passed on to another server to get populated with a token, I structured the bodies differently. This was to make it easier to send requests. Whenever there are any inconsistencies in the request bodies, these will be pointed out in the services.
Since this is out of scope, you will have to decide how to store tokens securely. You’ll also need to slightly modify request bodies to match exactly what the Commerce Layer API requires. When there is an inconsistency, I will link to the API reference and guides detailing how to correctly structure the body.
App Structure
To organize the app, we will break it down into four main parts. A better description of what each of the modules does is given under their corresponding sections:
- the core module,
- the data module,
- the shared module,
- the feature modules.
The feature modules will group related pages and components together. There will be four feature modules:
- the auth module,
- the product module,
- the cart module,
- the checkout module.
As we get to each module, I’ll explain what its purpose is and break down its contents.
Below is a tree of the src/app folder and where each module resides.
src
├── app
│   ├── core
│   ├── data
│   ├── features
│   │   ├── auth
│   │   ├── cart
│   │   ├── checkout
│   │   └── products
└── shared
Generating The App And Adding Dependencies
We’ll begin by generating the app. Our organization will be called The LIme Brand and will have test data already seeded by Commerce Layer.
ng new lime-appWe’ll need a couple of dependencies. Mainly Angular Material and Until Destroy. Angular Material will provide components and styling. Until Destroy automatically unsubscribes from observables when components are destroyed. To install them run:
npm install @ngneat/until-destroy
ng add @angular/material
Assets
When adding addresses to Commerce Layer, an alpha-2 country code needs to be used. We’ll add a json file containing these codes to the assets folder at assets/json/country-codes.json. You can find this file linked here.
Styles
The components we’ll create share some global styling. We shall place them in styles.css which can be found at this link.
Environment
Our configuration will consist of two fields. The apiUrl which should point to the Commerce Layer API. apiUrl is used by the services we will create to fetch data. The clientUrl should be the domain the app is running on. We use this when setting redirect URLs for Paypal. You can find this file at this link.
Shared Module
The shared module will contain services, pipes, and components shared across the other modules.
ng g m sharedIt consists of three components, one pipe, and two services. Here’s what that will look like.
src/app/shared
├── components
│   ├── item-quantity
│   │   ├── item-quantity.component.css
│   │   ├── item-quantity.component.html
│   │   └── item-quantity.component.ts
│   ├── simple-page
│   │   ├── simple-page.component.css
│   │   ├── simple-page.component.html
│   │   └── simple-page.component.ts
│   └── title
│       ├── title.component.css
│       ├── title.component.html
│       └── title.component.ts
├── pipes
│   └── word-wrap.pipe.ts
├── services
│   ├── http-error-handler.service.ts
│   └── local-storage.service.ts
└── shared.module.ts
We shall also use the shared module to export some commonly used Angular Material components. This makes it easier to use them out of the box instead of importing each component across various modules. Here’s what shared.module.ts will contain.
@NgModule({
  declarations: [SimplePageComponent, TitleComponent, WordWrapPipe, ItemQuantityComponent],
  imports: [CommonModule, MatIconModule, MatButtonModule, MatTooltipModule, MatMenuModule, RouterModule],
  exports: [
    CommonModule,
    ItemQuantityComponent,
    MatButtonModule,
    MatIconModule,
    MatSnackBarModule,
    MatTooltipModule,
    SimplePageComponent,
    TitleComponent,
    WordWrapPipe
  ]
})
export class SharedModule { }
Components
Item Quantity Component
This component sets the quantity of items when adding them to the cart. It will be used in the cart and products modules. A material selector would have been an easy choice for this purpose. However, the style of the material select didn’t match the material inputs used in all the other forms. A material menu looked very similar to the material inputs used. So I decided to create a select component with it instead.
ng g c shared/components/item-quantityThe component will have three input properties and one output property. quantity sets the initial quantity of items, maxValue indicates the maximum number of items that can be selected in one go, and disabled indicates whether the component should be disabled or not. The setQuantityEvent is triggered when a quantity is selected.
When the component is initialized, we’ll set the values that appear on the material menu. There also exists a method called setQuantity that will emit setQuantityEvent events.
This is the component file.
@Component({
  selector: 'app-item-quantity',
  templateUrl: './item-quantity.component.html',
  styleUrls: ['./item-quantity.component.css']
})
export class ItemQuantityComponent implements OnInit {
  @Input() quantity: number = 0;
  @Input() maxValue?: number = 0;
  @Input() disabled?: boolean = false;
  @Output() setQuantityEvent = new EventEmitter<number>();

  values: number[] = [];

  constructor() { }

  ngOnInit() {
    if (this.maxValue) {
      for (let i = 1; i <= this.maxValue; i++) {
        this.values.push(i);
      }
    }
  }

  setQuantity(value: number) {
    this.setQuantityEvent.emit(value);
  }
}
This is its template.
<button mat-stroked-button [matMenuTriggerFor]="menu" [disabled]="disabled">
    {{quantity}}
    <mat-icon ngIf="!disabled">expand_more</mat-icon>
</button>
<mat-menu #menu="matMenu">
    <button ngFor="let no of values" (click)="setQuantity(no)" mat-menu-item>{{no}}</button>
</mat-menu>
Here is its styling.
button {
    margin: 3px;
}
Title Component
This component doubles as a stepper title as well as a plain title on some simpler pages. Although Angular Material provides a stepper component, it wasn’t the best fit for a rather long checkout process, wasn’t as responsive on smaller displays, and required a lot more time to implement. A simpler title however could be repurposed as a stepper indicator and be useful across multiple pages.
ng g c shared/components/titleThe component has four input properties: a title, a subtitle, a number (no), and centerText, to indicate whether to center the text of the component.
@Component({
  selector: 'app-title',
  templateUrl: './title.component.html',
  styleUrls: ['./title.component.css']
})
export class TitleComponent {
  @Input() title: string = '';
  @Input() subtitle: string = '';
  @Input() no?: string;
  @Input() centerText?: boolean = false;
}
Below is its template. You can find its styling linked here.
<div id="header">
    <h1 *ngIf="no" class="mat-display-1" id="no">{{no}}</h1>
    <div [ngClass]="{ 'centered-section': centerText}">
        <h1 class="mat-display-2">{{title}}</h1>
        <p id="subheading">{{subtitle}}</p>
    </div>
</div>
Simple Page Component
There are multiple instances where a title, an icon, and a button were all that were needed for a page. These include a 404 page, an empty cart page, an error page, a payment page, and an order placement page. That’s the purpose the simple page component will serve. When the button on the page is clicked, it will either redirect to a route or perform some action in response to a buttonEvent.
To make it:
ng g c shared/components/simple-pageThis is its component file.
@Component({
  selector: 'app-simple-page',
  templateUrl: './simple-page.component.html',
  styleUrls: ['./simple-page.component.css']
})
export class SimplePageComponent {
  @Input() title: string = '';
  @Input() subtitle?: string;
  @Input() number?: string;
  @Input() icon?: string;
  @Input() buttonText: string = '';
  @Input() centerText?: boolean = false;
  @Input() buttonDisabled?: boolean = false;
  @Input() route?: string | undefined;
  @Output() buttonEvent = new EventEmitter();

  constructor(private router: Router) { }

  buttonClicked() {
    if (this.route) {
      this.router.navigateByUrl(this.route);
    } else {
      this.buttonEvent.emit();
    }
  }
}
And its template contains:
<div id="container">
    <app-title no="{{number}}" title="{{title}}" subtitle="{{subtitle}}" [centerText]="centerText"></app-title>
    <div *ngIf="icon" id="icon-container">
        <mat-icon color="primary" class="icon">{{icon}}</mat-icon>
    </div>
    <button mat-flat-button color="primary" (click)="buttonClicked()" [disabled]="buttonDisabled">
        {{buttonText}}
    </button>
</div>
It’s styling can be found here.
Pipes
Word Wrap Pipe
Some products' names and other types of information displayed on the site are really long. In some instances, getting these long sentences to wrap in material components is challenging. So we’ll use this pipe to cut the sentences down to a specified length and add ellipses to the end of the result.
To create it run:
ng g pipe shared/pipes/word-wrapIt will contain:
import { Pipe, PipeTransform } from '@angular/core';

@Pipe({
  name: 'wordWrap'
})
export class WordWrapPipe implements PipeTransform {
  transform(value: string, length: number): string {
    return `${value.substring(0, length)}...`;
  }
}
Services
HTTP Error Handler Service
There are quite a number of http services in this project. Creating an error handler for each method is repetitive. So creating one single handler that can be used by all methods makes sense. The error handler can be used to format an error and also pass on the errors to other external logging platforms.
Generate it by running:
ng g s shared/services/http-error-handlerThis service will contain only one method. The method will format the error message to be displayed depending on whether it’s a client or server error. However, there is room to improve it further.
@Injectable({
  providedIn: 'root'
})
export class HttpErrorHandler {

  constructor() { }

  handleError(err: HttpErrorResponse): Observable {
    let displayMessage = '';

    if (err.error instanceof ErrorEvent) {
      displayMessage = Client-side error: ${err.error.message};
    } else {
      displayMessage = Server-side error: ${err.message};
    }

    return throwError(displayMessage);
  }
}
Local Storage Service
We shall use local storage to keep track of the number of items in a cart. It’s also useful to store the Id of an order here. An order corresponds to a cart on Commerce Layer.
To generate the local storage service run:
ng g s shared/services/local-storageThe service will contain four methods to add, delete, and get items from local storage and another to clear it.
import { Injectable } from '@angular/core';

@Injectable({
  providedIn: 'root'
})
export class LocalStorageService {

  constructor() { }

  addItem(key: string, value: string) {
    localStorage.setItem(key, value);
  }

  deleteItem(key: string) {
    localStorage.removeItem(key);
  }

  getItem(key: string): string | null {
    return localStorage.getItem(key);
  }

  clear() {
    localStorage.clear();
  }
}
Data Module
This module is responsible for data retrieval and management. It’s what we’ll use to get the data our app consumes. Below is its structure:
src/app/data
├── data.module.ts
├── models
└── services
To generate the module run:
ng g m dataModels
The models define how the data we consume from the API is structured. We’ll have 16 interface declarations. To create them run:
for model in \
address cart country customer-address \
customer delivery-lead-time line-item order \
payment-method payment-source paypal-payment \
price shipment shipping-method sku stock-location; \
do ng g interface "data/models/${model}"; done
The following table links to each file and gives a description of what each interface is.
| Interface | Description |
|---|---|
| Address | Represents a general address. |
| Cart | Client side version of an order tracking the number of products a customer intends to purchase. |
| Country | Alpha-2 country code. |
| Customer Address | An address associated with a customer. |
| Customer | A registered user. |
| Delivery Lead Time | Represents the amount of time it will take to delivery a shipment. |
| Line Item | An itemized product added to the cart. |
| Order | A shopping cart or collection of line items. |
| Payment Method | A payment type made available to an order. |
| Payment Source | A payment associated with an order. |
| Paypal Payment | A payment made through Paypal |
| Price | Price associated with an SKU. |
| Shipment | Collection of items shipped together. |
| Shipping Method | Method through which a package is shipped. |
| SKU | A unique stock-keeping unit. |
| Stock Location | Location that contains SKU inventory. |
Services
This folder contains the services that create, retrieve, and manipulate app data. We’ll create 11 services here.
for service in \
address cart country customer-address \
customer delivery-lead-time line-item \
order paypal-payment shipment sku; \
do ng g s "data/services/${service}"; done
Address Service
This service creates and retrieves addresses. It’s important when creating and assigning shipping and billing addresses to orders. It has two methods. One to create an address and another to retrieve one.
The route used here is /api/addresses. If you’re going to use the Commerce Layer API directly, make sure to structure the data as demonstrated in this example.
@Injectable({
  providedIn: 'root'
})
export class AddressService {
  private url: string = ${environment.apiUrl}/api/addresses;

  constructor(private http: HttpClient, private eh: HttpErrorHandler) { }

  createAddress(address: Address): Observable<Address> {
    return this.http.post<Address>(this.url, address)
      .pipe(catchError(this.eh.handleError));
  }

  getAddress(id: string): Observable<Address> {
    return this.http.get<Address>(${this.url}/${id})
      .pipe(catchError(this.eh.handleError));
  }
}
Cart Service
The cart is responsible for maintaining the quantity of items added and the order Id. Making API calls to get the number of items in an order everytime a new line item is created can be expensive. Instead, we could just use local storage to maintain the count on the client. This eliminates the need to make unnecessary order fetches every time an item is added to the cart.
We also use this service to store the order Id. A cart corresponds to an order on Commerce Layer. Once the first item is added to the cart, an order is created. We need to preserve this order Id so we can fetch it during the checkout process.
Additionally, we need a way to communicate to the header that an item has been added to the cart. The header contains the cart button and displays the amount of items in it. We’ll use an observable of a BehaviorSubject with the current value of the cart. The header can subscribe to this and track changes in the cart value.
Lastly, once an order has been completed the cart value needs to be cleared. This ensures that there’s no confusion when creating subsequent newer orders. The values that were stored are cleared once the current order is marked as placed.
We’ll accomplish all this using the local storage service created earlier.
@Injectable({
  providedIn: 'root'
})
export class CartService {
  private cart = new BehaviorSubject({
    orderId: this.orderId,
    itemCount: this.itemCount
  });

  cartValue$ = this.cart.asObservable();

  constructor(private storage: LocalStorageService) { }

  get orderId(): string {
    const id = this.storage.getItem('order-id');
    return id ? id : '';
  }

  set orderId(id: string) {
    this.storage.addItem('order-id', id);
    this.cart.next({ orderId: id, itemCount: this.itemCount });
  }

  get itemCount(): number {
    const itemCount = this.storage.getItem('item-count');

    return itemCount ? parseInt(itemCount) : 0;
  }

  set itemCount(amount: number) {
    this.storage.addItem('item-count', amount.toString());
    this.cart.next({ orderId: this.orderId, itemCount: amount });
  }

  incrementItemCount(amount: number) {
    this.itemCount = this.itemCount + amount;
  }

  decrementItemCount(amount: number) {
    this.itemCount = this.itemCount - amount;
  }

  clearCart() {
    this.storage.deleteItem('item-count');
    this.cart.next({ orderId: '', itemCount: 0 });
  }
}
Country Service
When adding addresses on Commerce Layer, the country code has to be an alpha 2 code. This service reads a json file containing these codes for every country and returns it in its getCountries method.
@Injectable({
  providedIn: 'root'
})
export class CountryService {

  constructor(private http: HttpClient) { }

  getCountries(): Observable<Country[]> {
    return this.http.get<Country[]>('./../../../assets/json/country-codes.json');
  }
}
Customer Address Service
This service is used to associate addresses with customers. It also fetches a specific or all addresses related to a customer. It is used when the customer adds their shipping and billing addresses to their order. The createCustomer method creates a customer, getCustomerAddresses gets all of a customer’s addresses, and getCustomerAddress gets a specific one.
When creating a customer address, be sure to structure the post body according to this example.
@Injectable({
  providedIn: 'root'
})
export class CustomerAddressService {
  private url: string = ${environment.apiUrl}/api/customer_addresses;

  constructor(private http: HttpClient, private eh: HttpErrorHandler) { }

  createCustomerAddress(addressId: string, customerId: string): Observable<CustomerAddress> {
    return this.http.post<CustomerAddress>(this.url, {
      addressId: addressId, customerId: customerId
    })
      .pipe(catchError(this.eh.handleError));
  }

  getCustomerAddresses(): Observable<CustomerAddress[]> {
    return this.http.get<CustomerAddress[]>(${this.url})
      .pipe(catchError(this.eh.handleError));
  }

  getCustomerAddress(id: string): Observable<CustomerAddress> {
    return this.http.get<CustomerAddress>(${this.url}/${id})
      .pipe(catchError(this.eh.handleError));
  }
}
Customer Service
Customers are created and their information retrieved using this service. When a user signs up, they become a customer and are created using the createCustomerMethod. getCustomer returns the customer associated with a specific Id. getCurrentCustomer returns the customer currently logged in.
When creating a customer, structure the data like this. You can add their first and last names to the metadata, as shown in its attributes.
The route /api/customers/current is not available on Commerce Layer. So you’ll need to figure out how to get the currently logged in customer.
@Injectable({
  providedIn: 'root'
})
export class CustomerService {
  private url: string = ${environment.apiUrl}/api/customers;

  constructor(private http: HttpClient, private eh: HttpErrorHandler) { }

  createCustomer(email: string, password: string, firstName: string, lastName: string): Observable<Customer> {
    return this.http.post<Customer>(this.url, {
      email: email,
      password: password,
      firstName: firstName,
      lastName: lastName
    })
      .pipe(catchError(this.eh.handleError));
  }

  getCurrentCustomer(): Observable<Customer> {
    return this.http.get<Customer>(${this.url}/current)
      .pipe(catchError(this.eh.handleError));
  }

  getCustomer(id: string): Observable<Customer> {
    return this.http.get<Customer>(${this.url}/${id})
      .pipe(catchError(this.eh.handleError));
  }
}
Delivery Lead Time Service
This service returns information about shipping timelines from various stock locations.
@Injectable({
  providedIn: 'root'
})
export class DeliveryLeadTimeService {
  private url: string = ${environment.apiUrl}/api/delivery_lead_times;

  constructor(private http: HttpClient, private eh: HttpErrorHandler) { }

  getDeliveryLeadTimes(): Observable<DeliveryLeadTime[]> {
    return this.http.get<DeliveryLeadTime[]>(this.url)
      .pipe(catchError(this.eh.handleError));
  }
}
Line Item Service
Items added to the cart are managed by this service. With it, you can create an item the moment it is added to the cart. An item’s information can also be fetched. The item may also be updated when its quantity changes or deleted when removed from the cart.
When creating items or updating them, structure the request body as shown in this example.
@Injectable({
  providedIn: 'root'
})
export class LineItemService {
  private url: string = ${environment.apiUrl}/api/line_items;

  constructor(private http: HttpClient, private eh: HttpErrorHandler) { }

  createLineItem(lineItem: LineItem): Observable<LineItem> {
    return this.http.post<LineItem>(this.url, lineItem)
      .pipe(catchError(this.eh.handleError));
  }

  getLineItem(id: string): Observable<LineItem> {
    return this.http.get<LineItem>(${this.url}/${id})
      .pipe(catchError(this.eh.handleError));
  }

  updateLineItem(id: string, quantity: number): Observable<LineItem> {
    return this.http.patch<LineItem>(${this.url}/${id}, { quantity: quantity })
      .pipe(catchError(this.eh.handleError));
  }

  deleteLineItem(id: string): Observable<LineItem> {
    return this.http.delete<LineItem>(${this.url}/${id})
      .pipe(catchError(this.eh.handleError));
  }
}
Order Service
Similar to the line item service, the order service allows you to create, update, delete, or get an order. Additionally, you may choose to get the shipments associated with an order separately using the getOrderShipments method. This service is used heavily throughout the checkout process.
There are different kinds of information about an order that are required throughout checkout. Since it may be expensive to fetch a whole order and its relations, we specify what we want to get from an order using GetOrderParams. The equivalent of this on the CL API is the include query parameter where you list the order relationships to be included. You can check what fields need to be included for the cart summary here and for the various checkout stages here.
In the same manner, when updating an order, we use UpdateOrderParams to specify update fields. This is because in the server that populates the token, some extra operations are performed depending on what field is being updated. However, if you’re making direct requests to the CL API, you do not need to specify this. You can do away with it since the CL API doesn’t require you to specify them. Although, the request body should resemble this example.
@Injectable({
  providedIn: 'root'
})
export class OrderService {
  private url: string = ${environment.apiUrl}/api/orders;

  constructor(
    private http: HttpClient,
    private eh: HttpErrorHandler) { }

  createOrder(): Observable<Order> {
    return this.http.post<Order>(this.url, {})
      .pipe(catchError(this.eh.handleError));
  }

  getOrder(id: string, orderParam: GetOrderParams): Observable<Order> {
    let params = {};
    if (orderParam != GetOrderParams.none) {
      params = { [orderParam]: 'true' };
    }

    return this.http.get<Order>(${this.url}/${id}, { params: params })
      .pipe(catchError(this.eh.handleError));
  }

  updateOrder(order: Order, params: UpdateOrderParams[]): Observable<Order> {
    let updateParams = [];
    for (const param of params) {
      updateParams.push(param.toString());
    }

    return this.http.patch<Order>(
      ${this.url}/${order.id},
      order,
      { params: { 'field': updateParams } }
    )
      .pipe(catchError(this.eh.handleError));
  }

  getOrderShipments(id: string): Observable<Shipment[]> {
    return this.http.get<Shipment[]>(${this.url}/${id}/shipments)
      .pipe(catchError(this.eh.handleError));
  }
}
Paypal Payment Service
This service is responsible for creating and updating Paypal payments for orders. Additionally, we can get a Paypal payment given its id. The post body should have a structure similar to this example when creating a Paypal payment.
@Injectable({
  providedIn: 'root'
})
export class PaypalPaymentService {
  private url: string = ${environment.apiUrl}/api/paypal_payments;

  constructor(private http: HttpClient, private eh: HttpErrorHandler) { }

  createPaypalPayment(payment: PaypalPayment): Observable<PaypalPayment> {
    return this.http.post<PaypalPayment>(this.url, payment)
      .pipe(catchError(this.eh.handleError));
  }

  getPaypalPayment(id: string): Observable<PaypalPayment> {
    return this.http.get<PaypalPayment>(${this.url}/${id})
      .pipe(catchError(this.eh.handleError));
  }

  updatePaypalPayment(id: string, paypalPayerId: string): Observable<PaypalPayment> {
    return this.http.patch<PaypalPayment>(
      ${this.url}/${id},
      { paypalPayerId: paypalPayerId }
    )
      .pipe(catchError(this.eh.handleError));
  }
}
Shipment Service
This service gets a shipment or updates it given its id. The request body of a shipment update should look similar to this example.
@Injectable({
  providedIn: 'root'
})
export class ShipmentService {
  private url: string = ${environment.apiUrl}/api/shipments;

  constructor(private http: HttpClient, private eh: HttpErrorHandler) { }

  getShipment(id: string): Observable<Shipment> {
    return this.http.get<Shipment>(${this.url}/${id})
      .pipe(catchError(this.eh.handleError));
  }

  updateShipment(id: string, shippingMethodId: string): Observable<Shipment> {
    return this.http.patch<Shipment>(
      ${this.url}/${id},
      { shippingMethodId: shippingMethodId }
    )
      .pipe(catchError(this.eh.handleError));
  }
}
SKU Service
The SKU service gets products from the store. If multiple products are being retrieved, they can be paginated and have a page size set. Page size and page number should be set as query params like in this example if you’re making direct requests to the API. A single product can also be retrieved given its id.
@Injectable({
  providedIn: 'root'
})
export class SkuService {
  private url: string = ${environment.apiUrl}/api/skus;

  constructor(private http: HttpClient, private eh: HttpErrorHandler) { }

  getSku(id: string): Observable<Sku> {
    return this.http.get<Sku>(${this.url}/${id})
      .pipe(catchError(this.eh.handleError));
  }

  getSkus(page: number, pageSize: number): Observable<Sku[]> {
    return this.http.get<Sku[]>(
      this.url,
      {
        params: {
          'page': page.toString(),
          'pageSize': pageSize.toString()
        }
      })
      .pipe(catchError(this.eh.handleError));
  }
}
Core Module
The core module contains everything central to and common across the application. These include components like the header and pages like the 404 page. Services responsible for authentication and session management also fall here, as well as app-wide interceptors and guards.
The core module tree will look like this.
src/app/core
├── components
│   ├── error
│   │   ├── error.component.css
│   │   ├── error.component.html
│   │   └── error.component.ts
│   ├── header
│   │   ├── header.component.css
│   │   ├── header.component.html
│   │   └── header.component.ts
│   └── not-found
│       ├── not-found.component.css
│       ├── not-found.component.html
│       └── not-found.component.ts
├── core.module.ts
├── guards
│   └── empty-cart.guard.ts
├── interceptors
│   └── options.interceptor.ts
└── services
    ├── authentication.service.ts
    ├── header.service.ts
    └── session.service.ts
To generate the module and its contents run:
ng g m core
ng g g core/guards/empty-cart
ng g s core/header/header
ng g interceptor core/interceptors/options
for comp in header error not-found; do ng g c "core/${comp}"; done
for serv in authentication session; do ng g s "core/authentication/${serv}"; done
The core module file should like this. Note that routes have been registered for the NotFoundComponent and ErrorComponent.
@NgModule({
  declarations: [HeaderComponent, NotFoundComponent, ErrorComponent],
  imports: [
    RouterModule.forChild([
      { path: '404', component: NotFoundComponent },
      { path: 'error', component: ErrorComponent },
      { path: '**', redirectTo: '/404' }
    ]),
    MatBadgeModule,
    SharedModule
  ],
  exports: [HeaderComponent]
})
export class CoreModule { }
Services
The services folder holds the authentication, session, and header services.
Authentication Service
The AuthenticationService allows you to acquire client and customer tokens. These tokens are used to access the rest of the API’s routes. Customer tokens are returned when a user exchanges an email and password for it and have a wider range of permissions. Client tokens are issued without needing credentials and have narrower permissions.
getClientSession gets a client token. login gets a customer token. Both methods also create a session. The body of a client token request should look like this and that of a customer token like this.
@Injectable({
  providedIn: 'root'
})
export class AuthenticationService {
  private url: string = ${environment.apiUrl}/oauth/token;

  constructor(private http: HttpClient, private eh: HttpErrorHandler) { }

  getClientSession(): Observable<object> {
    return this.http.post<object>(
      this.url,
      { grantType: 'client_credentials' })
      .pipe(catchError(this.eh.handleError));
  }

  login(email: string, password: string): Observable<object> {
    return this.http.post<object>(
      this.url,
      { username: email, password: password, grantType: 'password' })
      .pipe(catchError(this.eh.handleError));
  }
}
Session Service
The SessionService is responsible for session management. The service will contain an observable from a BehaviorSubject called loggedInStatus to communicate whether a user is logged in. setLoggedInStatus sets the value of this subject, true for logged in, and false for not logged in. isCustomerLoggedIn makes a request to the server to check if the user has an existing session. logout destroys the session on the server. The last two methods access routes that are unique to the server that populates the request with a token. They are not available from Commerce Layer. You’ll have to figure out how to implement them.
@Injectable({
  providedIn: 'root'
})
export class SessionService {
  private url: string = ${environment.apiUrl}/session;
  private isLoggedIn = new BehaviorSubject(false);

  loggedInStatus = this.isLoggedIn.asObservable();

  constructor(private http: HttpClient, private eh: HttpErrorHandler) { }

  setLoggedInStatus(status: boolean) {
    this.isLoggedIn.next(status);
  }

  isCustomerLoggedIn(): Observable<{ message: string }> {
    return this.http.get<{ message: string }>(${this.url}/customer/status)
      .pipe(catchError(this.eh.handleError));
  }

  logout(): Observable<{ message: string }> {
    return this.http.get<{ message: string }>(${this.url}/destroy)
      .pipe(catchError(this.eh.handleError));
  }
}
Header Service
The HeaderService is used to communicate whether the cart, login, and logout buttons should be shown in the header. These buttons are hidden on the login and signup pages but present on all other pages to prevent confusion. We’ll use an observable from a BehaviourSubject called showHeaderButtons that shares this. We’ll also have a setHeaderButtonsVisibility method to set this value.
@Injectable({
  providedIn: 'root'
})
export class HeaderService {
  private headerButtonsVisibility = new BehaviorSubject(true);

  showHeaderButtons = this.headerButtonsVisibility.asObservable();

  constructor() { }

  setHeaderButtonsVisibility(visible: boolean) {
    this.headerButtonsVisibility.next(visible);
  }
}
Components
Error Component
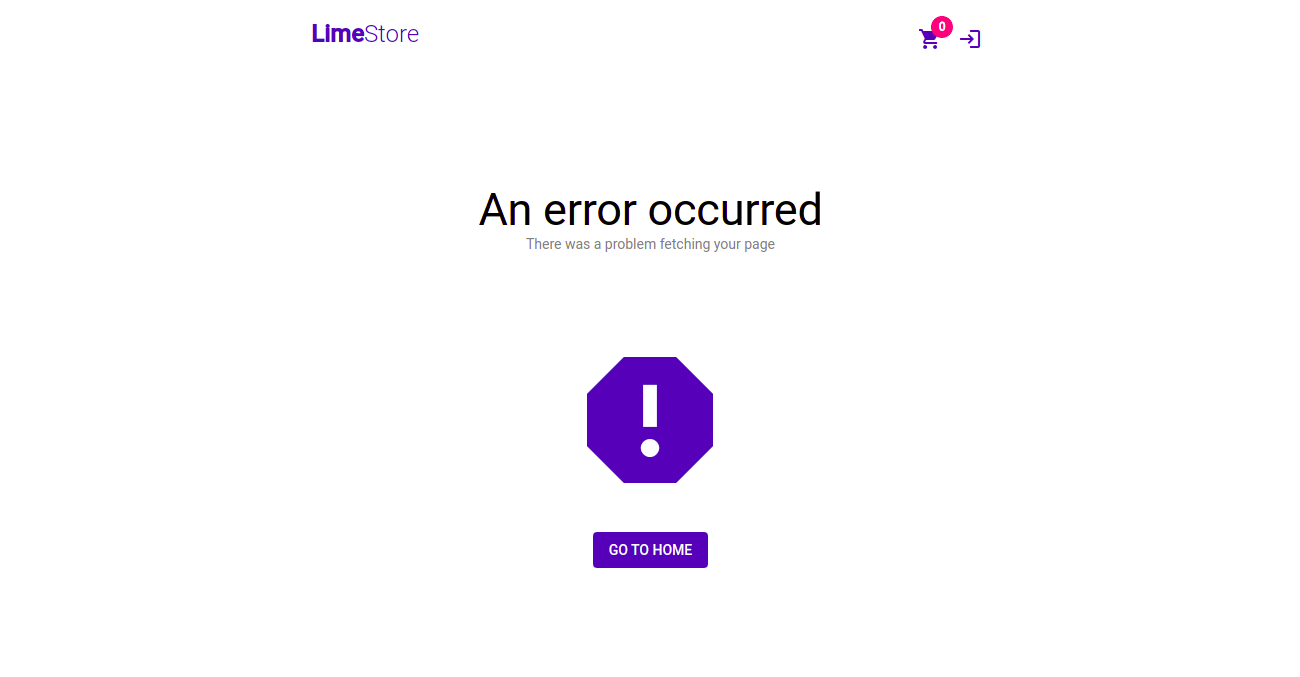
This component is used as an error page. It is useful in instances when server requests fail and absolutely no data is displayed on a page. Instead of showing a blank page, we let the user know that a problem occurred. Below is it’s template.
<app-simple-page title="An error occurred" subtitle="There was a problem fetching your page" buttonText="GO TO HOME" icon="report" [centerText]="true" route="/">
</app-simple-page>
This is what the component will look like.
Not Found Component
This is a 404 page that the user gets redirected to when they request a route not available on the router. Only its template is modified.
<app-simple-page title="404: Page not found" buttonText="GO TO HOME" icon="search" subtitle="The requested page could not be found" [centerText]="true" route="/"></app-simple-page>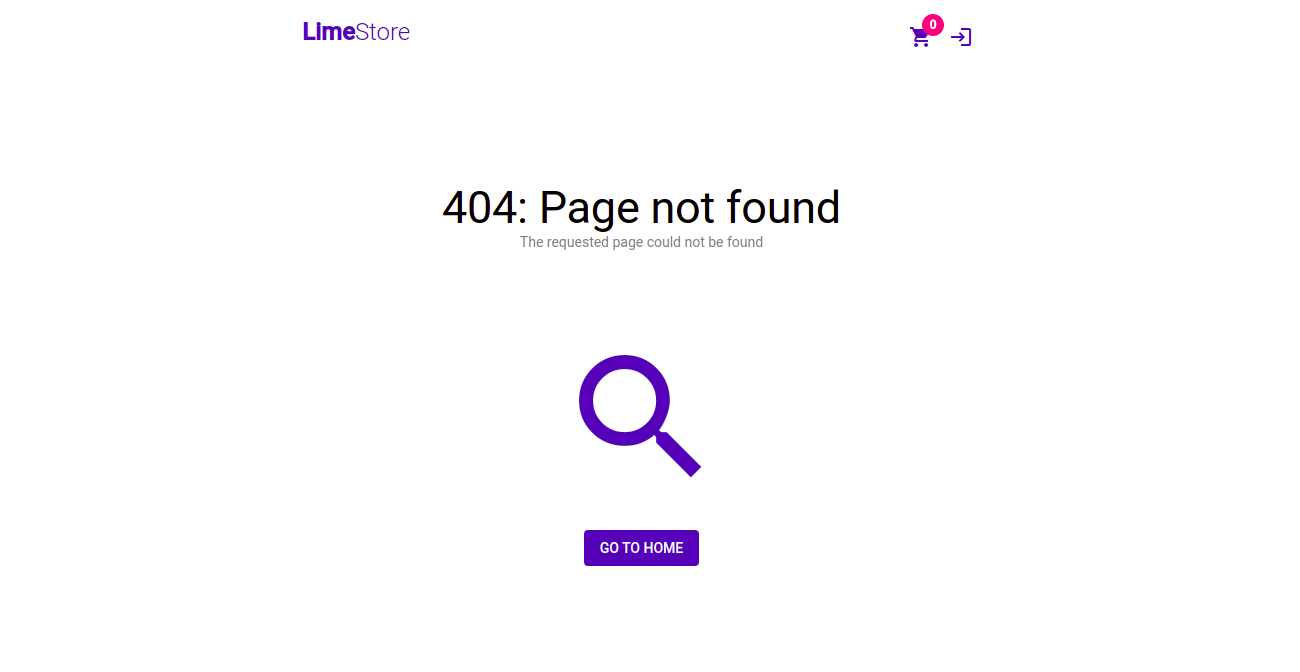
Header Component
The HeaderComponent is basically the header displayed at the top of a page. It will contain the app title, the cart, login, and logout buttons.
When this component is initialized, a request is made to check whether the user has a current session. This happens when subscribing to this.session.isCustomerLoggedIn(). We subscribe to this.session.loggedInStatus to check if the user logs out throughout the life of the app. The this.header.showHeaderButtons subscription decides whether to show all the buttons on the header or hide them. this.cart.cartValue$ gets the count of items in the cart.
There exists a logout method that destroys a user’s session and assigns them a client token. A client token is assigned because the session maintaining their customer token is destroyed and a token is still required for each API request. A material snackbar communicates to the user whether their session was successfully destroyed or not.
We use the @UntilDestroy({ checkProperties: true }) decorator to indicate that all subscriptions should be automatically unsubscribed from when the component is destroyed.
@UntilDestroy({ checkProperties: true })
@Component({
  selector: 'app-header',
  templateUrl: './header.component.html',
  styleUrls: ['./header.component.css']
})
export class HeaderComponent implements OnInit {
  cartAmount: number = 0;
  isLoggedIn: boolean = false;
  showButtons: boolean = true;

  constructor(
    private session: SessionService,
    private snackBar: MatSnackBar,
    private cart: CartService,
    private header: HeaderService,
    private auth: AuthenticationService
  ) { }

  ngOnInit() {
    this.session.isCustomerLoggedIn()
      .subscribe(
        () => {
          this.isLoggedIn = true;
          this.session.setLoggedInStatus(true);
        }
      );

    this.session.loggedInStatus.subscribe(status => this.isLoggedIn = status);

    this.header.showHeaderButtons.subscribe(visible => this.showButtons = visible);

    this.cart.cartValue$.subscribe(cart => this.cartAmount = cart.itemCount);
  }

  logout() {
    concat(
      this.session.logout(),
      this.auth.getClientSession()
    ).subscribe(
      () => {
        this.snackBar.open('You have been logged out.', 'Close', { duration: 4000 });
        this.session.setLoggedInStatus(false);
      },
      err => this.snackBar.open('There was a problem logging you out.', 'Close', { duration: 4000 })
    );
  }
}
Below is the header template and linked here is its styling.
<div id="header-container">
    <div id="left-half" routerLink="/">
        <h1><span id="lime-text">Lime</span><span id="store-text">Store</span></h1>
    </div>
    <div id="right-half">
        <div id="button-container" ngIf="showButtons">
            <button mat-icon-button color="primary" aria-label="shopping cart">
                <mat-icon [matBadge]="cartAmount" matBadgeColor="accent" aria-label="shopping cart" routerLink="/cart">shopping_cart</mat-icon>
            </button>
            <button mat-icon-button color="primary" aria-label="login" ngIf="!isLoggedIn">
                <mat-icon aria-label="login" matTooltip="login" routerLink="/login">login</mat-icon>
            </button>
            <button mat-icon-button color="primary" aria-label="logout" *ngIf="isLoggedIn" (click)="logout()">
                <mat-icon aria-label="logout" matTooltip="logout">logout</mat-icon>
            </button>
        </div>
    </div>
</div>
Guards
Empty Cart Guard
This guard prevents users from accessing routes relating to checkout and billing if their cart is empty. This is because to proceed with checkout, there needs to be a valid order. An order corresponds to a cart with items in it. If there are items in the cart, the user can proceed to a guarded page. However, if the cart is empty, the user is redirected to an empty-cart page.
@Injectable({
  providedIn: 'root'
})
export class EmptyCartGuard implements CanActivate {
  constructor(private cart: CartService, private router: Router) { }

  canActivate(
    route: ActivatedRouteSnapshot,
    state: RouterStateSnapshot): Observable<boolean | UrlTree> | Promise<boolean | UrlTree> | boolean | UrlTree {
    if (this.cart.orderId) {
      if (this.cart.itemCount > 0) {
        return true;
      }
    }

    return this.router.parseUrl('/empty');
  }
}
Interceptors
Options Interceptor
This interceptor intercepts all outgoing HTTP requests and adds two options to the request. These are a Content-Type header and a withCredentials property. withCredentials specifies whether a request should be sent with outgoing credentials like the http-only cookies that we use. We use Content-Type to indicate that we are sending json resources to the server.
@Injectable()
export class OptionsInterceptor implements HttpInterceptor {

  constructor() { }

  intercept(request: HttpRequest<any>, next: HttpHandler): Observable<HttpEvent<any>> {
    request = request.clone({
      headers: request.headers.set('Content-Type', 'application/json'),
      withCredentials: true
    });

    return next.handle(request);
  }
}
Feature Modules
This section contains the main features of the app. As mentioned earlier, the features are grouped in four modules: auth, product, cart, and checkout modules.
Products Module
The products module contains pages that display products on sale. These include the product page and the product list page. It’s structured as shown below.
src/app/features/products
├── pages
│   ├── product
│   │   ├── product.component.css
│   │   ├── product.component.html
│   │   └── product.component.ts
│   └── product-list
│       ├── product-list.component.css
│       ├── product-list.component.html
│       └── product-list.component.ts
└── products.module.ts
To generate it and its components:
ng g m features/products
ng g c features/products/pages/product
ng g c features/products/pages/product-list
This is the module file:
@NgModule({
  declarations: [ProductListComponent, ProductComponent],
  imports: [
    RouterModule.forChild([
      { path: 'product/:id', component: ProductComponent },
      { path: '', component: ProductListComponent }
    ]),
    LayoutModule,
    MatCardModule,
    MatGridListModule,
    MatPaginatorModule,
    SharedModule
  ]
})
export class ProductsModule { }
Product List Component
This component displays a paginated list of available products for sale. It is the first page that is loaded when the app starts.
The products are displayed in a grid. Material grid list is the best component for this. To make the grid responsive, the number of grid columns will change depending on the screen size. The BreakpointObserver service allows us to determine the size of the screen and assign the columns during initialization.
To get the products, we call the getProducts method of the SkuService. It returns the products if successful and assigns them to the grid. If not, we route the user to the error page.
Since the products displayed are paginated, we will have a getNextPage method to get the additional products.
@UntilDestroy({ checkProperties: true })
@Component({
  selector: 'app-product-list',
  templateUrl: './product-list.component.html',
  styleUrls: ['./product-list.component.css']
})
export class ProductListComponent implements OnInit {
  cols = 4;
  length = 0;
  pageIndex = 0;
  pageSize = 20;
  pageSizeOptions: number[] = [5, 10, 20];

  pageEvent!: PageEvent | void;

  products: Sku[] = [];

  constructor(
    private breakpointObserver: BreakpointObserver,
    private skus: SkuService,
    private router: Router,
    private header: HeaderService) { }

  ngOnInit() {
    this.getProducts(1, 20);
    this.header.setHeaderButtonsVisibility(true);

    this.breakpointObserver.observe([
      Breakpoints.Handset,
      Breakpoints.Tablet,
      Breakpoints.Web
    ]).subscribe(result => {
      if (result.matches) {
        if (result.breakpoints['(max-width: 599.98px) and (orientation: portrait)'] || result.breakpoints['(max-width: 599.98px) and (orientation: landscape)']) {
          this.cols = 1;
        }
        else if (result.breakpoints['(min-width: 1280px) and (orientation: portrait)'] || result.breakpoints['(min-width: 1280px) and (orientation: landscape)']) {
          this.cols = 4;
        } else {
          this.cols = 3;
        }
      }
    });
  }

  private getProducts(page: number, pageSize: number) {
    this.skus.getSkus(page, pageSize)
      .subscribe(
        skus => {
          this.products = skus;
          this.length = skus[0].__collectionMeta.recordCount;
        },
        err => this.router.navigateByUrl('/error')
      );
  }

  getNextPage(event: PageEvent) {
    this.getProducts(event.pageIndex + 1, event.pageSize);
  }

  trackSkus(index: number, item: Sku) {
    return ${item.id}-${index};
  }
}
The template is shown below and its styling can be found here.
<mat-grid-list cols="{{cols}}" rowHeight="400px" gutterSize="20px" class="grid-layout">
    <mat-grid-tile *ngFor="let product of products; trackBy: trackSkus">
        <mat-card>
            <img id="card-image" mat-card-image src="{{product.imageUrl}}" alt="product photo">
            <mat-card-content>
                <mat-card-title matTooltip="{{product.name}}">{{product.name |wordWrap:35}}</mat-card-title>
                <mat-card-subtitle>{{product.prices[0].compareAtAmountFloat | currency:'EUR'}}</mat-card-subtitle>
            </mat-card-content>
            <mat-card-actions>
                <button mat-flat-button color="primary" [routerLink]="['/product', product.id]">
                    View
                </button>
            </mat-card-actions>
        </mat-card>
    </mat-grid-tile>
</mat-grid-list>
<mat-paginator [length]="length" [pageIndex]="pageIndex" [pageSize]="pageSize" [pageSizeOptions]="pageSizeOptions" (page)="pageEvent = getNextPage($event)">
</mat-paginator>
The page will look like this.

Product Component
Once a product is selected from the product list page, this component displays its details. These include the product’s full name, price, and description. There’s also a button to add the item to the product cart.
On initialization, we get the id of the product from the route parameters. Using the id, we fetch the product from the SkuService.
When the user adds an item to the cart, the addItemToCart method is called. In it, we check if an order has already been created for the cart. If not, a new one is made using the OrderService. Afterwhich, a line item is created in the order that corresponds to the product. If an order already exists for the cart, just the line item is created. Depending on the status of the requests, a snackbar message is displayed to the user.
@UntilDestroy({ checkProperties: true })
@Component({
  selector: 'app-product',
  templateUrl: './product.component.html',
  styleUrls: ['./product.component.css']
})
export class ProductComponent implements OnInit {
  id: string = '';
  product!: Sku;
  quantity: number = 0;

  constructor(
    private route: ActivatedRoute,
    private skus: SkuService,
    private location: Location,
    private router: Router,
    private header: HeaderService,
    private orders: OrderService,
    private lineItems: LineItemService,
    private cart: CartService,
    private snackBar: MatSnackBar
  ) { }

  ngOnInit() {
    this.route.paramMap
      .pipe(
        mergeMap(params => {
          const id = params.get('id')
          this.id = id ? id : '';

          return this.skus.getSku(this.id);
        }),
        tap((sku) => {
          this.product = sku;
        })
      ).subscribe({
        error: (err) => this.router.navigateByUrl('/error')
      });

    this.header.setHeaderButtonsVisibility(true);
  }

  addItemToCart() {
    if (this.quantity > 0) {
      if (this.cart.orderId == '') {
        this.orders.createOrder()
          .pipe(
            mergeMap((order: Order) => {
              this.cart.orderId = order.id || '';

              return this.lineItems.createLineItem({
                orderId: order.id,
                name: this.product.name,
                imageUrl: this.product.imageUrl,
                quantity: this.quantity,
                skuCode: this.product.code
              });
            })
          )
          .subscribe(
            () => {
              this.cart.incrementItemCount(this.quantity);
              this.showSuccessSnackBar();
            },
            err => this.showErrorSnackBar()
          );
      } else {
        this.lineItems.createLineItem({
          orderId: this.cart.orderId,
          name: this.product.name,
          imageUrl: this.product.imageUrl,
          quantity: this.quantity,
          skuCode: this.product.code
        }).subscribe(
          () => {
            this.cart.incrementItemCount(this.quantity);
            this.showSuccessSnackBar();
          },
          err => this.showErrorSnackBar()
        );
      }
    } else {
      this.snackBar.open('Select a quantity greater than 0.', 'Close', { duration: 8000 });
    }
  }

  setQuantity(no: number) {
    this.quantity = no;
  }

  goBack() {
    this.location.back();
  }

  private showSuccessSnackBar() {
    this.snackBar.open('Item successfully added to cart.', 'Close', { duration: 8000 });
  }

  private showErrorSnackBar() {
    this.snackBar.open('Failed to add your item to the cart.', 'Close', { duration: 8000 });
  }
}
The ProductComponent template is as follows and its styling is linked here.
<div id="container">
    <mat-card *ngIf="product" class="product-card">
        <img mat-card-image src="{{product.imageUrl}}" alt="Photo of a product">
        <mat-card-content>
            <mat-card-title>{{product.name}}</mat-card-title>
            <mat-card-subtitle>{{product.prices[0].compareAtAmountFloat | currency:'EUR'}}</mat-card-subtitle>
            <p>
                {{product.description}}
            </p>
        </mat-card-content>
        <mat-card-actions>
            <app-item-quantity [quantity]="quantity" [maxValue]="10" (setQuantityEvent)="setQuantity($event)"></app-item-quantity>
            <button mat-raised-button color="accent" (click)="addItemToCart()">
                <mat-icon>add_shopping_cart</mat-icon>
                Add to cart
            </button>
            <button mat-raised-button color="primary" (click)="goBack()">
                <mat-icon>storefront</mat-icon>
                Continue shopping
            </button>
        </mat-card-actions>
    </mat-card>
</div>
The page will look like this.

Auth Module
The Auth module contains pages responsible for authentication. These include the login and signup pages. It‘s structured as follows.
src/app/features/auth/
├── auth.module.ts
└── pages
    ├── login
    │   ├── login.component.css
    │   ├── login.component.html
    │   └── login.component.ts
    └── signup
        ├── signup.component.css
        ├── signup.component.html
        └── signup.component.ts
To generate it and its components:
ng g m features/auth
ng g c features/auth/pages/signup
ng g c features/auth/pages/login
This is its module file.
@NgModule({
  declarations: [LoginComponent, SignupComponent],
  imports: [
    RouterModule.forChild([
      { path: 'login', component: LoginComponent },
      { path: 'signup', component: SignupComponent }
    ]),
    MatFormFieldModule,
    MatInputModule,
    ReactiveFormsModule,
    SharedModule
  ]
})
export class AuthModule { }
Signup Component
A user signs up for an account using this component. A first name, last name, email, and password are required for the process. The user also needs to confirm their password. The input fields will be created with the FormBuilder service. Validation is added to require that all the inputs have values. Additional validation is added to the password field to ensure a minimum length of eight characters. A custom matchPasswords validator ensures that the confirmed password matches the initial password.
When the component is initialized, the cart, login, and logout buttons in the header are hidden.This is communicated to the header using the HeaderService.
After all the fields are marked as valid, the user can then sign up. In the signup method, the createCustomer method of the CustomerService receives this input. If the signup is successful, the user is informed that their account was successfully created using a snackbar. They are then rerouted to the home page.
@UntilDestroy({ checkProperties: true })
@Component({
  selector: 'app-signup',
  templateUrl: './signup.component.html',
  styleUrls: ['./signup.component.css']
})
export class SignupComponent implements OnInit {
  signupForm = this.fb.group({
    firstName: ['', Validators.required],
    lastName: ['', Validators.required],
    email: ['', [Validators.required, Validators.email]],
    password: ['', [Validators.required, Validators.minLength(8)]],
    confirmedPassword: ['', [Validators.required]]
  }, { validators: this.matchPasswords });

  @ViewChild(FormGroupDirective) sufDirective: FormGroupDirective | undefined;

  constructor(
    private customer: CustomerService,
    private fb: FormBuilder,
    private snackBar: MatSnackBar,
    private router: Router,
    private header: HeaderService
  ) { }

  ngOnInit() {
    this.header.setHeaderButtonsVisibility(false);
  }

  matchPasswords(signupGroup: AbstractControl): ValidationErrors | null {
    const password = signupGroup.get('password')?.value;
    const confirmedPassword = signupGroup.get('confirmedPassword')?.value;

    return password == confirmedPassword ? null : { differentPasswords: true };
  }

  get password() { return this.signupForm.get('password'); }

  get confirmedPassword() { return this.signupForm.get('confirmedPassword'); }

  signup() {
    const customer = this.signupForm.value;

    this.customer.createCustomer(
      customer.email,
      customer.password,
      customer.firstName,
      customer.lastName
    ).subscribe(
      () => {
        this.signupForm.reset();
        this.sufDirective?.resetForm();

        this.snackBar.open('Account successfully created. You will be redirected in 5 seconds.', 'Close', { duration: 5000 });

        setTimeout(() => this.router.navigateByUrl('/'), 6000);
      },
      err => this.snackBar.open('There was a problem creating your account.', 'Close', { duration: 5000 })
    );
  }
}
Below is the template for the SignupComponent.
<form id="container" [formGroup]="signupForm" (ngSubmit)="signup()">
    <h1 class="mat-display-3">Create Account</h1>
    <mat-form-field appearance="outline">
        <mat-label>First Name</mat-label>
        <input matInput formControlName="firstName">
        <mat-icon matPrefix>portrait</mat-icon>
    </mat-form-field>
    <mat-form-field appearance="outline">
        <mat-label>Last Name</mat-label>
        <input matInput formControlName="lastName">
        <mat-icon matPrefix>portrait</mat-icon>
    </mat-form-field>
    <mat-form-field appearance="outline">
        <mat-label>Email</mat-label>
        <input matInput formControlName="email" type="email">
        <mat-icon matPrefix>alternate_email</mat-icon>
    </mat-form-field>
    <mat-form-field appearance="outline">
        <mat-label>Password</mat-label>
        <input matInput formControlName="password" type="password">
        <mat-icon matPrefix>vpn_key</mat-icon>
    </mat-form-field>
    <mat-form-field appearance="outline">
        <mat-label>Confirm Password</mat-label>
        <input matInput formControlName="confirmedPassword" type="password">
        <mat-icon matPrefix>vpn_key</mat-icon>
    </mat-form-field>
    <div ngIf="confirmedPassword?.invalid && (confirmedPassword?.dirty || confirmedPassword?.touched)">
        <mat-error ngIf="signupForm.hasError('differentPasswords')">
            Your passwords do not match.
        </mat-error>
    </div>
    <div ngIf="password?.invalid && (password?.dirty || password?.touched)">
        <mat-error ngIf="password?.hasError('minlength')">
            Your password should be at least 8 characters.
        </mat-error>
    </div>
    <button mat-flat-button color="primary" [disabled]="!signupForm.valid">Sign Up</button>
</form>
The component will turn out as follows.

Login Component
A registered user logs into their account with this component. An email and password need to be entered. Their corresponding input fields would have validation that makes them required.
Similar to the SignupComponent, the cart, login, and logout buttons in the header are hidden. Their visibility is set using the HeaderService during component initialization.
To login, the credentials are passed to the AuthenticationService. If successful, the login status of the user is set using the SessionService. The user is then routed back to the page they were on. If unsuccessful, a snackbar is displayed with an error and the password field is reset.
@UntilDestroy({ checkProperties: true })
@Component({
  selector: 'app-login',
  templateUrl: './login.component.html',
  styleUrls: ['./login.component.css']
})
export class LoginComponent implements OnInit {
  loginForm = this.fb.group({
    email: ['', Validators.required],
    password: ['', Validators.required]
  });

  constructor(
    private authService: AuthenticationService,
    private session: SessionService,
    private snackBar: MatSnackBar,
    private fb: FormBuilder,
    private header: HeaderService,
    private location: Location
  ) { }

  ngOnInit() {
    this.header.setHeaderButtonsVisibility(false);
  }

  login() {
    const credentials = this.loginForm.value;

    this.authService.login(
      credentials.email,
      credentials.password
    ).subscribe(
      () => {
        this.session.setLoggedInStatus(true);
        this.location.back();
      },
      err => {
        this.snackBar.open(
          'Login failed. Check your login credentials.',
          'Close',
          { duration: 6000 });

        this.loginForm.patchValue({ password: '' });
      }
    );
  }
}
Below is the LoginComponent template.
<form id="container" [formGroup]="loginForm" (ngSubmit)="login()">
    <h1 class="mat-display-3">Login</h1>
    <mat-form-field appearance="outline">
        <mat-label>Email</mat-label>
        <input matInput type="email" formControlName="email" required>
        <mat-icon matPrefix>alternate_email</mat-icon>
    </mat-form-field>
    <mat-form-field appearance="outline">
        <mat-label>Password</mat-label>
        <input matInput type="password" formControlName="password" required>
        <mat-icon matPrefix>vpn_key</mat-icon>
    </mat-form-field>
    <button mat-flat-button color="primary" [disabled]="!loginForm.valid">Login</button>
    <p id="newAccount" class="mat-h3">Not registered yet? <a id="newAccountLink" routerLink="/signup">Create an account.</a></p>
</form>
Here is a screenshot of the page.

Cart Module
The cart module contains all pages related to the cart. These include the order summary page, a coupon and gift card code page, and an empty cart page. It's structured as follows.
src/app/features/cart/
├── cart.module.ts
└── pages
    ├── codes
    │   ├── codes.component.css
    │   ├── codes.component.html
    │   └── codes.component.ts
    ├── empty
    │   ├── empty.component.css
    │   ├── empty.component.html
    │   └── empty.component.ts
    └── summary
        ├── summary.component.css
        ├── summary.component.html
        └── summary.component.ts
To generate it, run:
ng g m features/cart
ng g c features/cart/codes
ng g c features/cart/empty
ng g c features/cart/summary
This is the module file.
@NgModule({
  declarations: [SummaryComponent, CodesComponent, EmptyComponent],
  imports: [
    RouterModule.forChild([
      {
        path: '', canActivate: [EmptyCartGuard], children: [
          { path: 'cart', component: SummaryComponent },
          { path: 'codes', component: CodesComponent }
        ]
      },
      { path: 'empty', component: EmptyComponent }
    ]),
    MatDividerModule,
    MatFormFieldModule,
    MatInputModule,
    MatMenuModule,
    ReactiveFormsModule,
    SharedModule
  ]
})
export class CartModule { }
Codes Component
As mentioned earlier, this component is used to add any coupon or gift card codes to an order. This allows the user to apply discounts to the total of their order before proceeding to checkout.
There will be two input fields. One for coupons and another for gift card codes.
The codes are added by updating the order. The updateOrder method of the OrderService updates the order with the codes. Afterwhich, both fields are reset and the user is informed of the success of the operation with a snackbar. A snackbar is also shown when an error occurs. Both the addCoupon and addGiftCard methods call the updateOrder method.
@UntilDestroy({ checkProperties: true })
@Component({
  selector: 'app-codes',
  templateUrl: './codes.component.html',
  styleUrls: ['./codes.component.css']
})
export class CodesComponent {
  couponCode = new FormControl('');
  giftCardCode = new FormControl('');

  @ViewChild(FormControlDirective) codesDirective: FormControlDirective | undefined;

  constructor(
    private cart: CartService,
    private order: OrderService,
    private snackBar: MatSnackBar
  ) { }

  private updateOrder(order: Order, params: UpdateOrderParams[], codeType: string) {
    this.order.updateOrder(order, params)
      .subscribe(
        () => {
          this.snackBar.open(Successfully added ${codeType} code., 'Close', { duration: 8000 });
          this.couponCode.reset();
          this.giftCardCode.reset();
          this.codesDirective?.reset();
        },
        err => this.snackBar.open(There was a problem adding your ${codeType} code., 'Close', { duration: 8000 })
      );
  }

  addCoupon() {
    this.updateOrder({ id: this.cart.orderId, couponCode: this.couponCode.value }, [UpdateOrderParams.couponCode], 'coupon');
  }

  addGiftCard() {
    this.updateOrder({ id: this.cart.orderId, giftCardCode: this.giftCardCode.value }, [UpdateOrderParams.giftCardCode], 'gift card');
  }

}
The template is shown below and its styling can be found at this link.
<div id="container">
    <app-title title="Redeem a code" subtitle="Enter a coupon code or gift card" [centerText]="true"></app-title>
    <div class="input-row">
        <mat-form-field appearance="outline">
            <mat-label>Coupon Code</mat-label>
            <input matInput [formControl]="couponCode" required>
            <mat-icon matPrefix>card_giftcard</mat-icon>
        </mat-form-field>
        <button class="redeem" mat-flat-button color="accent" [disabled]="couponCode.invalid" (click)="addCoupon()">Redeem</button>
    </div>
    <div class="input-row">
        <mat-form-field appearance="outline">
            <mat-label>Gift Card Code</mat-label>
            <input matInput [formControl]="giftCardCode" required>
            <mat-icon matPrefix>redeem</mat-icon>
        </mat-form-field>
        <button class="redeem" mat-flat-button color="accent" [disabled]="giftCardCode.invalid" (click)="addGiftCard()">Redeem</button>
    </div>
    <button color="primary" mat-flat-button routerLink="/cart">
        <mat-icon>shopping_cart</mat-icon>
        CONTINUE TO CART
    </button>
</div>
Here is a screenshot of the page.

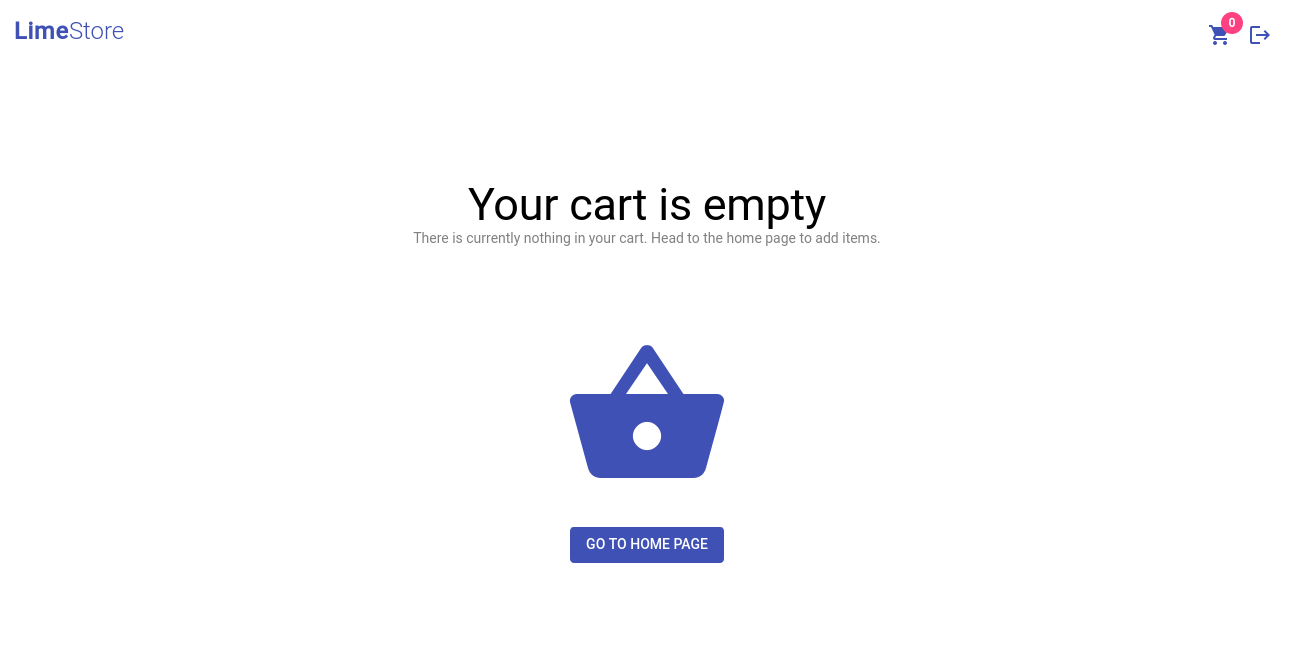
Empty Component
It should not be possible to check out with an empty cart. There needs to be a guard that prevents users from accessing checkout module pages with empty carts. This has already been covered as part of the CoreModule. The guard redirects requests to checkout pages with an empty cart to the EmptyCartComponent.
It's a very simple component that has some text indicating to the user that their cart is empty. It also has a button that the user can click to go to the homepage to add things to their cart. So we’ll use the SimplePageComponent to display it. Here is the template.
<app-simple-page title="Your cart is empty" subtitle="There is currently nothing in your cart. Head to the home page to add items." buttonText="GO TO HOME PAGE" icon="shopping_basket" [centerText]="true" route="/">
</app-simple-page>
Here is a screenshot of the page.
Summary Component
This component summarizes the cart/order. It lists all the items in the cart, their names, quantities, and pictures. It additionally breaks down the cost of the order including taxes, shipping, and discounts. The user should be able to view this and decide whether they are satisfied with the items and cost before proceeding to checkout.
On initialization, the order and its line items are fetched using the OrderService. A user should be able to modify the line items or even remove them from the order. Items are removed when the deleteLineItem method is called. In it the deleteLineItem method of the LineItemService receives the id of the line item to be deleted. If a deletion is successful, we update the item count in the cart using the CartService.
The user is then routed to the customer page where they begin the process of checking out. The checkout method does the routing.
@UntilDestroy({ checkProperties: true })
@Component({
  selector: 'app-summary',
  templateUrl: './summary.component.html',
  styleUrls: ['./summary.component.css']
})
export class SummaryComponent implements OnInit {
  order: Order = {};

  summary: { name: string, amount: string | undefined, id: string }[] = [];

  constructor(
    private orders: OrderService,
    private lineItems: LineItemService,
    private cart: CartService,
    private snackBar: MatSnackBar,
    private router: Router
  ) { }

  ngOnInit() {
    this.orders.getOrder(this.cart.orderId, GetOrderParams.cart)
      .subscribe(
        order => this.processOrder(order),
        err => this.showOrderError('retrieving your cart')
      );
  }

  private processOrder(order: Order) {
    this.order = order;

    this.summary = [
      { name: 'Subtotal', amount: order.formattedSubtotalAmount, id: 'subtotal' },
      { name: 'Discount', amount: order.formattedDiscountAmount, id: 'discount' },
      { name: 'Taxes (included)', amount: order.formattedTotalTaxAmount, id: 'taxes' },
      { name: 'Shipping', amount: order.formattedShippingAmount, id: 'shipping' },
      { name: 'Gift Card', amount: order.formattedGiftCardAmount, id: 'gift-card' }
    ];
  }

  private showOrderError(msg: string) {
    this.snackBar.open(There was a problem ${msg}., 'Close', { duration: 8000 });
  }

  checkout() {
    this.router.navigateByUrl('/customer');
  }

  deleteLineItem(id: string) {
    this.lineItems.deleteLineItem(id)
      .pipe(
        mergeMap(() => this.orders.getOrder(this.cart.orderId, GetOrderParams.cart))
      ).subscribe(
        order => {
          this.processOrder(order);
          this.cart.itemCount = order.skusCount || this.cart.itemCount;
          this.snackBar.open(Item successfully removed from cart., 'Close', { duration: 8000 })
        },
        err => this.showOrderError('deleting your order')
      );
  }
}
Below is the template and its styling is linked here.
<div class="container" ngIf="order">
    <h3 id="order-id">Order #{{order.number}} ({{order.skusCount}} items)</h3>
    <div class="line-item" ngFor="let item of order.lineItems">
        <div id="product-details">
            <img ngIf="item.imageUrl" class="image-xs" src="{{item.imageUrl}}" alt="product photo">
            <div ngIf="!item.imageUrl" class="image-xs no-image"></div>
            <div id="line-details">
                <div>{{item.name}}</div>
                <div> {{item.formattedUnitAmount }} </div>
            </div>
        </div>
        <div id="product-config">
            <app-item-quantity [quantity]="item.quantity || 0" [disabled]="true"></app-item-quantity>
            <div class="itemTotal"> {{item.formattedTotalAmount }} </div>
            <button mat-icon-button color="warn" (click)="deleteLineItem(item.id || '')">
                <mat-icon>clear</mat-icon>
        </button>
        </div>
    </div>
    <mat-divider></mat-divider>
    <div class="costSummary">
        <div class="costItem" *ngFor="let item of summary" [id]="item.id">
            <h3 class="costLabel">{{item.name}}</h3>
            <p> {{item.amount }} </p>
        </div>
    </div>
    <mat-divider></mat-divider>
    <div class="costSummary">
        <div class="costItem" id="total">
            <h2 id="totalLabel">Total</h2>
            <h2> {{order.formattedTotalAmountWithTaxes}} </h2>
        </div>
    </div>
    <div id="checkout-button">
        <button color="accent" mat-flat-button routerLink="/codes">
        <mat-icon>redeem</mat-icon>
        ADD GIFT CARD/COUPON
    </button>
        <button color="primary" mat-flat-button (click)="checkout()">
        <mat-icon>point_of_sale</mat-icon>
        CHECKOUT
    </button>
    </div>
</div>
Here is a screenshot of the page.

Checkout Module
This module is responsible for the checkout process. Checkout involves providing a billing and shipping address, a customer email, and selecting a shipping and payment method. The last step of this process is placement and confirmation of the order. The structure of the module is as follows.
src/app/features/checkout/
├── components
│   ├── address
│   ├── address-list
│   └── country-select
└── pages
    ├── billing-address
    ├── cancel-payment
    ├── customer
    ├── payment
    ├── place-order
    ├── shipping-address
    └── shipping-methods
This module is the biggest by far and contains 3 components and 7 pages. To generate it and its components run:
ng g m features/checkout
for comp in \
address address-list country-select; do \
ng g c "features/checkout/components/${comp}" \
; done
for page in \
billing-address cancel-payment customer \
payment place-order shipping-address \
shipping-methods; do \
ng g c "features/checkout/pages/${page}"; done
This is the module file.
@NgModule({
  declarations: [
    CustomerComponent,
    AddressComponent,
    BillingAddressComponent,
    ShippingAddressComponent,
    ShippingMethodsComponent,
    PaymentComponent,
    PlaceOrderComponent,
    AddressListComponent,
    CountrySelectComponent,
    CancelPaymentComponent
  ],
  imports: [
    RouterModule.forChild([
      {
        path: '', canActivate: [EmptyCartGuard], children: [
          { path: 'billing-address', component: BillingAddressComponent },
          { path: 'cancel-payment', component: CancelPaymentComponent },
          { path: 'customer', component: CustomerComponent },
          { path: 'payment', component: PaymentComponent },
          { path: 'place-order', component: PlaceOrderComponent },
          { path: 'shipping-address', component: ShippingAddressComponent },
          { path: 'shipping-methods', component: ShippingMethodsComponent }
        ]
      }
    ]),
    MatCardModule,
    MatCheckboxModule,
    MatDividerModule,
    MatInputModule,
    MatMenuModule,
    MatRadioModule,
    ReactiveFormsModule,
    SharedModule
  ]
})
export class CheckoutModule { }
Components
Country Select Component
This component lets a user select a country as part of an address. The material select component has a pretty different appearance when compared to the input fields in the address form. So for the sake of uniformity, a material menu component is used instead.
When the component is initialized, the country code data is fetched using the CountryService. The countries property holds the values returned by the service. These values will be added to the menu in the template.
The component has one output property, setCountryEvent. When a country is selected, this event emits the alpha-2 code of the country.
@UntilDestroy({ checkProperties: true })
@Component({
  selector: 'app-country-select',
  templateUrl: './country-select.component.html',
  styleUrls: ['./country-select.component.css']
})
export class CountrySelectComponent implements OnInit {
  country: string = 'Country';
  countries: Country[] = [];
  @Output() setCountryEvent = new EventEmitter<string>();

  constructor(private countries: CountryService) { }

  ngOnInit() {
    this.countries.getCountries()
      .subscribe(
        countries => {
          this.countries = countries;
        }
      );
  }

  setCountry(value: Country) {
    this.country = value.name || '';
    this.setCountryEvent.emit(value.code);
  }}
Below is its template and linked here is its styling.
<button id="country-select" mat-stroked-button [matMenuTriggerFor]="countryMenu">
    {{country}}
    <mat-icon>expand_more</mat-icon>
</button>
<mat-menu #countryMenu="matMenu">
    <button *ngFor="let cnt of countries" (click)="setCountry(cnt)" mat-menu-item>{{cnt.name}}</button>
</mat-menu>
Address Component
This is a form for capturing addresses. It is used by both the shipping and billing address pages. A valid Commerce Layer address should contain a first and last name, an address line, a city, zip code, state code, country code, and phone number.
The FormBuilder service will create the form group. Since this component is used by multiple pages, it has a number of input and output properties. The input properties include the button text, title displayed, and text for a checkbox. The output properties will be event emitters for when the button is clicked to create the address and another for when the checkbox value changes.
When the button is clicked, the addAddress method is called and the createAddress event emits the complete address. Similarly, when the checkbox is checked, the isCheckboxChecked event emits the checkbox value.
@Component({
  selector: 'app-address',
  templateUrl: './address.component.html',
  styleUrls: ['./address.component.css']
})
export class AddressComponent {
  @Input() buttonText: string = '';
  @Input() showTitle?: boolean = false;

  @Output() createAddress = new EventEmitter<Address>();

  @Input() checkboxText: string = '';
  @Output() isCheckboxChecked = new EventEmitter<boolean>();

  countryCode: string = '';

  addressForm = this.fb.group({
    firstName: [''],
    lastName: [''],
    line1: [''],
    city: [''],
    zipCode: [''],
    stateCode: [''],
    phone: ['']
  });

  @ViewChild(FormGroupDirective) afDirective: FormGroupDirective | undefined;

  constructor(private fb: FormBuilder) { }

  setCountryCode(code: string) {
    this.countryCode = code;
  }

  addAddress() {
    this.createAddress.emit({
      firstName: this.addressForm.get('firstName')?.value,
      lastName: this.addressForm.get('lastName')?.value,
      line1: this.addressForm.get('line1')?.value,
      city: this.addressForm.get('city')?.value,
      zipCode: this.addressForm.get('zipCode')?.value,
      stateCode: this.addressForm.get('stateCode')?.value || 'N/A',
      countryCode: this.countryCode,
      phone: this.addressForm.get('phone')?.value
    });
  }

  setCheckboxValue(change: MatCheckboxChange) {
    if (this.isCheckboxChecked) {
      this.isCheckboxChecked.emit(change.checked);
    }
  }
}
This is its template and its styling is linked here.
<form id="container" [formGroup]="addressForm">
    <p class="mat-headline" *ngIf="showTitle">Or add a new address</p>
    <div class="row">
        <mat-form-field appearance="outline">
            <mat-label>First Name</mat-label>
            <input matInput formControlName="firstName">
        </mat-form-field>
        <mat-form-field appearance="outline">
            <mat-label>Last Name</mat-label>
            <input matInput formControlName="lastName">
        </mat-form-field>
    </div>
    <div class="row">
        <mat-form-field appearance="outline">
            <mat-label>Address</mat-label>
            <input matInput formControlName="line1">
        </mat-form-field>
        <mat-form-field appearance="outline">
            <mat-label>City</mat-label>
            <input matInput formControlName="city">
        </mat-form-field>
    </div>
    <div class="row">
        <mat-form-field appearance="outline">
            <mat-label>State Code</mat-label>
            <input matInput formControlName="stateCode">
        </mat-form-field>
        <mat-form-field appearance="outline">
            <mat-label>Zip Code</mat-label>
            <input matInput formControlName="zipCode">
        </mat-form-field>
    </div>
    <div class="row">
        <mat-form-field appearance="outline">
            <mat-label>Phone</mat-label>
            <input matInput formControlName="phone">
        </mat-form-field>
        <app-country-select (setCountryEvent)="setCountryCode($event)"></app-country-select>
    </div>
    <mat-checkbox color="accent" (change)="setCheckboxValue($event)">
        {{checkboxText}}
    </mat-checkbox>
    <button id="submit-button" mat-flat-button color="primary" (click)="addAddress()">
        {{buttonText}}
    </button>
</form>
Address List Component
When a customer logs in, they can access their existing addresses. Instead of having them re-enter an address, they can pick from an address list. This is the purpose of this component. On initialization, all the customer's addresses are fetched using the CustomerAddressService if they are logged in. We will check their login status using the SessionService.
This component has a setAddressEvent output property. When an address is selected, setAddressEvent emits its id to the parent component.
@Component({
  selector: 'app-address-list',
  templateUrl: './address-list.component.html',
  styleUrls: ['./address-list.component.css']
})
export class AddressListComponent implements OnInit {
  addresses: CustomerAddress[] = [];

  @Output() setAddressEvent = new EventEmitter<string>();

  constructor(
    private session: SessionService,
    private customerAddresses: CustomerAddressService,
    private snackBar: MatSnackBar
  ) { }

  ngOnInit() {
    this.session.loggedInStatus
      .pipe(
        mergeMap(
          status => iif(() => status, this.customerAddresses.getCustomerAddresses())
        ))
      .subscribe(
        addresses => {
          if (addresses.length) {
            this.addresses = addresses
          }
        },
        err => this.snackBar.open('There was a problem getting your existing addresses.', 'Close', { duration: 8000 })
      );
  }

  setAddress(change: MatRadioChange) {
    this.setAddressEvent.emit(change.value);
  }
}
Here is its template. You can find its styling here.
<div id="container">
    <p class="mat-headline">Pick an existing address</p>
    <mat-error ngIf="!addresses.length">You have no existing addresses</mat-error>
    <mat-radio-group ngIf="addresses.length" class="addresses" (change)="setAddress($event)">
        <mat-card class="address" *ngFor="let address of addresses">
            <mat-radio-button [value]="address.address?.id" color="primary">
                <p>{{address.address?.firstName}} {{address.address?.lastName}},</p>
                <p>{{address.address?.line1}},</p>
                <p>{{address.address?.city}},</p>
                <p>{{address.address?.zipCode}},</p>
                <p>{{address.address?.stateCode}}, {{address.address?.countryCode}}</p>
                <p>{{address.address?.phone}}</p>
            </mat-radio-button>
        </mat-card>
    </mat-radio-group>
</div>
Pages
Customer Component
An order needs to be associated with an email address. This component is a form that captures the customer email address. When the component is initialized, the current customer's email address is fetched if they are logged in. We get the customer from the CustomerService. If they do not wish to change their email address, this email will be the default value.
If the email is changed or a customer is not logged in, the order is updated with the inputted email. We use the OrderService to update the order with the new email address. If successful, we route the customer to the billing address page.
@UntilDestroy({ checkProperties: true })
@Component({
  selector: 'app-customer',
  templateUrl: './customer.component.html',
  styleUrls: ['./customer.component.css']
})
export class CustomerComponent implements OnInit {
  email = new FormControl('', [Validators.required, Validators.email]);

  constructor(
    private orders: OrderService,
    private customers: CustomerService,
    private cart: CartService,
    private router: Router,
    private snackBar: MatSnackBar
  ) { }

  ngOnInit() {
    this.customers.getCurrentCustomer()
      .subscribe(
        customer => this.email.setValue(customer.email)
      );
  }

  addCustomerEmail() {
    this.orders.updateOrder(
      { id: this.cart.orderId, customerEmail: this.email.value },
      [UpdateOrderParams.customerEmail])
      .subscribe(
        () => this.router.navigateByUrl('/billing-address'),
        err => this.snackBar.open('There was a problem adding your email to the order.', 'Close', { duration: 8000 })
      );
  }
}
Here is the component template and linked here is its styling.
<div id="container">
    <app-title no="1" title="Customer" subtitle="Billing information and shipping address"></app-title>
    <mat-form-field appearance="outline">
        <mat-label>Email</mat-label>
        <input matInput [formControl]="email" required>
        <mat-icon matPrefix>alternate_email</mat-icon>
    </mat-form-field>
    <button mat-flat-button color="primary" [disabled]="email.invalid" (click)="addCustomerEmail()">
        PROCEED TO BILLING ADDRESS
    </button>
</div>
Here is a screenshot of the customer page.

Billing Address Component
The billing address component lets a customer either add a new billing address or pick from their existing addresses. Users who are not logged in have to input a new address. Those who have logged in get an option to pick between new or existing addresses.
The showAddress property indicates whether existing addresses should be shown on the component. sameShippingAddressAsBilling indicates whether the shipping address should be the same as what the billing address is set. When a customer selects an existing address, then its id is assigned to selectedCustomerAddressId.
When the component is initialized, we use the SessionService to check if the current user is logged in. If they are logged in, we will display their existing addresses if they have any.
As mentioned earlier, if a user is logged in, they can pick an existing address as their billing address. In the updateBillingAddress method, if they are logged in, the address they select is cloned and set as the order's billing address. We do this by updating the order using the updateOrder method of the OrderService and supplying the address Id.
If they are not logged in, the user has to provide an address. Once provided, the address is created using the createAddress method. In it, the AddressService takes the input and makes the new address. After which, the order is updated using the id of the newly created address. If there is an error or either operation is successful, we show a snackbar.
If the same address is selected as a shipping address, the user is routed to the shipping methods page. If they'd like to provide an alternate shipping address, they are directed to the shipping address page.
@UntilDestroy({ checkProperties: true })
@Component({
  selector: 'app-billing-address',
  templateUrl: './billing-address.component.html',
  styleUrls: ['./billing-address.component.css']
})
export class BillingAddressComponent implements OnInit {
  showAddresses: boolean = false;
  sameShippingAddressAsBilling: boolean = false;
  selectedCustomerAddressId: string = '';

  constructor(
    private addresses: AddressService,
    private snackBar: MatSnackBar,
    private session: SessionService,
    private orders: OrderService,
    private cart: CartService,
    private router: Router,
    private customerAddresses: CustomerAddressService) { }

  ngOnInit() {
    this.session.loggedInStatus
      .subscribe(
        status => this.showAddresses = status
      );
  }

  updateBillingAddress(address: Address) {
    if (this.showAddresses && this.selectedCustomerAddressId) {
      this.cloneAddress();
    } else if (address.firstName && address.lastName && address.line1 && address.city && address.zipCode && address.stateCode && address.countryCode && address.phone) {
      this.createAddress(address);
    }
    else {
      this.snackBar.open('Check your address. Some fields are missing.', 'Close');
    }
  }

  setCustomerAddress(customerAddressId: string) {
    this.selectedCustomerAddressId = customerAddressId;
  }

  setSameShippingAddressAsBilling(change: boolean) {
    this.sameShippingAddressAsBilling = change;
  }

  private createAddress(address: Address) {
    this.addresses.createAddress(address)
      .pipe(
        concatMap(
          address => {
            const update = this.updateOrderObservable({
              id: this.cart.orderId,
              billingAddressId: address.id
            }, [UpdateOrderParams.billingAddress]);

            if (this.showAddresses) {
              return combineLatest([update, this.customerAddresses.createCustomerAddress(address.id || '', '')]);
            } else {
              return update;
            }
          }))
      .subscribe(
        () => this.showSuccessSnackBar(),
        err => this.showErrorSnackBar()
      );
  }

  private cloneAddress() {
    this.updateOrderObservable({
      id: this.cart.orderId,
      billingAddressCloneId: this.selectedCustomerAddressId
    }, [UpdateOrderParams.billingAddressClone])
      .subscribe(
        () => this.showSuccessSnackBar(),
        err => this.showErrorSnackBar()
      );
  }

  private updateOrderObservable(order: Order, updateParams: UpdateOrderParams[]): Observable<any> {
    return iif(() => this.sameShippingAddressAsBilling,
      concat([
        this.orders.updateOrder(order, updateParams),
        this.orders.updateOrder(order, [UpdateOrderParams.shippingAddressSameAsBilling])
      ]),
      this.orders.updateOrder(order, updateParams)
    );
  }

  private showErrorSnackBar() {
    this.snackBar.open('There was a problem creating your address.', 'Close', { duration: 8000 });
  }

  private navigateTo(path: string) {
    setTimeout(() => this.router.navigateByUrl(path), 4000);
  }

  private showSuccessSnackBar() {
    this.snackBar.open('Billing address successfully added. Redirecting...', 'Close', { duration: 3000 });
    if (this.sameShippingAddressAsBilling) {
      this.navigateTo('/shipping-methods');
    } else {
      this.navigateTo('/shipping-address');
    }
  }
}
Here is the template. This link points to its styling.
<app-title no="2" title="Billing Address" subtitle="Address to bill charges to"></app-title>
<app-address-list ngIf="showAddresses" (setAddressEvent)="setCustomerAddress($event)"></app-address-list>
<mat-divider ngIf="showAddresses"></mat-divider>
<app-address [showTitle]="showAddresses" buttonText="PROCEED TO NEXT STEP" checkboxText="Ship to the same address" (isCheckboxChecked)="setSameShippingAddressAsBilling($event)" (createAddress)="updateBillingAddress($event)"></app-address>
This is what the billing address page will look like.

Shipping Address Component
The shipping address component behaves a lot like the billing address component. However, there are a couple of differences. For one, the text displayed on the template is different. The other key differences are in how the order is updated using the OrderService once an address is created or selected. The fields that the order updates are shippingAddressCloneId for selected addresses and shippingAddress for new addresses. If a user chooses to change the billing address, to be the same as the shipping address, the billingAddressSameAsShipping field is updated.
After a shipping address is selected and the order is updated, the user is routed to the shipping methods page.
@UntilDestroy({ checkProperties: true })
@Component({
  selector: 'app-shipping-address',
  templateUrl: './shipping-address.component.html',
  styleUrls: ['./shipping-address.component.css']
})
export class ShippingAddressComponent implements OnInit {
  showAddresses: boolean = false;
  sameBillingAddressAsShipping: boolean = false;
  selectedCustomerAddressId: string = '';

  constructor(
    private addresses: AddressService,
    private snackBar: MatSnackBar,
    private session: SessionService,
    private orders: OrderService,
    private cart: CartService,
    private router: Router,
    private customerAddresses: CustomerAddressService) { }

  ngOnInit() {
    this.session.loggedInStatus
      .subscribe(
        status => this.showAddresses = status
      );
  }

  updateShippingAddress(address: Address) {
    if (this.showAddresses && this.selectedCustomerAddressId) {
      this.cloneAddress();
    } else if (address.firstName && address.lastName && address.line1 && address.city && address.zipCode && address.stateCode && address.countryCode && address.phone) {
      this.createAddress(address);
    }
    else {
      this.snackBar.open('Check your address. Some fields are missing.', 'Close');
    }
  }

  setCustomerAddress(customerAddressId: string) {
    this.selectedCustomerAddressId = customerAddressId;
  }

  setSameBillingAddressAsShipping(change: boolean) {
    this.sameBillingAddressAsShipping = change;
  }

  private createAddress(address: Address) {
    this.addresses.createAddress(address)
      .pipe(
        concatMap(
          address => {
            const update = this.updateOrderObservable({
              id: this.cart.orderId,
              shippingAddressId: address.id
            }, [UpdateOrderParams.shippingAddress]);

            if (this.showAddresses) {
              return combineLatest([update, this.customerAddresses.createCustomerAddress(address.id || '', '')]);
            } else {
              return update;
            }
          }))
      .subscribe(
        () => this.showSuccessSnackBar(),
        err => this.showErrorSnackBar()
      );
  }

  private cloneAddress() {
    this.updateOrderObservable({
      id: this.cart.orderId,
      shippingAddressCloneId: this.selectedCustomerAddressId
    }, [UpdateOrderParams.shippingAddressClone])
      .subscribe(
        () => this.showSuccessSnackBar(),
        err => this.showErrorSnackBar()
      );
  }

  private updateOrderObservable(order: Order, updateParams: UpdateOrderParams[]): Observable<any> {
    return iif(() => this.sameBillingAddressAsShipping,
      concat([
        this.orders.updateOrder(order, updateParams),
        this.orders.updateOrder(order, [UpdateOrderParams.billingAddressSameAsShipping])
      ]),
      this.orders.updateOrder(order, updateParams)
    );
  }

  private showErrorSnackBar() {
    this.snackBar.open('There was a problem creating your address.', 'Close', { duration: 8000 });
  }

  private showSuccessSnackBar() {
    this.snackBar.open('Shipping address successfully added. Redirecting...', 'Close', { duration: 3000 });

    setTimeout(() => this.router.navigateByUrl('/shipping-methods'), 4000);
  }
}
Here is the template and its styling can be found here.
<app-title no="3" title="Shipping Address" subtitle="Address to ship package to"></app-title>
<app-address-list ngIf="showAddresses" (setAddressEvent)="setCustomerAddress($event)"></app-address-list>
<mat-divider ngIf="showAddresses"></mat-divider>
<app-address [showTitle]="showAddresses" buttonText="PROCEED TO SHIPPING METHODS" checkboxText="Bill to the same address" (isCheckboxChecked)="setSameBillingAddressAsShipping($event)" (createAddress)="updateShippingAddress($event)"></app-address>
The shipping address page will look like this.

Shipping Methods Component
This component displays the number of shipments required for an order to be fulfilled, the available shipping methods, and their associated costs. The customer can then select a shipping method they prefer for each shipment.
The shipments property contains all the shipments of the order. The shipmentsForm is the form within which the shipping method selections will be made.
When the component is initialized, the order is fetched and will contain both its line items and shipments. At the same time, we get the delivery lead times for the various shipping methods. We use the OrderService to get the order and the DeliveryLeadTimeService for the lead times. Once both sets of information are returned, they are combined into an array of shipments and assigned to the shipments property. Each shipment will contain its items, the shipping methods available, and the corresponding cost.
After the user has selected a shipping method for each shipment, the selected shipping method is updated for each in setShipmentMethods. If successful, the user is routed to the payments page.
@UntilDestroy({ checkProperties: true })
@Component({
  selector: 'app-shipping-methods',
  templateUrl: './shipping-methods.component.html',
  styleUrls: ['./shipping-methods.component.css']
})
export class ShippingMethodsComponent implements OnInit {
  shipments: Shipment[] | undefined = [];
  shipmentsForm: FormGroup = this.fb.group({});

  constructor(
    private orders: OrderService,
    private dlts: DeliveryLeadTimeService,
    private cart: CartService,
    private router: Router,
    private fb: FormBuilder,
    private shipments: ShipmentService,
    private snackBar: MatSnackBar
  ) { }

  ngOnInit() {
    combineLatest([
      this.orders.getOrder(this.cart.orderId, GetOrderParams.shipments),
      this.dlts.getDeliveryLeadTimes()
    ]).subscribe(
      ([lineItems, deliveryLeadTimes]) => {
        let li: LineItem;
        let lt: DeliveryLeadTime[];

        this.shipments = lineItems.shipments?.map((shipment) => {
          if (shipment.id) {
            this.shipmentsForm.addControl(shipment.id, new FormControl('', Validators.required));
          }

          if (shipment.lineItems) {
            shipment.lineItems = shipment.lineItems.map(item => {
              li = this.findItem(lineItems, item.skuCode || '');
              item.imageUrl = li.imageUrl;
              item.name = li.name;
              return item;
            });
          }

          if (shipment.availableShippingMethods) {
            lt = this.findLocationLeadTime(deliveryLeadTimes, shipment);
            shipment.availableShippingMethods = shipment.availableShippingMethods?.map(
              method => {
                method.deliveryLeadTime = this.findMethodLeadTime(lt, method);
                return method;
              });
          }

          return shipment;
        });
      },
      err => this.router.navigateByUrl('/error')
    );
  }

  setShipmentMethods() {
    const shipmentsFormValue = this.shipmentsForm.value;

    combineLatest(Object.keys(shipmentsFormValue).map(
      key => this.shipments.updateShipment(key, shipmentsFormValue[key])
    )).subscribe(
      () => {
        this.snackBar.open('Your shipments have been updated with a shipping method.', 'Close', { duration: 3000 });
        setTimeout(() => this.router.navigateByUrl('/payment'), 4000);
      },
      err => this.snackBar.open('There was a problem adding shipping methods to your shipments.', 'Close', { duration: 5000 })
    );
  }


  private findItem(lineItems: LineItem[], skuCode: string): LineItem {
    return lineItems.filter((item) => item.skuCode == skuCode)[0];
  }

  private findLocationLeadTime(times: DeliveryLeadTime[], shipment: Shipment): DeliveryLeadTime[] {
    return times.filter((dlTime) => dlTime?.stockLocation?.id == shipment?.stockLocation?.id);
  }

  private findMethodLeadTime(times: DeliveryLeadTime[], method: ShippingMethod): DeliveryLeadTime {
    return times.filter((dlTime) => dlTime?.shippingMethod?.id == method?.id)[0];
  }
}
Here is the template and you can find the styling at this link.
<form id="container" [formGroup]="shipmentsForm">
    <app-title no="4" title="Shipping Methods" subtitle="How to ship your packages"></app-title>
    <div class="shipment-container" ngFor="let shipment of shipments; let j = index; let isLast = last">
        <h1>Shipment {{j+1}} of {{shipments?.length}}</h1>
        <div class="row" ngFor="let item of shipment.lineItems">
            <img class="image-xs" [src]="item.imageUrl" alt="product photo">
            <div id="shipment-details">
                <h4 id="item-name">{{item.name}}</h4>
                <p>{{item.skuCode}}</p>
            </div>
            <div id="quantity-section">
                <p id="quantity-label">Quantity: </p>{{item.quantity}}
            </div>
        </div>
        <mat-radio-group [formControlName]="shipment?.id || j">
            <mat-radio-button ngFor="let method of shipment.availableShippingMethods" [value]="method.id">
                <div class="radio-button">
                    <p>{{method.name}}</p>
                    <div>
                        <p class="radio-label">Cost:</p>
                        <p> {{method.formattedPriceAmount}}</p>
                    </div>
                    <div>
                        <p class="radio-label">Timeline:</p>
                        <p> Available in {{method.deliveryLeadTime?.minDays}}-{{method.deliveryLeadTime?.maxDays}} days</p>
                    </div>
                </div>
            </mat-radio-button>
        </mat-radio-group>
        <mat-divider ngIf="!isLast"></mat-divider>
    </div>
    <button mat-flat-button color="primary" [disabled]="shipmentsForm.invalid" (click)="setShipmentMethods()">PROCEED TO PAYMENT</button>
</form>
This is a screenshot of the shipping methods page.
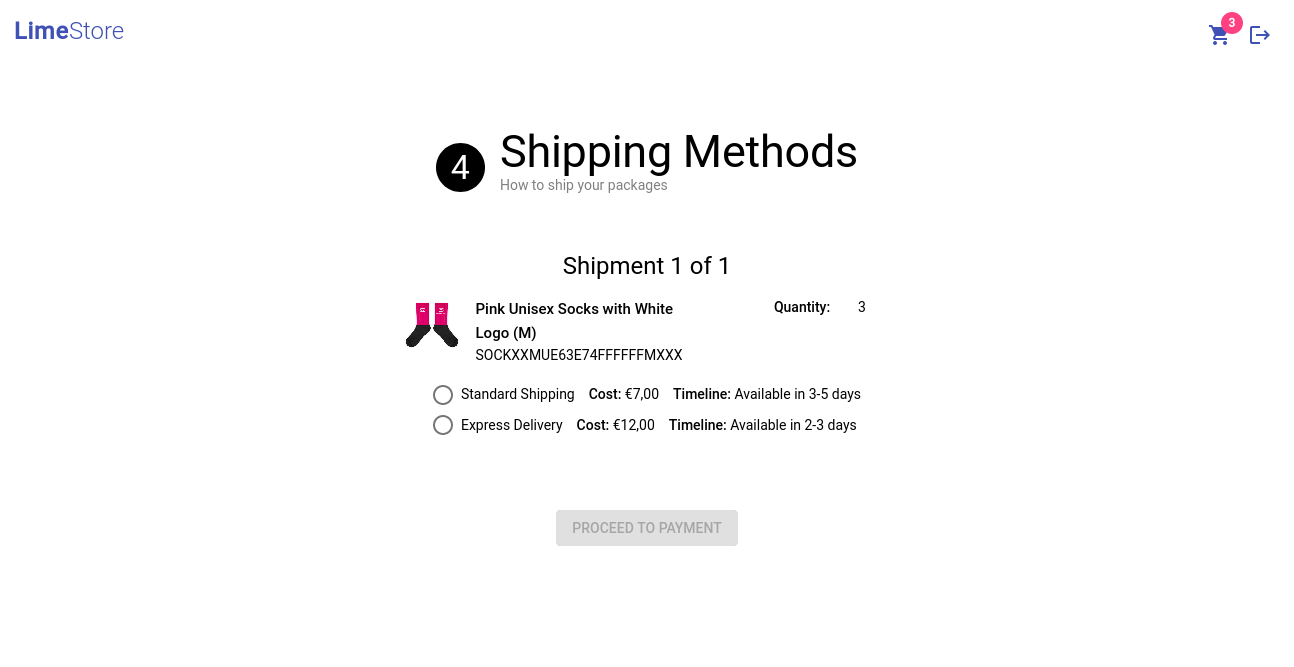
Payments Component
In this component, the user clicks the payment button if they wish to proceed to pay for their order with Paypal. The approvalUrl is the Paypal link that the user is directed to when they click the button.
During initialization, we get the order with the payment source included using the OrderService. If a payment source is set, we get its id and retrieve the corresponding Paypal payment from the PaypalPaymentService. The Paypal payment will contain the approval url. If no payment source has been set, we update the order with Paypal as the preferred payment method. We then proceed to create a new Paypal payment for the order using the PaypalPaymentService. From here, we can get the approval url from the newly created order.
Lastly, when the user clicks the button, they are redirected to Paypal where they can approve the purchase.
@UntilDestroy({ checkProperties: true })
@Component({
  selector: 'app-payment',
  templateUrl: './payment.component.html',
  styleUrls: ['./payment.component.css']
})
export class PaymentComponent implements OnInit {
  approvalUrl: string = '';

  constructor(
    private orders: OrderService,
    private cart: CartService,
    private router: Router,
    private payments: PaypalPaymentService
  ) { }

  ngOnInit() {
    const orderId = this.cart.orderId;

    this.orders.getOrder(orderId, GetOrderParams.paymentSource)
      .pipe(
        concatMap((order: Order) => {
          const paymentSourceId = order.paymentSource?.id;

          const paymentMethod = order.availablePaymentMethods?.filter(
            (method) => method.paymentSourceType == 'paypal_payments'
          )[0];

          return iif(
            () => paymentSourceId ? true : false,
            this.payments.getPaypalPayment(paymentSourceId || ''),
            this.orders.updateOrder({
              id: orderId,
              paymentMethodId: paymentMethod?.id
            }, [UpdateOrderParams.paymentMethod])
              .pipe(concatMap(
                order => this.payments.createPaypalPayment({
                  orderId: orderId,
                  cancelUrl: ${environment.clientUrl}/cancel-payment,
                  returnUrl: ${environment.clientUrl}/place-order
                })
              ))
          );
        }))
      .subscribe(
        paypalPayment => this.approvalUrl = paypalPayment?.approvalUrl || '',
        err => this.router.navigateByUrl('/error')
      );
  }

  navigateToPaypal() {
    window.location.href = this.approvalUrl;
  }
}
Here is its template.
<app-simple-page number="5" title="Payment" subtitle="Pay for your order" buttonText="PROCEED TO PAY WITH PAYPAL" icon="point_of_sale" (buttonEvent)="navigateToPaypal()" [buttonDisabled]="approvalUrl.length ? false : true"></app-simple-page>Here’s what the payments page will look like.
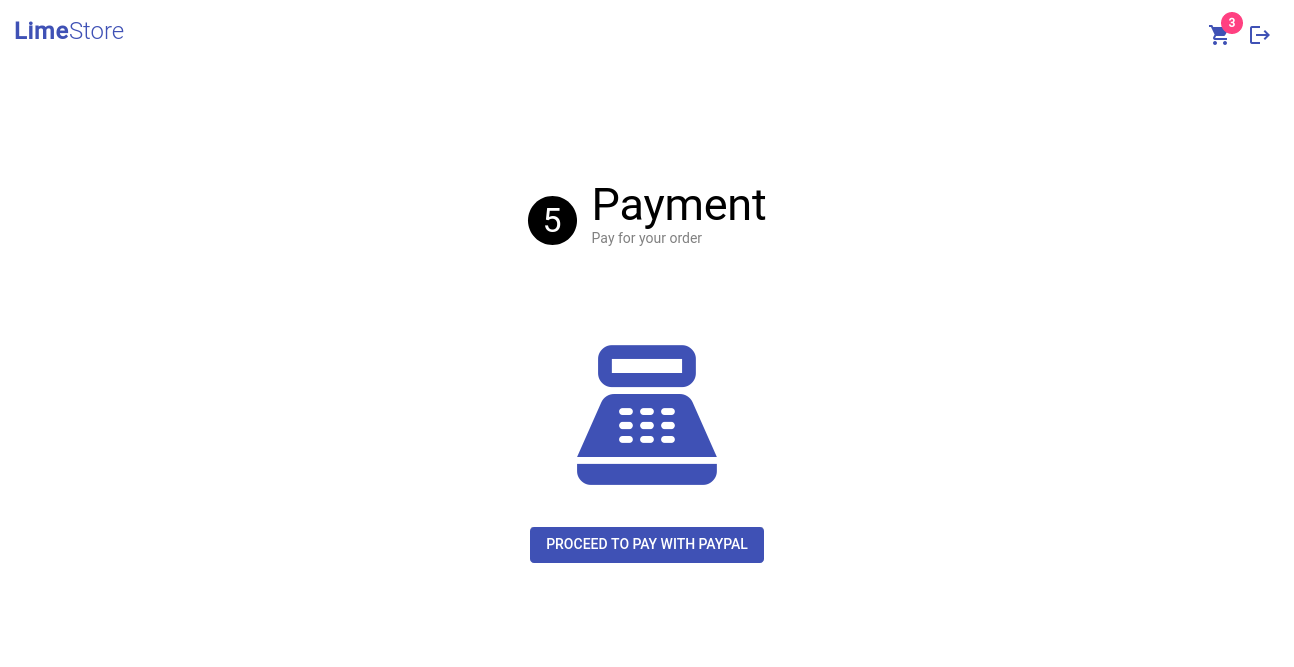
Cancel Payment Component
Paypal requires a cancel payment page. This component serves this purpose. This is its template.
<app-simple-page title="Payment cancelled" subtitle="Your Paypal payment has been cancelled" icon="money_off" buttonText="GO TO HOME" [centerText]="true" route="/"></app-simple-page>Here’s a screenshot of the page.

Place Order Component
This is the last step in the checkout process. Here the user confirms that they indeed want to place the order and begin its processing. When the user approves the Paypal payment, this is the page they are redirected to. Paypal adds a payer id query parameter to the url. This is the user's Paypal Id.
When the component is initialized, we get the payerId query parameter from the url. The order is then retrieved using the OrderService with the payment source included. The id of the included payment source is used to update the Paypal payment with the payer id, using the PaypalPayment service. If any of these fail, the user is redirected to the error page. We use the disableButton property to prevent the user from placing the order until the payer Id is set.
When they click the place-order button, the order is updated with a placed status. Afterwhich the cart is cleared, a successful snack bar is displayed, and the user is redirected to the home page.
@UntilDestroy({ checkProperties: true })
@Component({
  selector: 'app-place-order',
  templateUrl: './place-order.component.html',
  styleUrls: ['./place-order.component.css']
})
export class PlaceOrderComponent implements OnInit {
  disableButton = true;

  constructor(
    private route: ActivatedRoute,
    private router: Router,
    private payments: PaypalPaymentService,
    private orders: OrderService,
    private cart: CartService,
    private snackBar: MatSnackBar
  ) { }

  ngOnInit() {
    this.route.queryParams
      .pipe(
        concatMap(params => {
          const payerId = params['PayerID'];
          const orderId = this.cart.orderId;

          return iif(
            () => payerId.length > 0,
            this.orders.getOrder(orderId, GetOrderParams.paymentSource)
              .pipe(
                concatMap(order => {
                  const paymentSourceId = order.paymentSource?.id || '';

                  return iif(
                    () => paymentSourceId ? paymentSourceId.length > 0 : false,
                    this.payments.updatePaypalPayment(paymentSourceId, payerId)
                  );
                })
              )
          );
        }))
      .subscribe(
        () => this.disableButton = false,
        () => this.router.navigateByUrl('/error')
      );
  }

  placeOrder() {
    this.disableButton = true;

    this.orders.updateOrder({
      id: this.cart.orderId,
      place: true
    }, [UpdateOrderParams.place])
      .subscribe(
        () => {
          this.snackBar.open('Your order has been successfully placed.', 'Close', { duration: 3000 });
          this.cart.clearCart();
          setTimeout(() => this.router.navigateByUrl('/'), 4000);
        },
        () => {
          this.snackBar.open('There was a problem placing your order.', 'Close', { duration: 8000 });
          this.disableButton = false;
        }
      );
  }
}
Here is the template and its associated styling.
<app-simple-page title="Finalize Order" subtitle="Complete your order" [number]="'6'" icon="shopping_bag" buttonText="PLACE YOUR ORDER" (buttonEvent)="placeOrder()" [buttonDisabled]="disableButton"></app-simple-page>Here is a screenshot of the page.
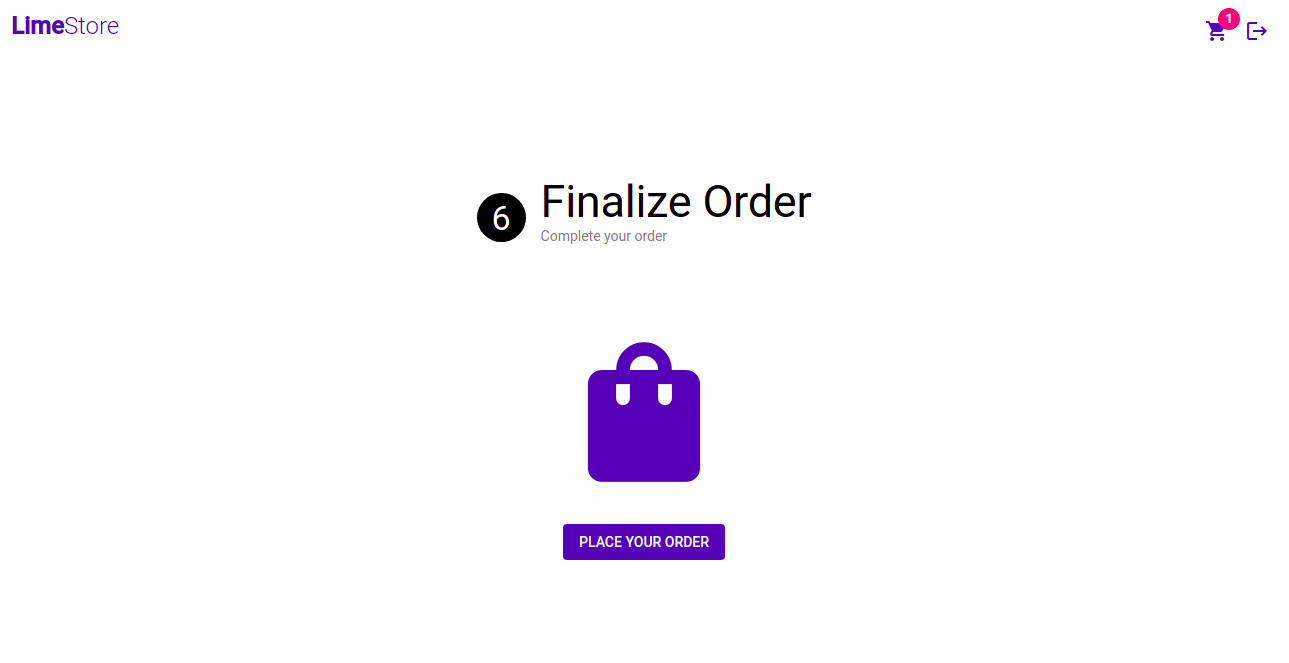
App Module
All requests made to Commerce Layer, other than for authentication, need to contain a token. So the moment the app is initialized, a token is fetched from the /oauth/token route on the server and a session is initialized. We’ll use the APP_INITIALIZER token to provide an initialization function in which the token is retrieved. Additionally, we’ll use the HTTP_INTERCEPTORS token to provide the OptionsInterceptor we created earlier. Once all the modules are added the app module file should look something like this.
@NgModule({
  declarations: [
    AppComponent
  ],
  imports: [
    BrowserModule,
    AppRoutingModule,
    HttpClientModule,
    BrowserAnimationsModule,
    AuthModule,
    ProductsModule,
    CartModule,
    CheckoutModule,
    CoreModule
  ],
  providers: [
    {
      provide: HTTP_INTERCEPTORS,
      useClass: OptionsInterceptor,
      multi: true
    },
    {
      provide: APP_INITIALIZER,
      useFactory: (http: HttpClient) => () => http.post<object>(
        ${environment.apiUrl}/oauth/token,
        { 'grantType': 'client_credentials' },
        { withCredentials: true }),
      multi: true,
      deps: [HttpClient]
    }
  ],
  bootstrap: [AppComponent]
})
export class AppModule { }
App Component
We’ll modify the app component template and its styling which you can find here.
<div id="page">
    <app-header></app-header>
    <div id="content">
        <router-outlet></router-outlet>
    </div>
</div>
Conclusion
In this article, we’ve covered how you could create an e-commerce Angular 11 app with Commerce Layer and Paypal. We’ve also touched on how to structure the app and how you could interface with an e-commerce API.
Although this app allows a customer to make a complete order, it is not by any means finished. There is so much you could add to improve it. For one, you may choose to enable item quantity changes in the cart, link cart items to their product pages, optimize the address components, add additional guards for checkout pages like the place-order page, and so on. This is just the starting point.
If you’d like to understand more about the process of making an order from start to finish, you could check out the Commerce Layer guides and API. You can view the code for this project at this repository.