How to Change Opacity in Procreate
Procreate is a powerful digital illustration app for iPad that offers a wide range of tools and features to create stunning artwork.
One essential feature is the ability to change the opacity of layers, brushes, and even specific elements within a layer.
In this article, we will walk you through the steps to change opacity in Procreate, and provide tips for effectively using opacity to enhance your digital art.
Changing Layer Opacity
Adjusting the opacity of an entire layer is a simple process that can help you create subtle effects or blend different elements within your artwork.
Steps to Change Layer Opacity
- Open your Procreate project and locate the Layers panel on the right side of the screen.
- Select the layer you want to adjust by tapping on the layer thumbnail.
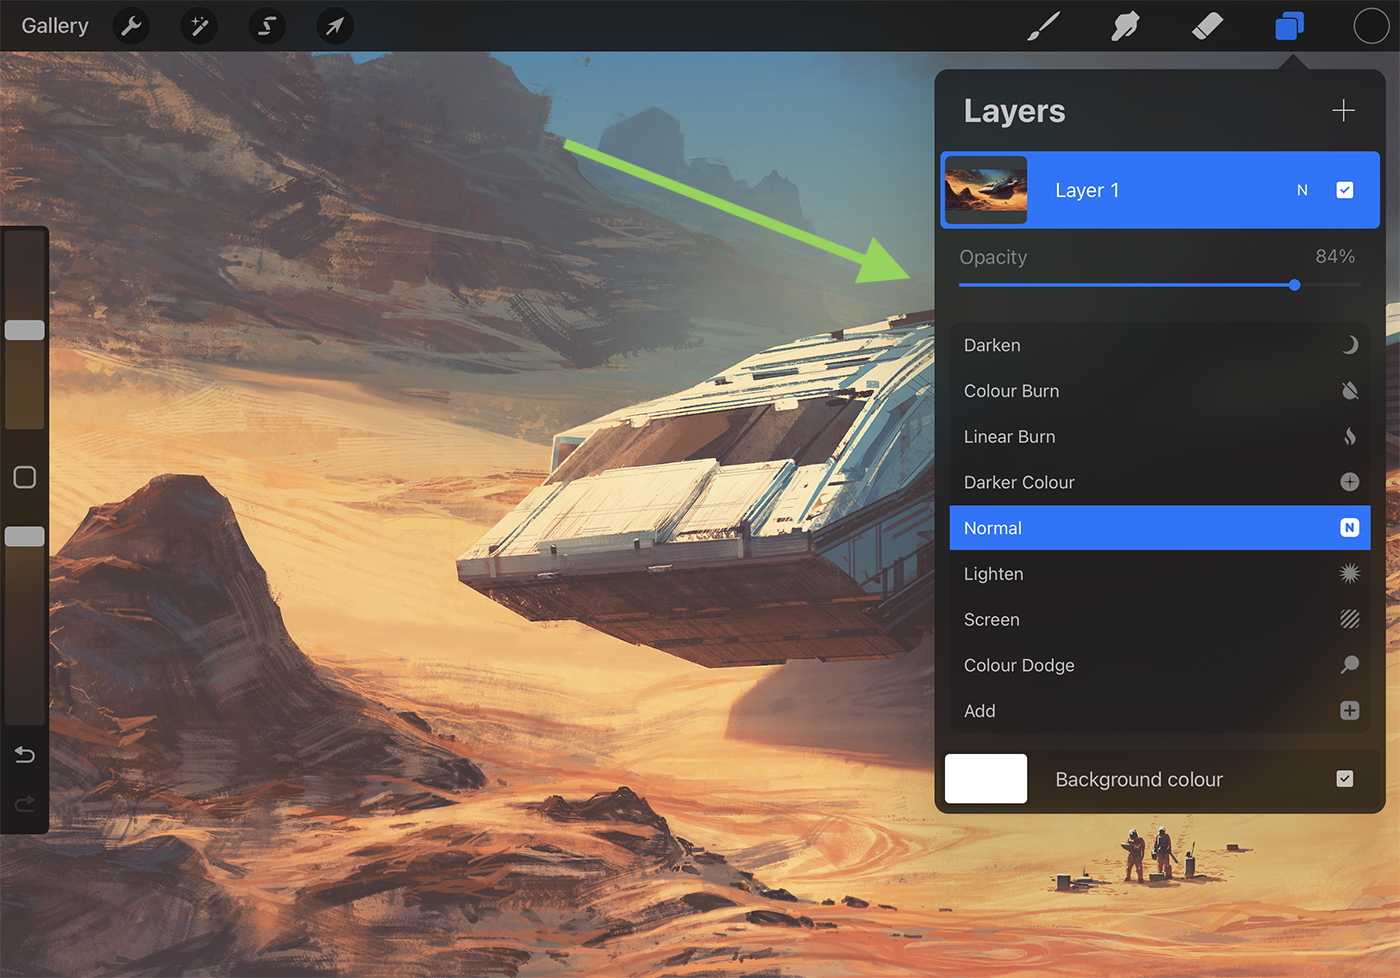
- Tap on the “N” icon located next to the layer thumbnail to open the Layer Options menu.
- Use the “Opacity” slider at the top of the Layer Options menu to adjust the layer’s opacity. Slide to the left to decrease opacity, and slide to the right to increase opacity.
- Tap anywhere outside the Layer Options menu to close it and apply the opacity change.
Changing Brush Opacity
Procreate allows you to modify the opacity of brushes, which can help you create soft transitions, add texture, or blend colors.
Steps to Change Brush Opacity
- Open your Procreate project and select the Brush tool from the top-right corner of the screen.
- Choose the desired brush from the Brush Library.
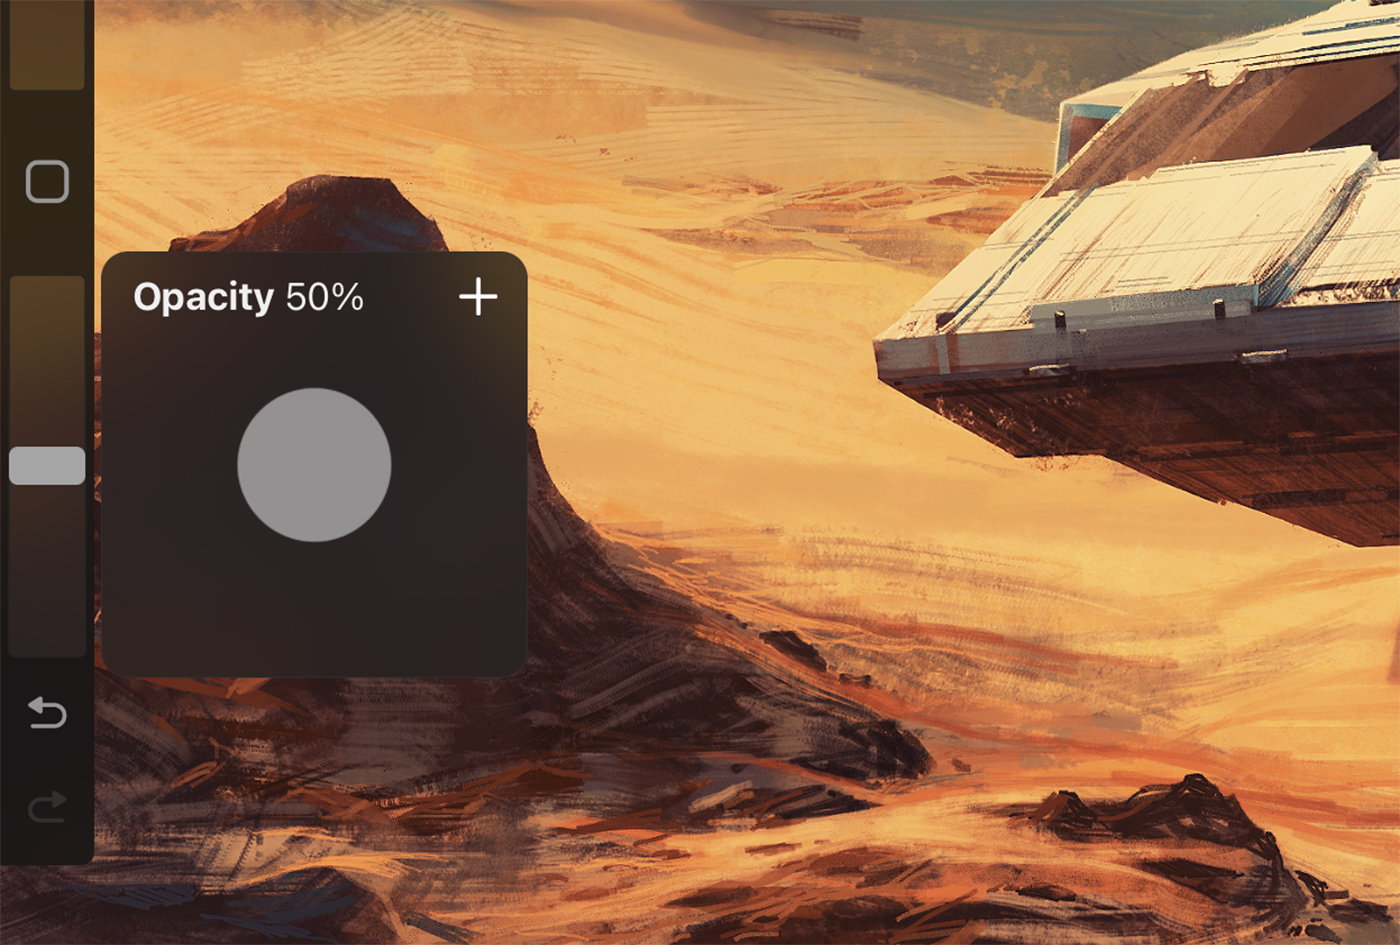
- Adjust the brush opacity by using the “Opacity” slider located in the top-left corner of the screen. Slide to the left to decrease opacity, and slide to the right to increase opacity.
- Begin painting on your canvas with the adjusted brush opacity.
Changing Opacity of Selected Elements
You can also change the opacity of specific elements within a layer using the Selection tool and the Transform options.
Steps to Change Opacity of Selected Elements
- Open your Procreate project and select the layer containing the element you want to adjust.
- Tap on the Selection tool (the S-shaped icon) in the top-left corner of the screen.
- Create a selection around the element you want to adjust using one of the available selection methods (freehand, automatic, rectangle, or ellipse).
- Once the selection is active, tap on the Transform tool (the arrow icon) in the top-left corner of the screen.
- In the Transform options that appear at the bottom of the screen, tap on the “Opacity” button.
- Use the slider to adjust the opacity of the selected element, and tap “Apply” to confirm the change.
Tips for Working with Opacity and Transparency in Procreate
Working with opacity and transparency in Procreate is crucial for creating visually appealing digital art. To help you make the most of these features, here are some tips and best practices:
1. Utilize Layer Blending Modes
When working with opacity, consider using layer blending modes to create unique interactions between layers. Blending modes, such as Multiply, Screen, and Overlay, can change the way layers combine, resulting in interesting effects and seamless blending.
2. Experiment with Different Brushes
Try various brushes with different opacity settings to create a diverse range of textures and effects. For example, use low-opacity brushes for soft shading and high-opacity brushes for bold strokes and strong contrasts.
3. Master the Smudge Tool
When working with transparency, the Smudge tool can be your best friend. Use the Smudge tool with various brushes and opacity settings to blend colors, create smooth gradients, and soften edges.
4. Combine Opacity and Selection Tools
Make use of the selection tools in combination with opacity adjustments to create precise effects. For example, create a selection around a specific area and then adjust its opacity to create a spotlight or focus effect.
5. Use Masks to Control Opacity
Layer masks are a powerful way to control opacity without permanently altering the layer’s content. Add a layer mask to a layer and paint with black or white to control the transparency of specific areas. Black conceals, while white reveals.
6. Create Realistic Shadows and Highlights
Adjusting opacity can help you create realistic shadows and highlights in your artwork. Use lower opacity brushes for soft shadows and higher opacity brushes for strong, defined highlights. Experiment with different colors and blending modes to achieve the desired effect.
7. Use Reference Layers for Color Effects
When working with multiple layers and transparency, create a reference layer on top of your artwork with various color effects, such as gradients or textures. Adjust the reference layer’s opacity and blending mode to apply the effects to the layers below it.
8. Keep Track of Your Layers
When working with numerous layers with different opacity settings, it’s essential to keep your layers organized. Rename your layers, group them, and use color-coding to easily locate and manage your layers.
By implementing these tips and best practices, you can effectively work with opacity and transparency in Procreate to create stunning digital art with depth, texture, and captivating effects.
Conclusion
Understanding how to change opacity in Procreate is essential for creating depth, texture, and nuanced effects in your digital artwork. By adjusting layer opacity, brush opacity, and the opacity of selected elements, you can achieve a wide range of artistic styles and techniques.
Remember to experiment with these methods and practice regularly to enhance your skills and create more dynamic and captivating digital art.