How to Create & Save a Preset in Lightroom
If you’re an Adobe Lightroom user, learning how to save a preset can make your workflow much smoother. Today we’re going to teach you how to create your own Lightroom presets in a few quick steps.
A Lightroom preset is a “package” of settings that can speed up the photo-editing process. Presets can be reused to create the same effects over and over again. Using them can take a lot of time out of the editing process for repetitive actions.
We have a full guide to Lightroom Presets if you want to learn more, or find presets that you can download and use right away.
Figure Out What Kind of Preset to Create

What sliders do you use frequently in Lightroom? That’s the starting point for creating a preset. The best presets are for steps you commonly take to save time during the image editing process.
Presets can be created for different types of sliders, which adjust elements in a photo using a scale. There are sliders for color, ton, contrast, vibrancy, exposure, and elements such as white, black, and shadows.
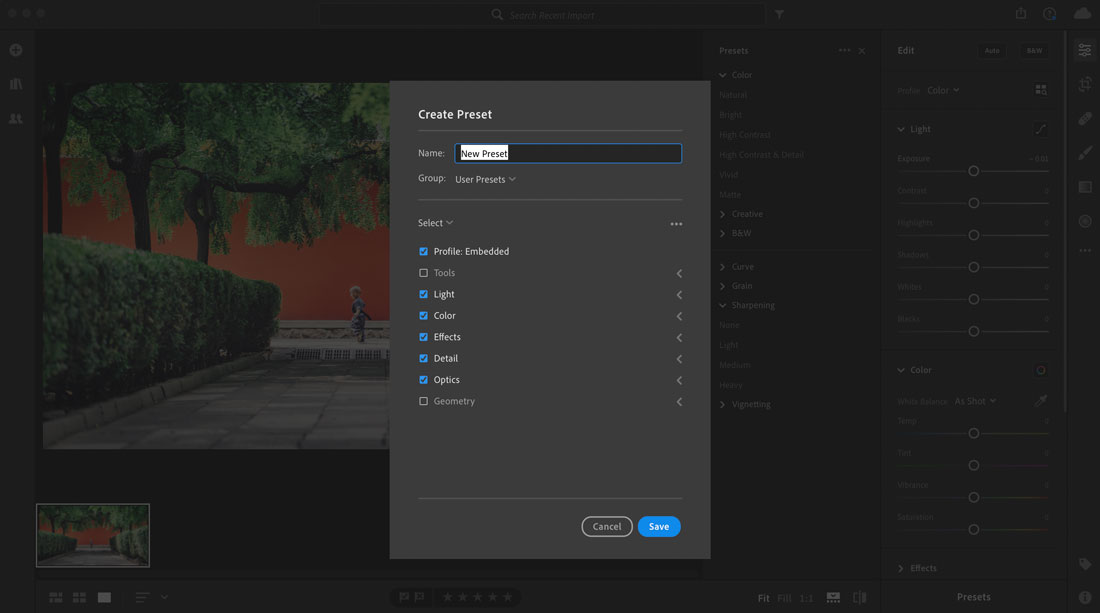
You can edit all of these controls in detail view using the Profile, Light, Color, Effects, Detail, optics, and Geometry panels.
How to Create a Preset in Lightroom

Once you know what editing controls would serve you best, you can create the Lightroom preset.
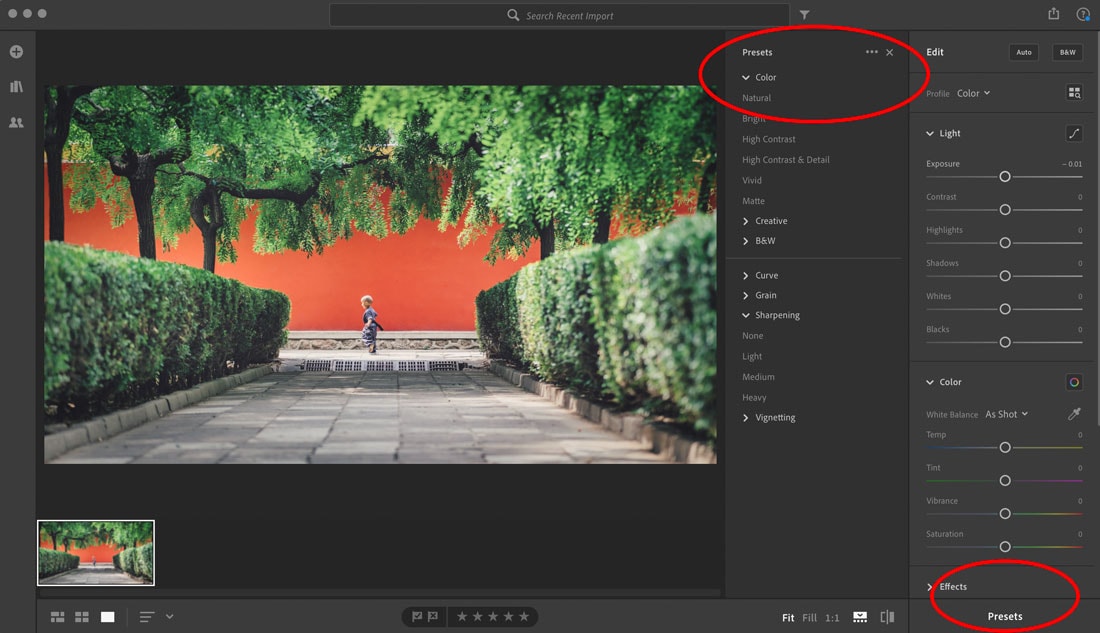
Open presets from the Edit icon, then Presets. (You might already use this to work with presets that you already have downloaded.)
Then, use then choose Create Preset to add a new preset. That option is located by clicking the three dots at the top right of the Presets Panel. A menu will open where you can choose what settings you want to save. The nice thing about presets is that if you don’t get it right the first time you can continue to tweak the preset and make adjustments later.
Pick a name for the custom preset. It will save in Lightroom in the User Presets area.
Organize Presets for Easy Access
The most important step in creating a Lightroom preset might be how you organize them. This step can determine if you actually use the tools you’ve created or not.
Use a preset name that tells you what it does. Names like Preset1, Preset2, etc. are not helpful later. A name like Grainy or Sunshine Blowout can tell you exactly what the tool does for later use.
Consider adding your initials to the beginning or end of every name if you use a lot of presets. This makes it easy to see presets you have created versus ones you may have downloaded from another source.
How to Use a Saved Preset in Lightroom

Once you have created and saved your Lightroom preset, it’s time to test it out.
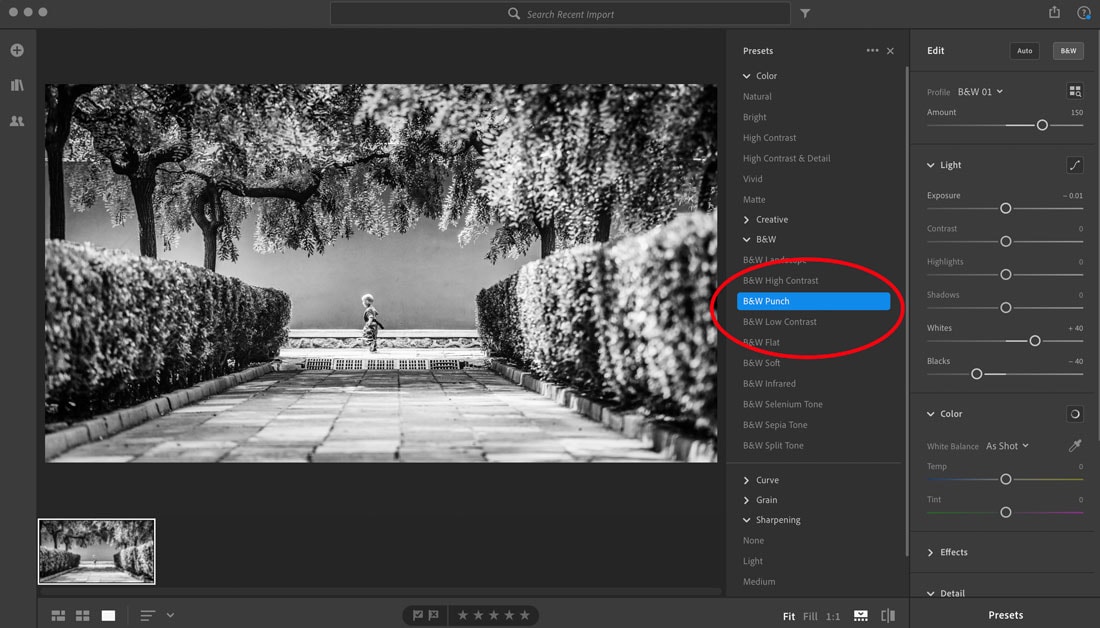
Open the photo you want to edit. Open the Presets panel.
You can preview how a preset will impact the look of a photo by hovering over the selected present without clicking. If you like it, click the preset and the changes will apply to the image.
You can use multiple presets on the same photo and commands such as Undo and Revert to Original give you the t=option to go back. You can also create multiple edits for the same photo using different saved presets. Make a copy of the image from the edit menu to take advantage of this feature.
Conclusion
Adobe Lightroom presets can be super tools when it comes to photo editing workflow. Make the most of them by creating and saving presets for functions you do most often.
Although it might be tricky the first couple times you create a preset, learning this tool and functionality can save you a lot of time in the long run. It will make editing that much easier and help you create consistent edits and image styles that you can reuse with just a click.