How to Change Your Shopify Store Name (Or Domain Name)
As your business evolves, you might find that your original Shopify store name or domain name no longer fits your brand. Fortunately, Shopify makes it easy to change both.
Whether you’re rebranding, finding a more memorable name, or making the name more relevant to your products, this guide will walk you through the steps to change your Shopify store name and domain name effectively.
Here’s how it’s done.
How to Change Your Shopify Store Name
Let’s start by learning how to change your store name.
Step 1: Log in to Your Shopify Admin Dashboard
Open your web browser and navigate to the Shopify login page. Enter your credentials to access the Shopify admin dashboard.
Step 2: Access the Settings Menu
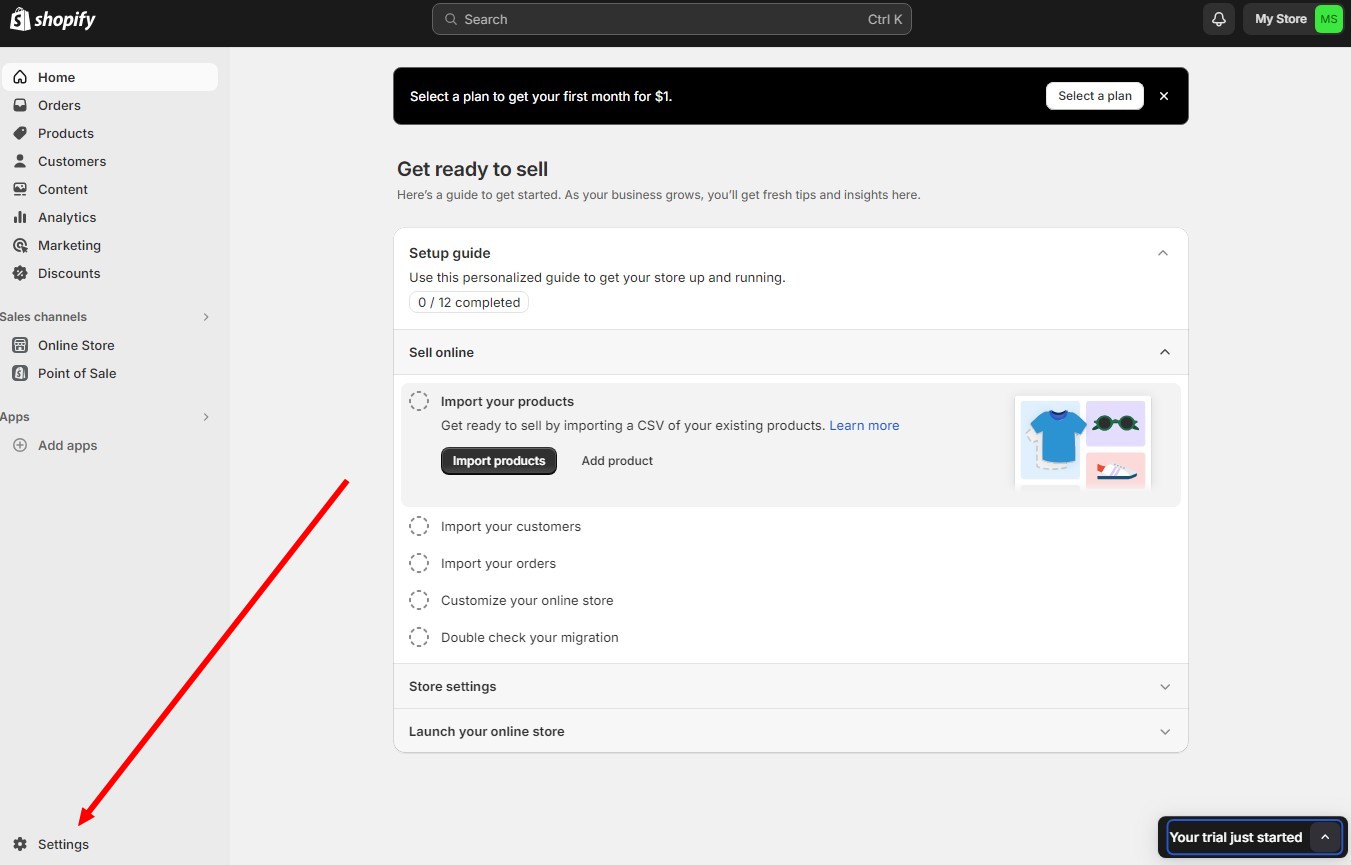
From the Shopify admin dashboard, click on “Settings” located at the bottom left of the page.
Step 3: Navigate to the General Settings
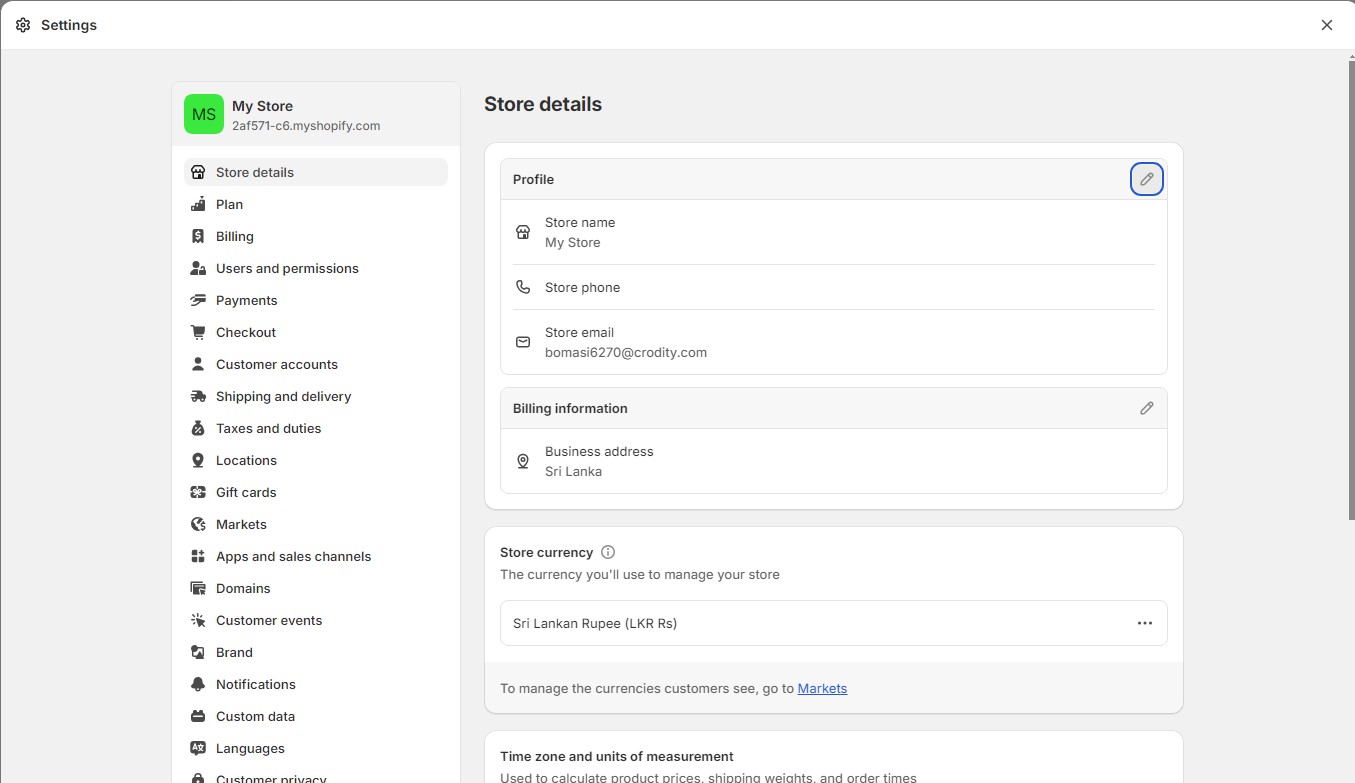
In the Settings page, click on “Store Details.” This section contains basic information about your store, including its name.
Step 4: Edit Your Store Name
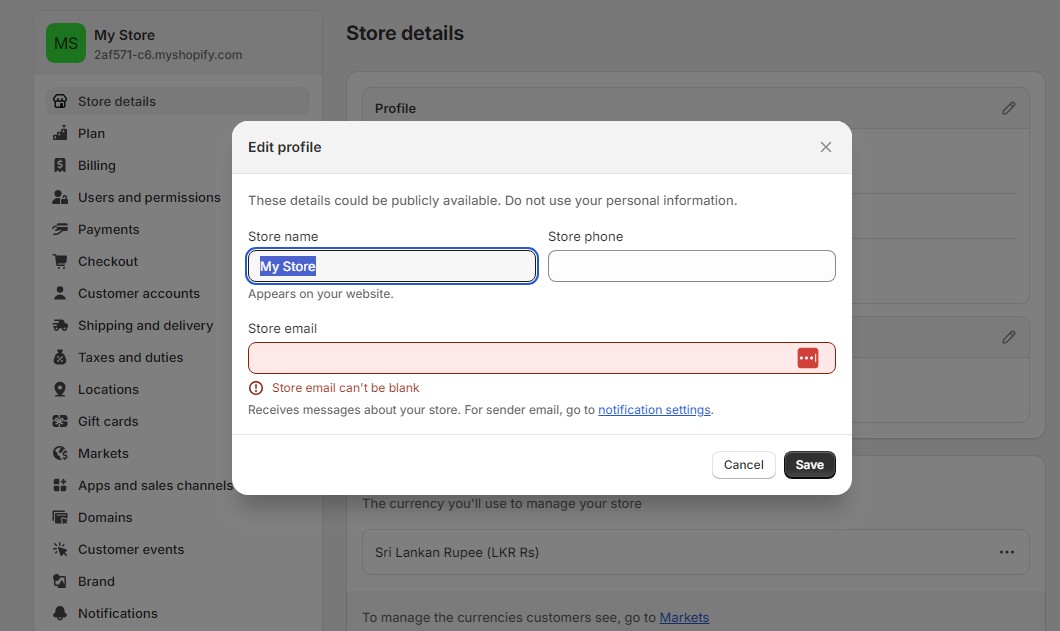
In the Profile section, you will see a field labeled “Store name.” Click the edit button and enter the new name for your store in this field.
Step 5: Save Your Changes
After entering the new store name, click on the “Save” button at the top or bottom of the page to apply the changes.
Step 6: Update Branding and Marketing Materials
Make sure to update your branding and marketing materials to reflect the new store name. This includes updating logos, business cards, social media profiles, and any other materials that feature your store name.
Changing Your Shopify Domain Name
If you also want to change the domain name, follow these steps.
Step 1: Purchase a New Domain (If Necessary)
If you don’t already have a new domain, you can purchase one through Shopify or a third-party domain provider. To buy a domain through Shopify, go to the “Domains” section in your Shopify settings and click on “Buy new domain.” Follow the prompts to complete the purchase.
Step 2: Access the Domains Settings
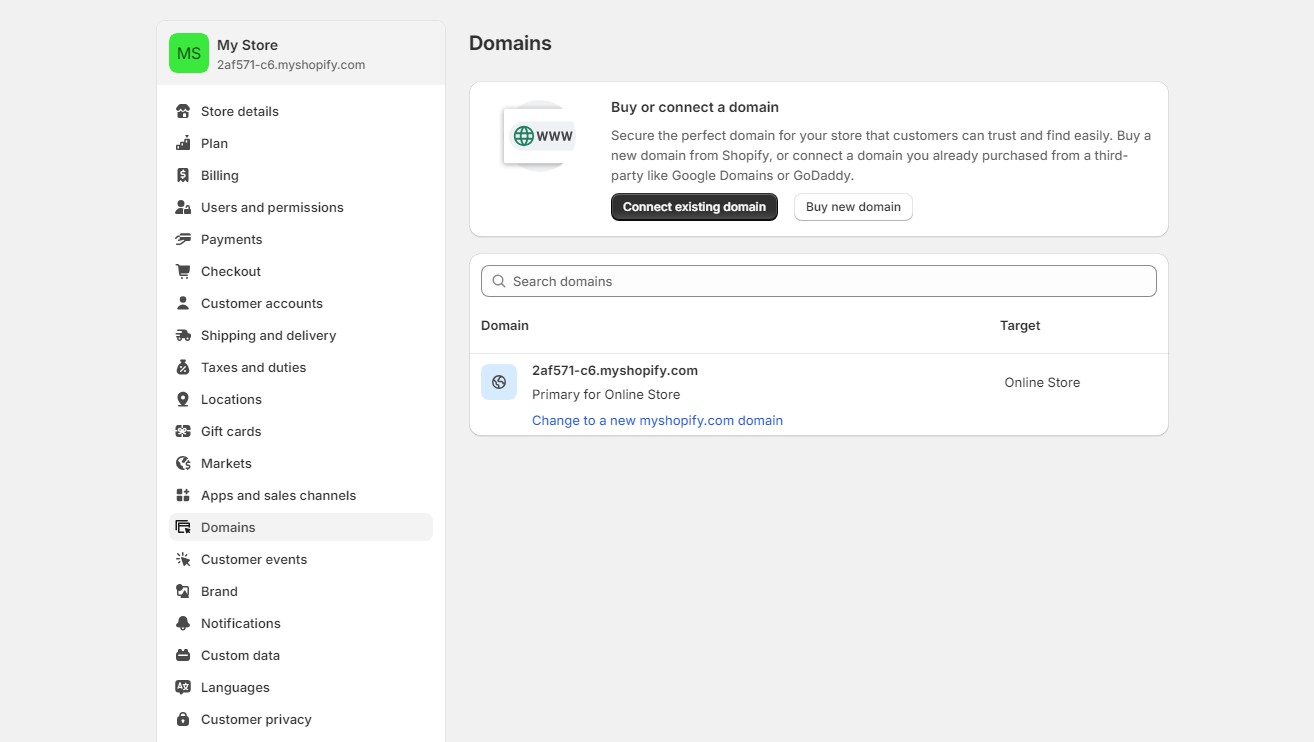
From the Shopify admin dashboard, click on “Settings” and then “Domains.” This section manages all domains associated with your Shopify store.
Step 3: Add a New Domain
Click on “Add domain” and then select “Connect existing domain” if you purchased your domain from a third-party provider, or “Buy new domain” if you are purchasing through Shopify.
Step 4: Connect Your New Domain
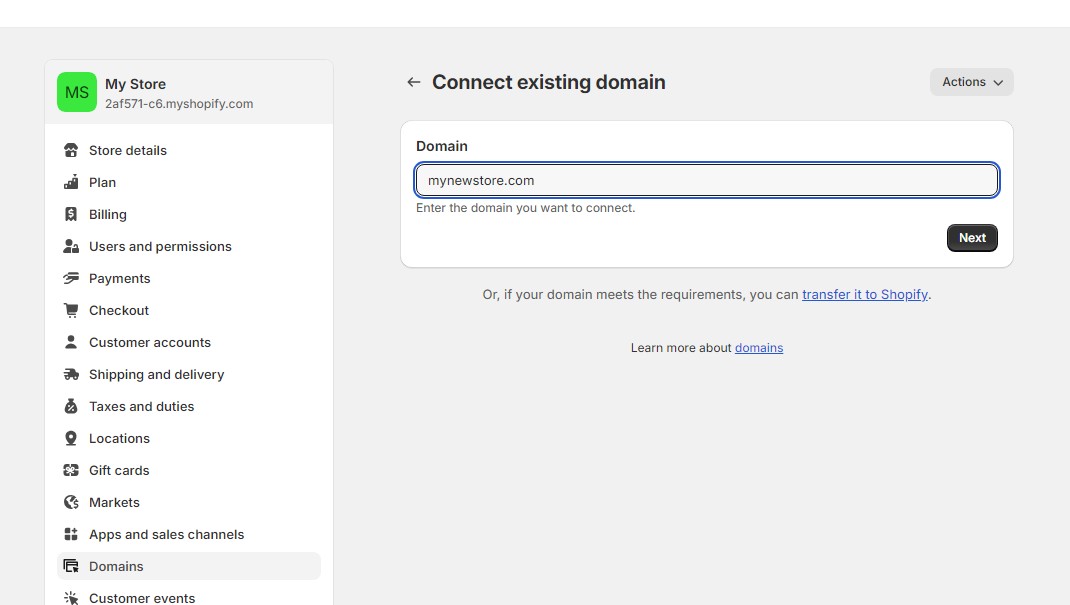
If you’re connecting a domain purchased from a third-party provider, follow the instructions to update the DNS settings. Shopify will provide specific DNS records that need to be configured with your domain registrar.
Step 5: Set Your Primary Domain
Once your new domain is connected, you need to set it as the primary domain. In the Domains section, find your new domain and click on “Set as primary.” This will make your new domain the default address for your store.
Step 6: Redirect Traffic from the Old Domain
To ensure you don’t lose traffic, set up URL redirects from your old domain to your new domain. This can be done in the Domains section by selecting “Manage” next to your old domain and setting up the redirects.
Step 7: Update Your Store’s SSL Certificate
Shopify provides free SSL certificates, but you may need to reissue them for your new domain. This ensures that your site remains secure and that visitors see the padlock icon in their browser.
10 Tips for Changing Your Shopify Store and Domain Name
Changing a store name is a big decision and it needs to be planned carefully. Follow these tips to ensure a smooth transition.
1. Announce the Change
Inform your customers and followers about the change well in advance. Use email newsletters, social media posts, and announcements on your website to communicate the upcoming change.
2. Check for Broken Links
After changing your domain, thoroughly check your website for any broken links. Update internal links to reflect the new domain to ensure a seamless user experience.
3. Monitor SEO Impact
Changing your domain can temporarily affect your SEO rankings. Use Google Search Console to monitor your website’s performance and submit a new sitemap to help search engines index your new domain faster.
4. Update Google My Business
If you have a Google My Business listing, make sure to update your business name and website URL to reflect the changes. This helps maintain consistency and ensures customers can find you easily.
5. Update Social Media Profiles
Update your social media profiles with the new store name and domain. Consistent branding across all platforms helps maintain customer trust and recognition.
6. Check Email Forwarding
If you use email forwarding with your old domain, set up forwarding for your new domain as well. This ensures you don’t miss any important emails during the transition.
7. Use a Professional Email Address
With your new domain, consider setting up a professional email address (e.g., info@yournewdomain.com). This enhances your brand’s professionalism and credibility.
8. Test Your Site Thoroughly
After making the changes, thoroughly test your site to ensure everything works correctly. Check for functionality, speed, and user experience to ensure a smooth transition.
9. Backup Your Data
Before making significant changes, backup your Shopify store data. This provides a safety net in case anything goes wrong during the transition.
10. Use Shopify Support
If you encounter any issues or need assistance during the process, don’t hesitate to reach out to Shopify Support. They can provide guidance and help resolve any problems you might face.
Conclusion
Changing your Shopify store name and domain name is a straightforward process but it can significantly impact your brand’s identity and online presence. The way you handle that process will determine whether it’ll be a positive or negative impact.
Hopefully, with the help of our guide and tips, you will be able to achieve positive results with your new branding change.