How to Hide Slides in Google Slides
Google Slides is a flexible and user-friendly tool that allows you to create professional presentations. Whether you’re preparing for a business meeting, a school project, or a public speech, Google Slides offers a range of features designed to enhance your presentation. One such feature is the ability to hide slides.
This can be particularly useful when you want to keep certain slides in reserve for potential use during a Q&A session or if you want to prepare alternative slides depending on the direction of your talk.
In this article, we’ll provide a detailed guide on how to hide slides in Google Slides, as well as some valuable tips to improve your presentation skills.
How to Hide Slides in Google Slides
Hiding slides in Google Slides is a simple and intuitive process. Here’s how you can do it:
1. Open Your Presentation
Begin by opening Google Slides and selecting the presentation that contains the slides you want to hide. Once the presentation is open, you’re ready to start.
2. Select the Slide
After your presentation is open, go to the left side of the screen where all of your slides are displayed. Click on the slide you wish to hide to select it.
3. Right-click on the Slide
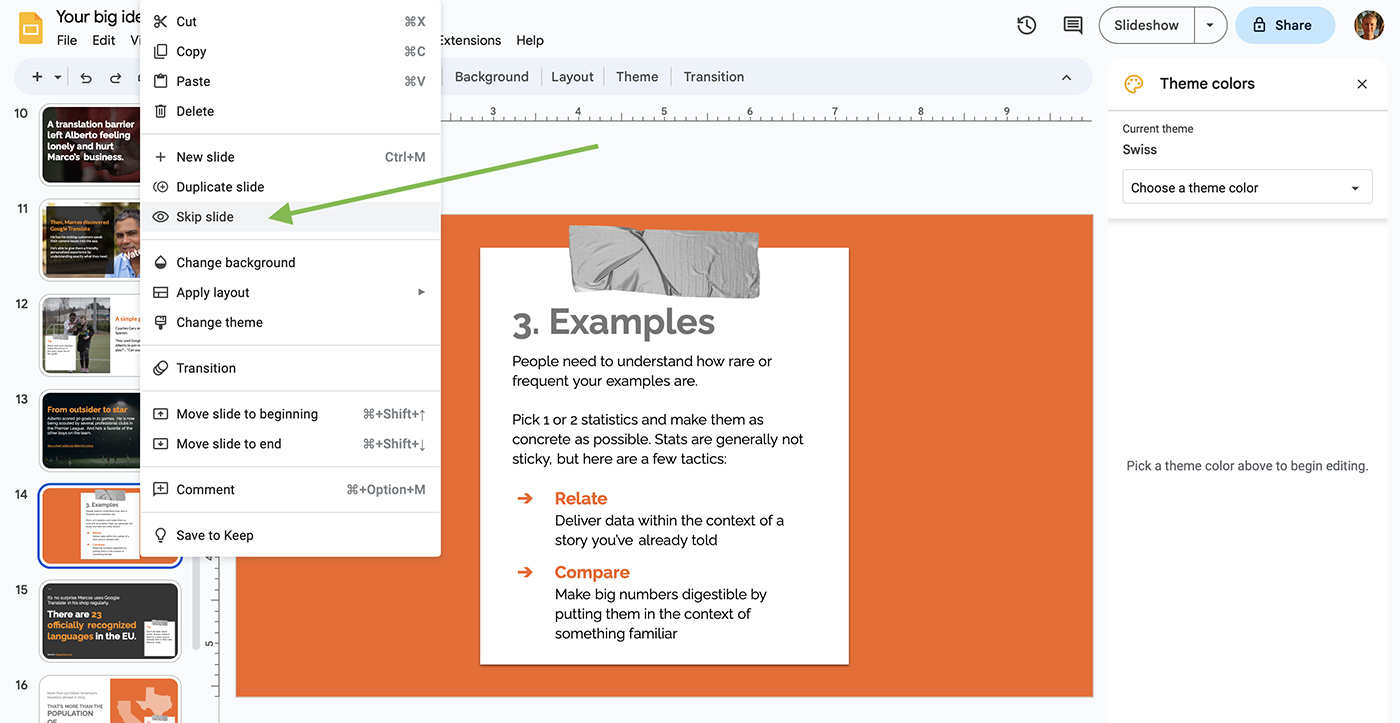
Once you’ve selected the slide you wish to hide, right-click on it. This will open a context menu with several options.
4. Hide the Slide
From the context menu, select the ‘Skip slide’ option. Once you click this, the slide will be marked as hidden.
5. Verify the Slide is Hidden
After clicking ‘Skip slide’, you will see the selected slide become slightly faded, indicating that it’s hidden. During the presentation, Google Slides will skip over this slide.
Tips for Using Hidden Slides in Google Slides
Now that you know how to hide slides, here are some tips to help you make the most of this feature:
1. Use Hidden Slides for Backup Information
Hidden slides are an excellent way to store backup or supplementary information. If you think there might be questions or areas where you may need to expand upon during your presentation, you can prepare additional slides and keep them hidden. If the need arises, you can easily unhide these slides during your presentation.
2. Keep Your Presentation Concise
Remember, the goal of your presentation is to convey information effectively. It’s not about including as much data as possible, but about presenting your information in a clear and concise manner. Use hidden slides to avoid overloading your audience with information, while still keeping important data at your fingertips.
3. Have an Alternate Ending
There might be times when you need to tailor your presentation based on your audience’s response. In such cases, having an alternate ending on a hidden slide can be very useful. Depending on how your presentation is received, you can decide on the spot which ending to use.
4. Practice Your Presentation
Hiding slides can help you streamline your presentation, but don’t forget to practice! Ensure you know the content of your hidden slides and when you intend to use them. This way, you can seamlessly integrate them into your presentation when needed.
5. Use Hidden Slides for Interactive Sessions
For interactive presentations or workshops, you can use hidden slides to store answers or solutions. After posing a question or problem to your audience, you can reveal the hidden slide with the answer or solution. This can make your sessions more engaging and interactive.
With the ability to hide slides in Google Slides, you can create flexible, dynamic presentations that can be easily adapted to suit your audience’s needs. So go ahead, start experimenting with this feature, and take your presentations to the next level!