How to Link Text Boxes in Indesign
Linking text boxes in InDesign allows you to create a continuous flow of text across multiple text frames on your document pages.
This feature is especially useful when working with multi-page layouts or when designing documents with columns, as it enables you to control the flow and distribution of your text content more effectively.
In this article, we’ll explain how to link text boxes in InDesign and provide some tips for working with linked text frames.
Creating Text Boxes
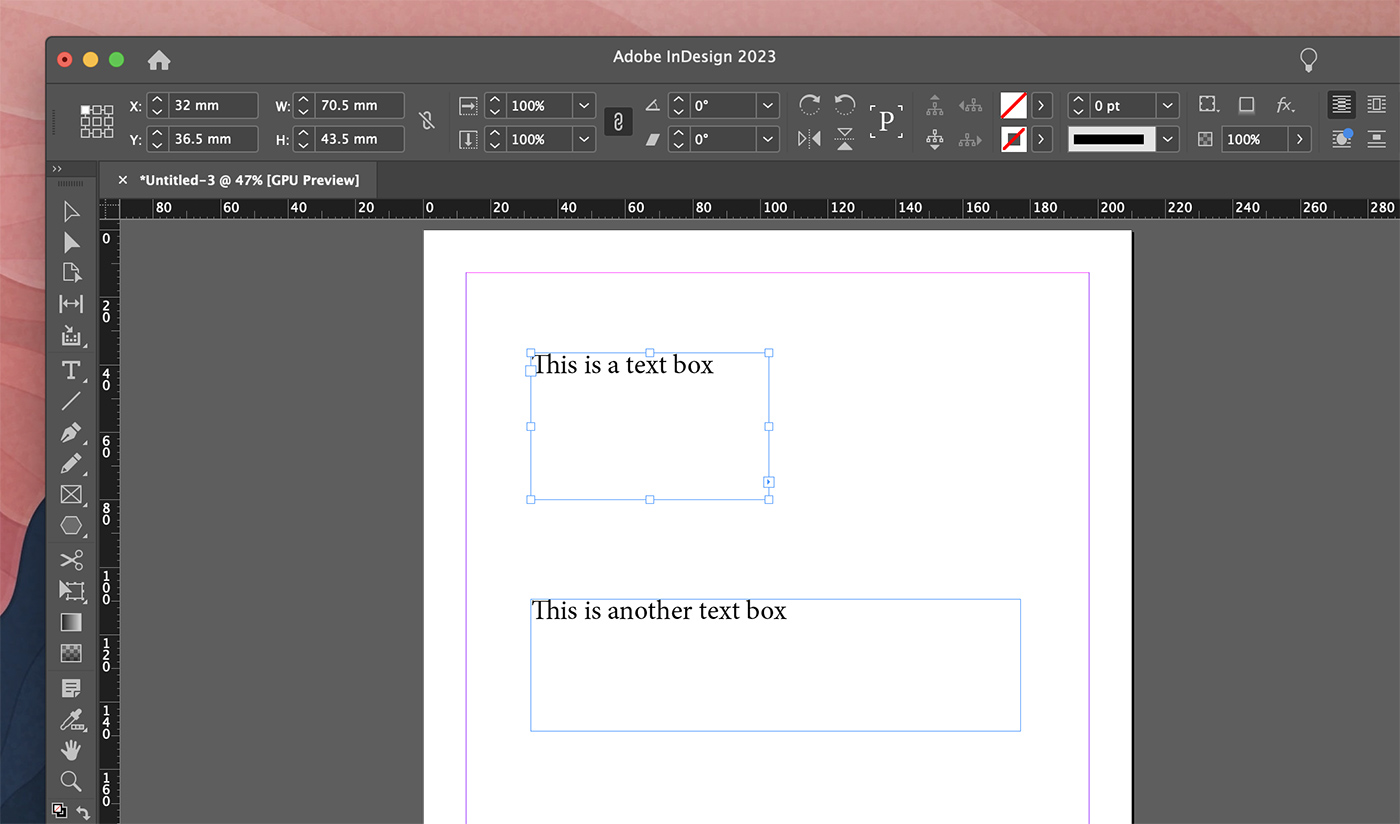
Before you can link text boxes, you’ll need to create them. Follow these steps to create a new text box:
- Select the Type Tool (T) from the Tools panel.
- Click and drag on the document workspace to create a text frame. Alternatively, you can click on the document workspace and start typing to create a text frame automatically.
- Adjust the size and position of the text frame using the Selection Tool (V) if needed.
Repeat these steps to create multiple text boxes that you want to link together.
Linking Text Boxes
Once you have created the text boxes you want to link, follow these steps to link them:
- Select the Selection Tool (V) from the Tools panel.
- Click on the first text box that you want to link. You should see a small square with an arrow icon (the out port) in the lower-right corner of the text box.
- Click on the out port. Your cursor will change to the Loaded Text Cursor, indicating that the text from the first text box is ready to be linked.
- Click on the second text box you want to link to. The text boxes are now linked, and any overflow text from the first box will flow into the second box.
You can continue linking text boxes in a chain by repeating steps 2-4 for each subsequent text box.
Unlinking Text Boxes
If you need to unlink text boxes, follow these steps:
- Select the Selection Tool (V) from the Tools panel.
- Click on the text box that you want to unlink.
- Go to the Object menu, choose “Text Frame Options,” and then click “Break Link to Previous.”
The selected text box will no longer be linked to the previous one. Keep in mind that when you unlink text boxes, any overflow text from the previous box will no longer flow into the unlinked box.
Tips for Working with Linked Text Boxes
When working with linked text boxes in InDesign, keep the following tips in mind:
- When linking text boxes, ensure that the order of the linked chain matches the intended flow of your text content. This will help prevent confusion and maintain the readability of your document.
- Use the Story Editor (Edit > Edit in Story Editor) to view and edit the text content of linked text boxes in a single, continuous editor window. This can be helpful for proofreading and making text changes across multiple linked frames.
- To see the entire chain of linked text boxes, select one of the text boxes in the chain and go to View > Extras > Show Text Threads. This will display lines connecting the linked text boxes, making it easier to visualize the flow of text across your document.
Additional Tips for Managing Linked Text Boxes
Here are some more tips to help you work with linked text boxes in InDesign more efficiently:
- When resizing linked text boxes, hold down the Shift key to maintain the aspect ratio of the text frame. This can help you preserve the overall layout and design of your document.
- If you have multiple text boxes linked together and need to insert a new text box into the chain, first link the new text box to the one that should follow it, and then link the preceding text box to the new one.
- Keep your text boxes organized in your Layers panel by grouping them according to their purpose or page. This will help you keep track of your text flow and make it easier to edit your document.
- To quickly duplicate a text box with the same formatting and appearance, hold down the Alt (Option on Mac) key while dragging the text box with the Selection Tool (V). This will create a copy of the text box that you can then link to your existing chain.
- If you need to adjust the spacing between linked text boxes, use the Text Frame Options dialog (Object > Text Frame Options) to set the Inset Spacing values. This will allow you to control the margins within the text frames without affecting the overall layout of your document.
Final Thoughts
Mastering the art of linking text boxes in InDesign is crucial for creating professional-looking documents with seamless text flow. By following the steps and tips provided in this article, you’ll be well on your way to becoming an InDesign expert. Experiment with different layouts and text box configurations to find the perfect solution for your design projects.