How to Share PowerPoint on Zoom or Teams (Live PowerPoint)
Whether you’re delivering a pitch, teaching a class, or sharing insights with your team remotely, the ability to seamlessly share your PowerPoint presentations via online meeting platforms like Zoom and Microsoft Teams is crucial.
In this guide, we will walk you through the steps to share your PowerPoint slideshows on Zoom and Microsoft Teams efficiently and will also offer tips to ensure your presentations go smoothly.
We will walk you through the process, step-by-step. Let’s dive in.
How to Share PowerPoint on Zoom
First, let’s see how to share a PowerPoint presentation on Zoom.
Step 1: Join or Start a Zoom Meeting
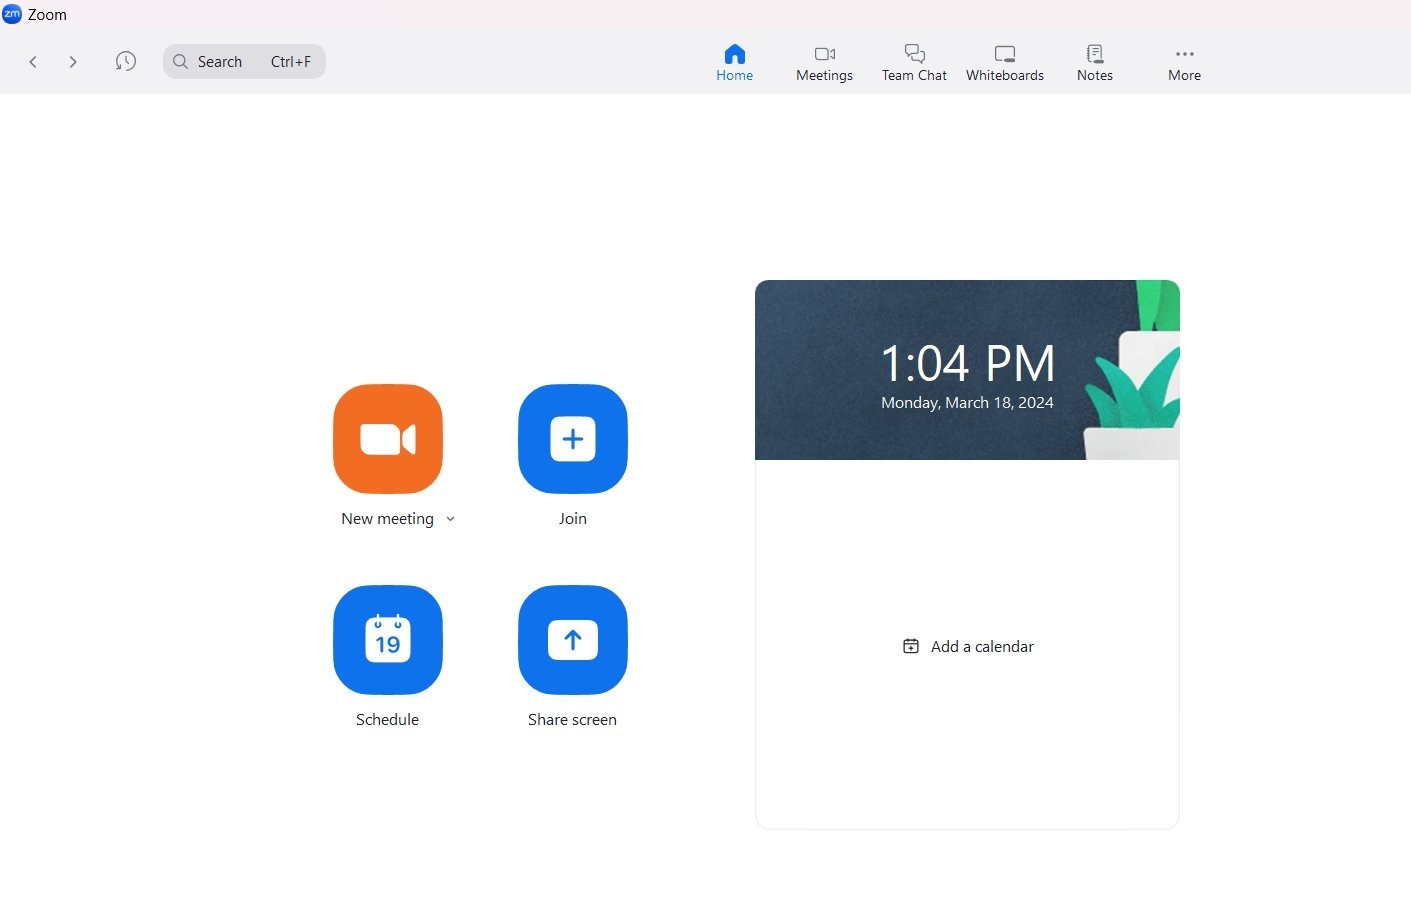
Begin by joining an existing meeting or starting a new one. Once you’re in the meeting, ensure your PowerPoint presentation is open on your computer.
Step 2: Share Your Screen
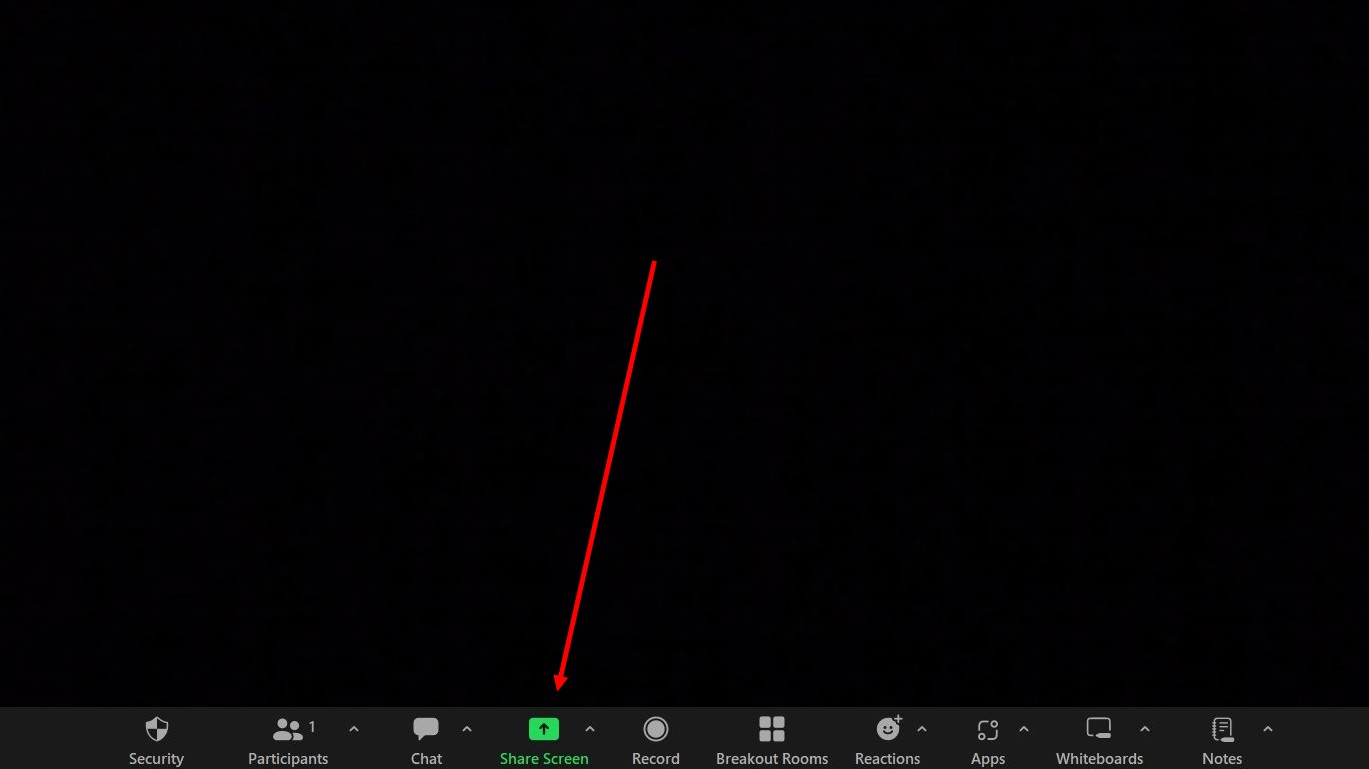
Look for the “Share Screen” button in the Zoom toolbar, usually located at the bottom of the meeting window. Click it to open the screen-sharing options.
Step 3: Select Your PowerPoint Window
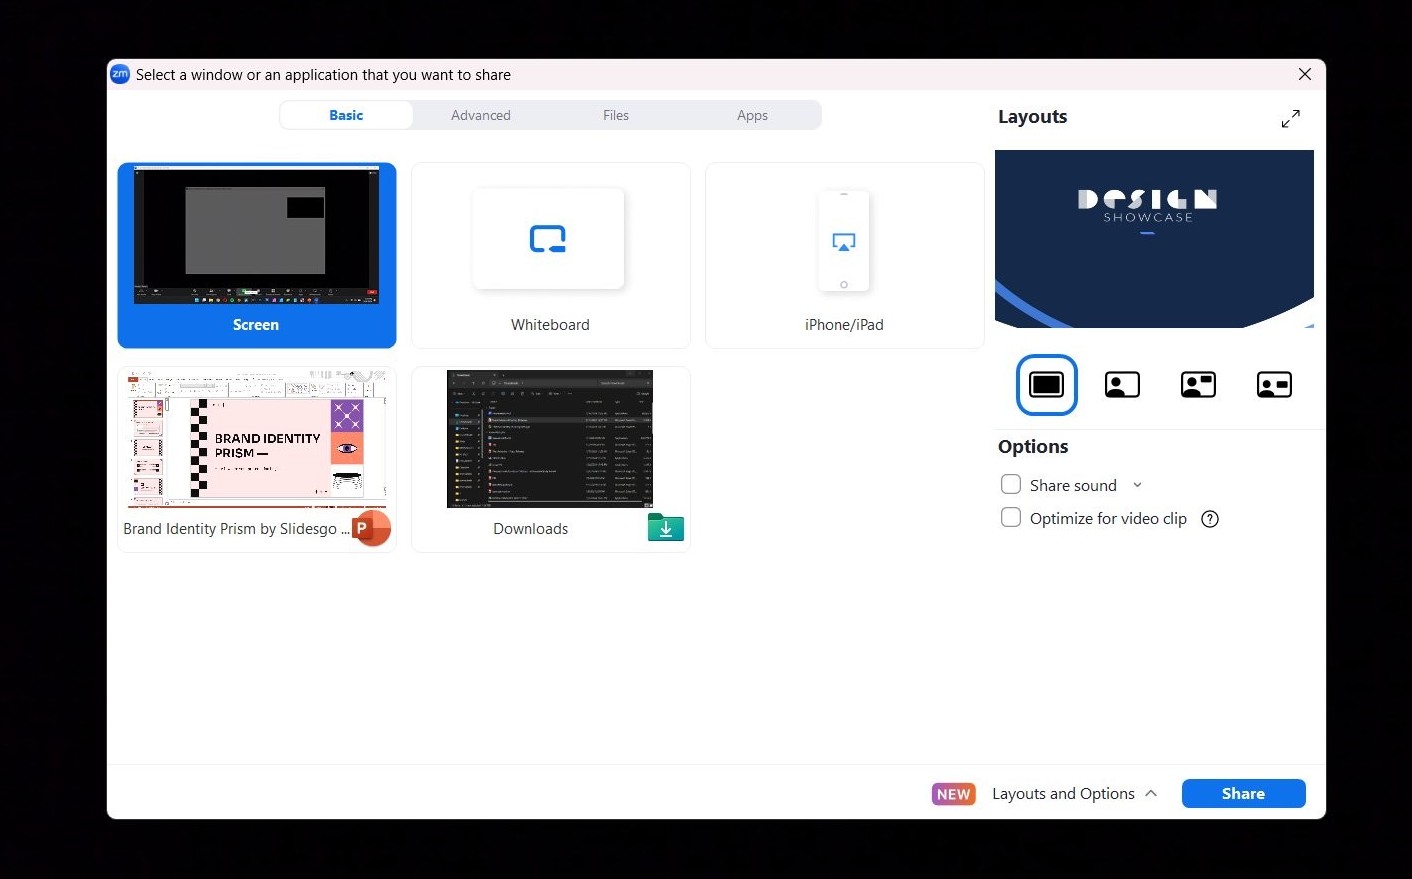
In the screen sharing menu, you’ll see all the windows you have open. Select the window that displays your PowerPoint presentation. If you want to share sound from your presentation, don’t forget to check the “Share computer sound” option. Then, click “Share.”
Step 4: Present Your PowerPoint
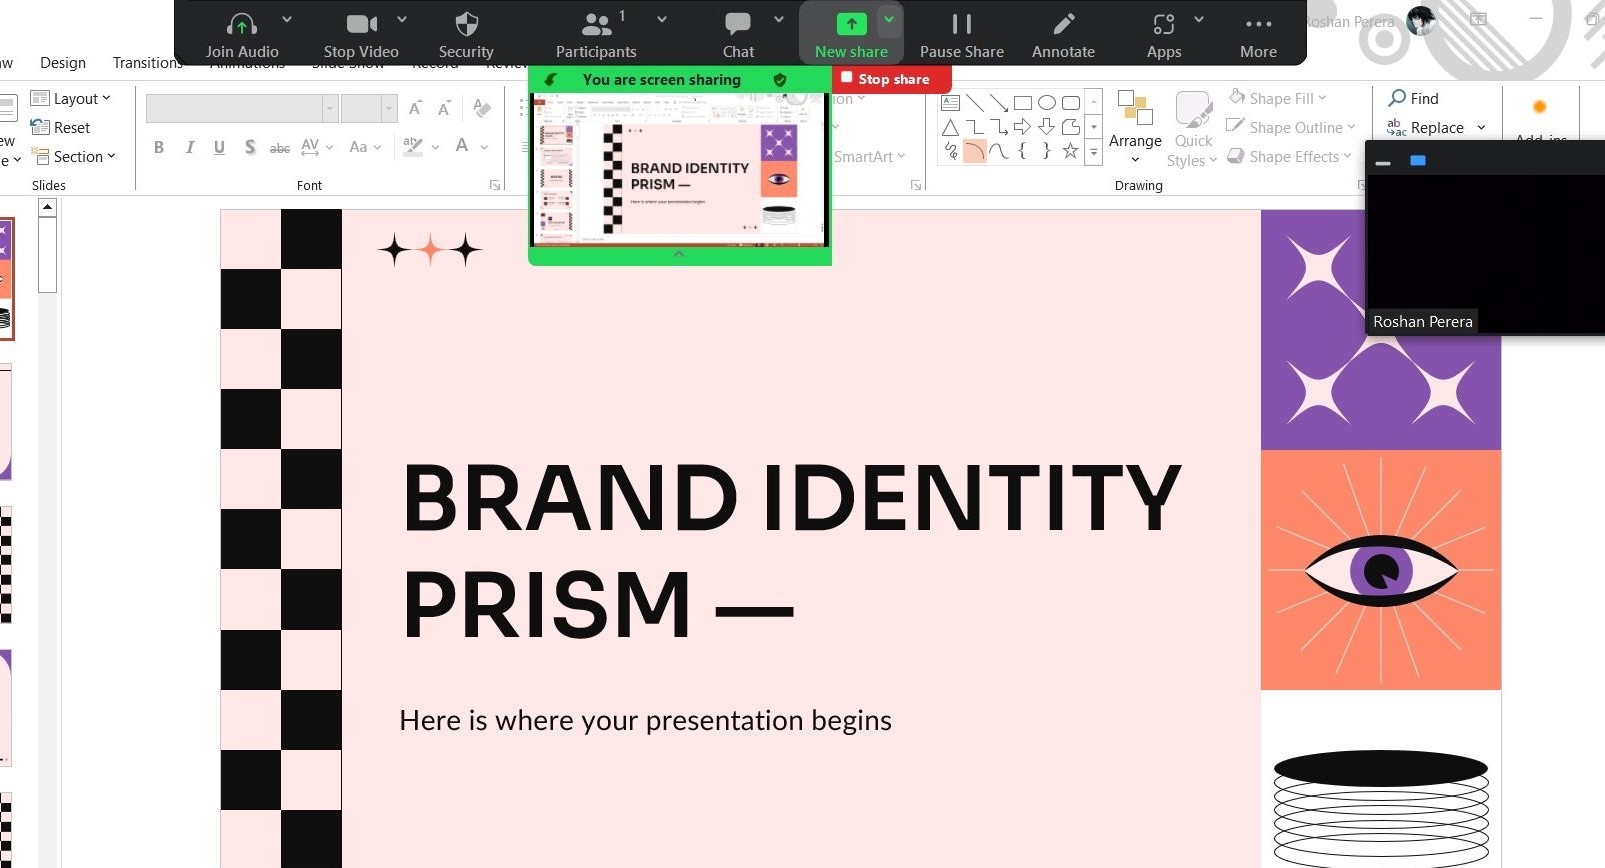
Once you’ve shared your screen, start your PowerPoint slideshow as you normally would. Your participants will now see your presentation in full screen.
How to Share PowerPoint on Microsoft Teams
If you’re using Microsoft Teams, here’s how to share your PowerPoint presentation.
Step 1: Join or Start a Teams Meeting
Similar to Zoom, the first step is to join or start a meeting in Microsoft Teams. Have your PowerPoint presentation ready to go on your device.
Step 2: Share Content
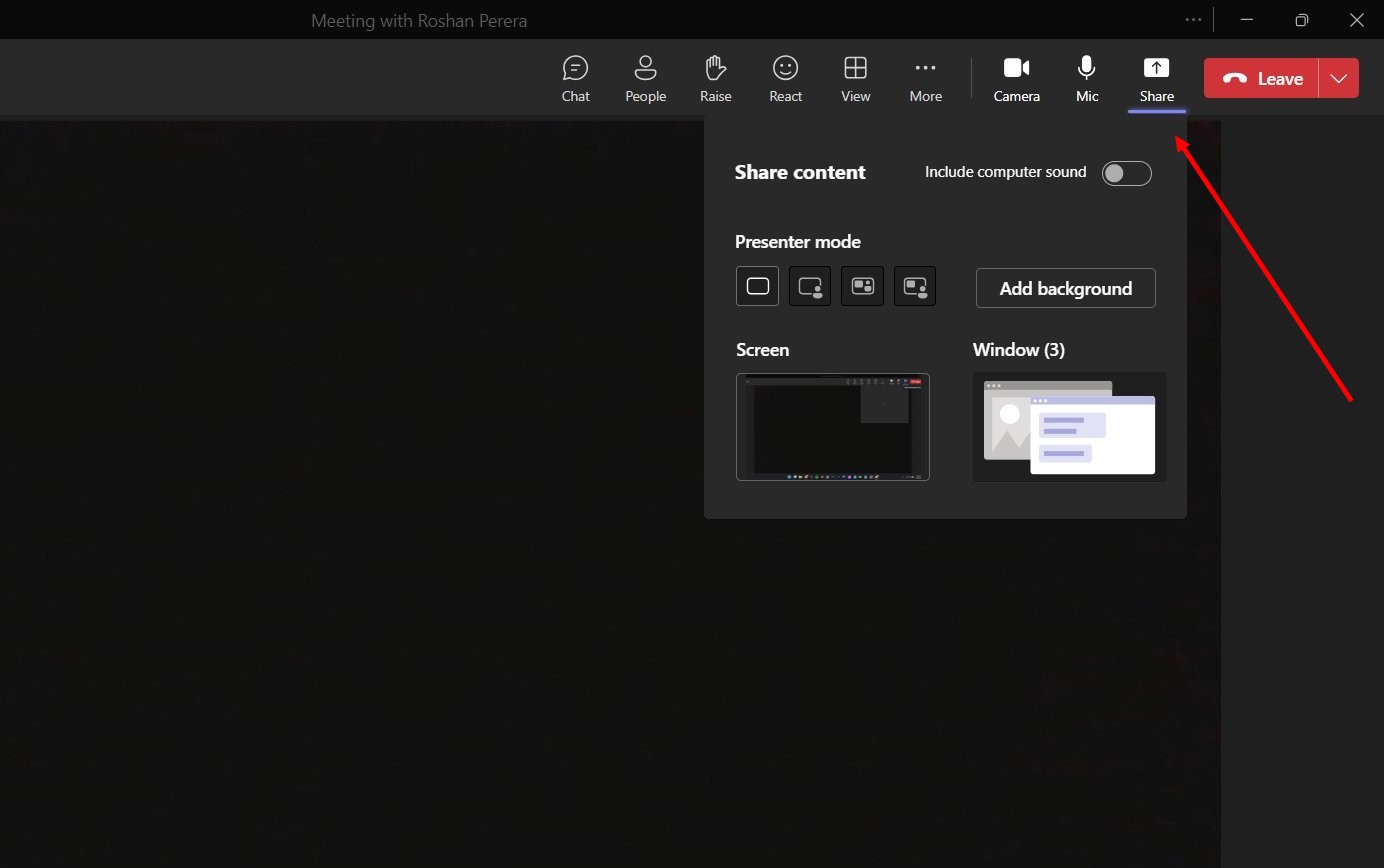
In the Teams meeting controls, find and click on the “Share content” icon, which looks like an upward-pointing arrow or a square depending on the version.
Step 3: Choose Your PowerPoint File
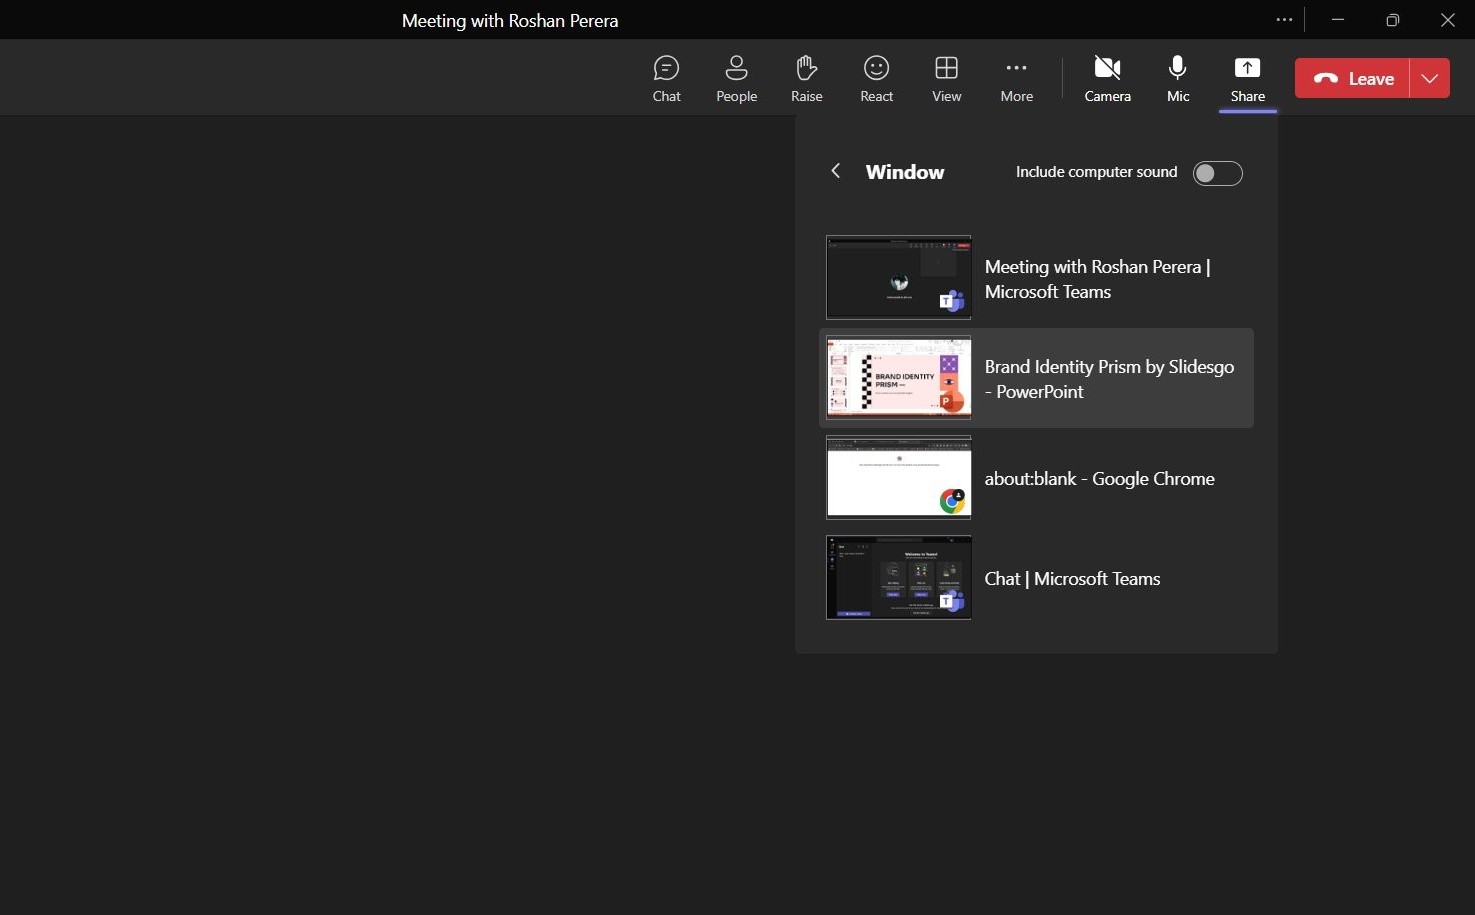
Teams offers the option to share a PowerPoint file directly. If your presentation is recent, you might see it under the “PowerPoint” section. If not, you can browse for your file by selecting “Browse” and then either “Upload from my computer” or “OneDrive” if your file is stored in the cloud.
Step 4: Navigate Your Slides
After selecting your presentation, it will open in Teams. You can navigate through your slides using the arrow keys or the slide navigator within Teams. This method allows your participants to interact with the presentation if you’ve granted them permission.
10+ Tips for Sharing PowerPoint Presentations
1. Check Your Internet Connection
A stable internet connection is crucial for uninterrupted presentations. Consider using a wired connection for better stability and to reduce the likelihood of connection issues.
2. Close Unnecessary Applications
Close all applications and browser tabs you don’t need during your presentation. This not only helps in reducing distractions but also conserves your computer’s resources, ensuring smoother performance.
3. Use Dual Monitors If Possible
Using dual monitors allows you to have your presentation on one screen and your meeting platform with notes on the other. This setup helps you manage your presentation more effectively while maintaining eye contact with your camera.
4. Familiarize Yourself with Platform Features
Take time to explore and understand the specific features of Zoom or Teams, such as how to switch between presentation modes or how to use in-meeting chat. This knowledge can help you navigate the platform confidently during your presentation.
5. Engage Your Audience
Keep your audience engaged by using interactive elements such as polls, Q&A sessions, or breakout rooms for discussions. Interaction helps maintain attention and fosters a more dynamic and memorable presentation.
6. Practice Screen Sharing Beforehand
Conduct a practice session to familiarize yourself with the screen-sharing process and to check the visibility and readability of your slides. This rehearsal can help you feel more confident and minimize technical glitches.
7. Have a Backup Plan
Prepare for the unexpected by having a backup of your presentation and any necessary platform alternatives ready. Whether it’s a PDF version of your slides or a secondary presentation tool, being prepared can save the day.
8. Optimize Your Presentation for Screen Sharing
Design your slides with screen sharing in mind. Use large, readable fonts and high-contrast colors to ensure your content is easily visible to all participants, even on smaller screens.
9. Mute Notifications
Turn off notifications on your computer and any other devices to prevent disruptions during your presentation. This includes email alerts, message pop-ups, and other notifications that could distract you or your audience.
10. Direct Attention with Annotations
Both Zoom and Teams offer annotation tools that allow you to draw attention to specific parts of your slide. Use these tools sparingly to highlight key points or to guide your audience through complex diagrams.
11. Share Only What’s Necessary
When sharing your screen, select the option to share only the PowerPoint window rather than your entire screen. This approach keeps your presentation focused and prevents accidental sharing of private information.
12. Ensure Good Audio and Lighting
Good audio and lighting are essential for keeping your audience engaged. Use an external microphone if possible, and position yourself in a well-lit area, ideally with the light source in front of you, to improve visibility.
Conclusion
Mastering the art of sharing PowerPoint presentations on Zoom and Teams can greatly enhance the impact and effectiveness of your virtual meetings.
By following the steps and tips outlined in this guide, you’ll be well-equipped to deliver engaging, seamless presentations that captivate your audience and communicate your message clearly.