How to Use Block Template Parts in a Classic WordPress Theme
Sometimes, it’s the unexpected features that make WordPress so powerful. Those little things that you didn’t know you need can end up having a big impact.
WordPress 6.1 has brought about one of these hidden gems: the ability to use block template parts within a classic theme.
It takes the capabilities of block themes and ports them over to their classic counterparts. Classic themes still make up the overwhelming majority of the market. Therefore, it makes sense to bring them up to speed on the latest tools.
Let’s explore what this feature does and why you might want to use it. Then, we’ll demonstrate how you can implement it on your website.
What’s a Block Template Part?
WordPress 5.9 introduced Full Site Editing capabilities. When combined with a block theme, the feature allows users to edit various templates within the back end.
Block template parts represent any area of a website you’d like to manage within the WordPress Site Editor. Examples include the site’s header and footer. But they could also include niche areas as well.
Theoretically, a block template part can be as broad or narrow as you like. This allows web designers to define only the theme elements they want to make editable. At best, this offers convenience for site owners while protecting the layout from any major mishaps.
Unlike the custom templates that have long been used in classic themes, block template parts are saved as HTML files. They also consist of block markup, rather than PHP.
Classic themes have traditionally used the WordPress Customizer to make specific areas editable. The feature works well enough but lacks the advanced capabilities of the Site Editor. Now, there’s a way for these themes to move past those limitations.
Adding a Block Template Part to a Classic Theme
Adding a block template part to a classic WordPress theme is a relatively simple 4-step process. Here’s an example of how to set things up.
Step 1: Allow Block Template Parts in Your Theme
The first step involves allowing your theme to use block template parts. This can be accomplished by adding a code snippet to your theme’s functions.php file:
Code snippet courtesy of Learn WordPress.
Note that if your theme’s functions.php file already has a function that adds theme support for other items, you’d only need to paste add_theme_support( 'block-template-parts' ); within the existing function.
Step 2: Design Your Template in the Block Editor
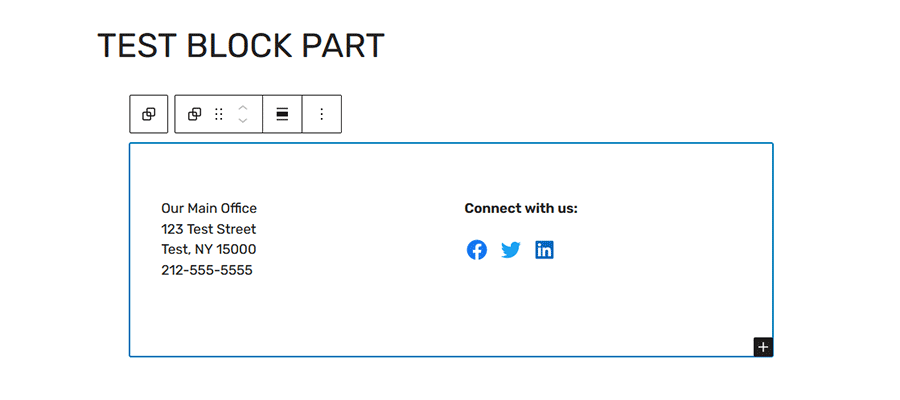
Next, it’s time to fire up the WordPress Block Editor. The easiest way to go about this step is to create a new page – we’ll call ours “Test Block Part”. It can be deleted once we have our block template part up and running.
Within this page, we’ve created a simple two-column layout. It includes our fictional client’s contact information and links to their social media profiles. Everything here uses standard blocks included with WordPress core.
The idea is to allow our client to make edits to this information as needed – but without having to touch the rest of the site’s layout.
Step 3: Copy and Paste Block Markup into an HTML File
Now that we have our layout built, it’s time to copy and paste the block markup into an HTML file.
There are a couple of options for copying the block markup:
- Select the blocks you’d like to copy within the Block Editor and enter
CTRL + C(orCOMMAND + Con a Mac) to copy the markup, OR; - Enter the WordPress Code Editor for your page by clicking on the Options button within the Block Editor, then copy the relevant markup;

Next, open the code or text editing app of your choice and paste the block markup into a new file. Our markup looks like this:
Save the file as an HTML document into the /parts directory of your theme (create the folder if it doesn’t already exist). Note that you don’t need anything else in the file besides the block markup.
For our example, we’ll call our file footer-contact-info.html. Make note of the file’s name, as we’ll need it in the final step.
Step 4: Add the Block Part Template to Your Theme
Now that we have our block part template created, we’ll need to add it to a PHP template in our classic theme.
WordPress has a built-in function called block_template_part() that we can use to call our block template part into the theme. It uses the HTML file’s name (minus the “.html” extension) to locate the template. Here’s what our code looks like:
We can add this function wherever we’d like the block template part to display. In this case, we’ll add it to our footer.php template.
All that’s left is to upload our updated theme files to the server. Once that’s complete, we’ll refresh the page and find our block template part proudly displaying at the bottom of the site.

Edit Your Block Template Part Anytime
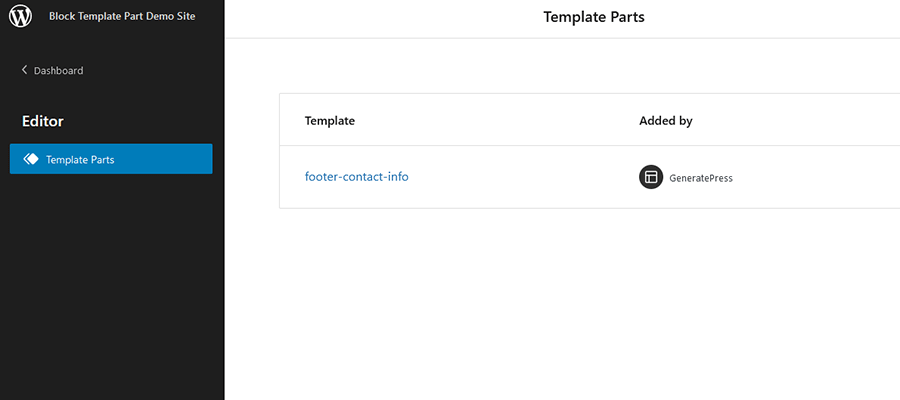
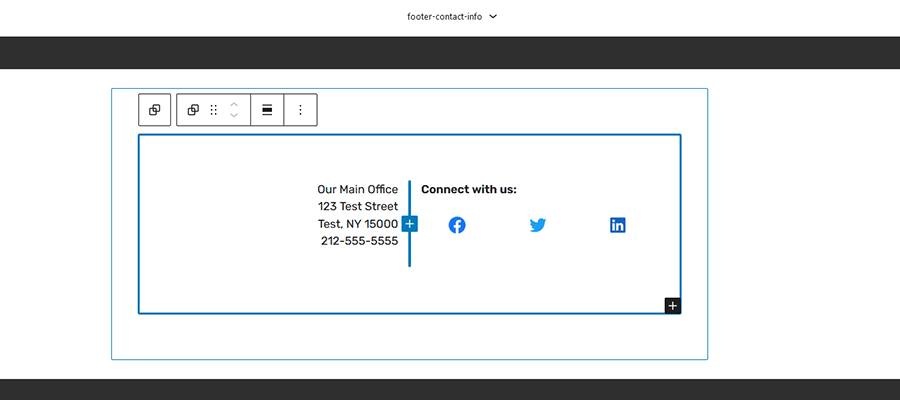
Whenever we need to make a change, our custom block template part is only a few clicks away. To find the template, visit Appearance > Template Parts, then click on the template’s name (footer-contact-info).
Edits can be made via the Block Editor – just like any WordPress page or post. Save your changes and they’ll appear on the front end of the website.
*Note: Some early implementations of this feature contained a bug that caused a block template part to be uneditable within WordPress. Adding a theme.json file to the theme temporarily fixes the issue.
Bringing Classic WordPress Themes into the Block Era
The ability to use block template parts in a classic WordPress theme is a step forward. Theme developers can stick with the power and flexibility offered by PHP-based themes while adding block template support where needed.
It’s also a way to open specific elements up to back-end editing without having to switch to a block theme. The process is easy to implement and much less labor-intensive than starting from scratch. The result is savings in both time and money.
In addition, it offers us a way to move beyond the Customizer. That feature will likely be phased out over time, so the ability to switch to block template parts helps us get a head start on migration.
Best of all, there are tons of potential use cases for this functionality. It may be just the thing you need to add a layer of convenience to your next WordPress project.