How to Edit a PowerPoint Template: A Quick Start Guide
Whether you’re starting from scratch and building a custom template, or have a PowerPoint template you’ve downloaded and want to customize, knowing how to edit a PowerPoint template is a great skill to have in your kit.
We’re going to walk you through editing a PowerPoint template step-by-step, explaining all the PowerPoint terminology along the way!
If you like the presentation template we are using here—Creativa—you can get it from Envato Elements. It’s a great multi-purpose template that’s great for all types of presentations.
PowerPoint Slide Layouts

First, a little terminology.
PowerPoint calls individual slide templates “slide layouts,” and the full template is the “master slide layout.” This little tidbit comes in handy if you have ever to use documentation or help files.
The slide theme is all of the stuff that’s unique to a set of slide layouts, including colors, fonts, effects or transitions and backgrounds.
Placeholders are all the boxes for specific types of content on each slide. You’ll know these because the containers have dotted lines and often contain text or icons that tell you to “place an image or text here”.
Each template includes all of the above with a set of slide layouts for specific needs. You can find all the different slide choices available for your theme under Home > Layout. (You can also find it under View > Slide Master.)
How to Edit a PowerPoint Template
Now that you know what you’re looking at in PowerPoint, you can start to edit the template. We’ll look at all of the changes you can make to the slide master so you can go from a templated presentation to something that feels a little more custom.
Going down the PowerPoint template route is a great option for most people. The best advice is to pick a template you really like, to start with slides for most of the content elements you will need, and then adjust colors and fonts for your brand. You should also remove slide types that you don’t need to make the deck easier to manage and edit. (This can also help decrease overall file size as well.)
Here’s how you do it.
Step 1: Open the Slide Master and Remove Unnecessary Items
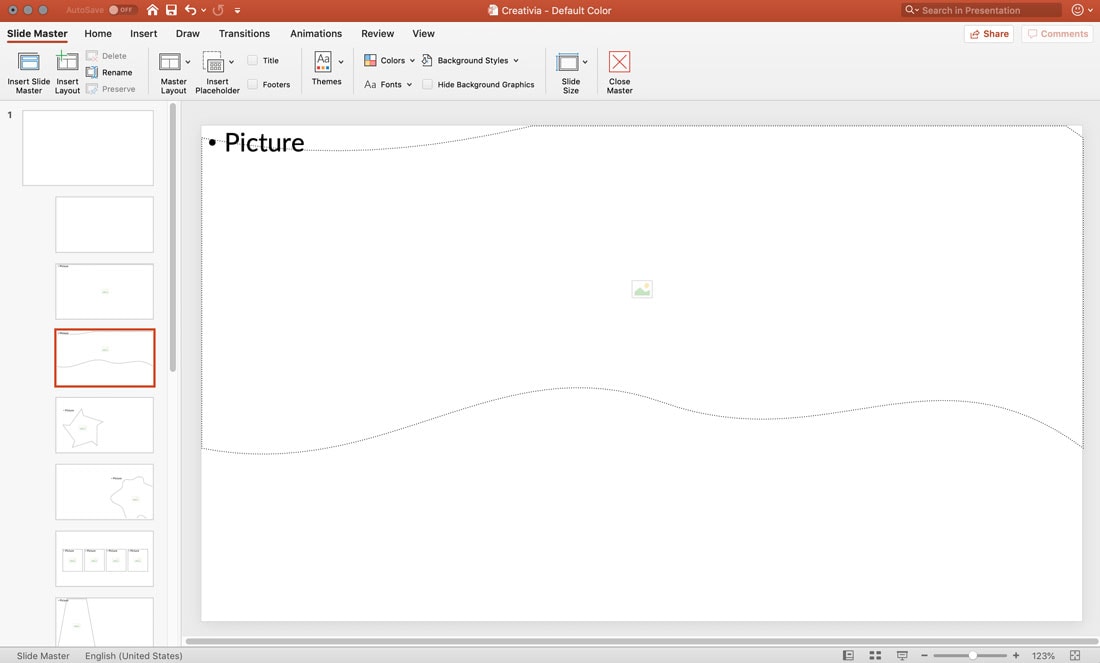
Start with the Slide Master, navigate to it using View > Slide Master.
Make sure the slide groupings make sense to you, and change or rename them if necessary. You can also remove groups if you don’t want them.
Note that anything included on a Slide Master (slide number one in the image above) will carry to all slides in that group (called slide layouts). This is helpful when you have an element such as a logo or background that appears on every slide in that group in the same position.
Rearrange slides to fit your needs and delete any slide types that you don’t need.
Step 2: Add Common Elements to Master Slides
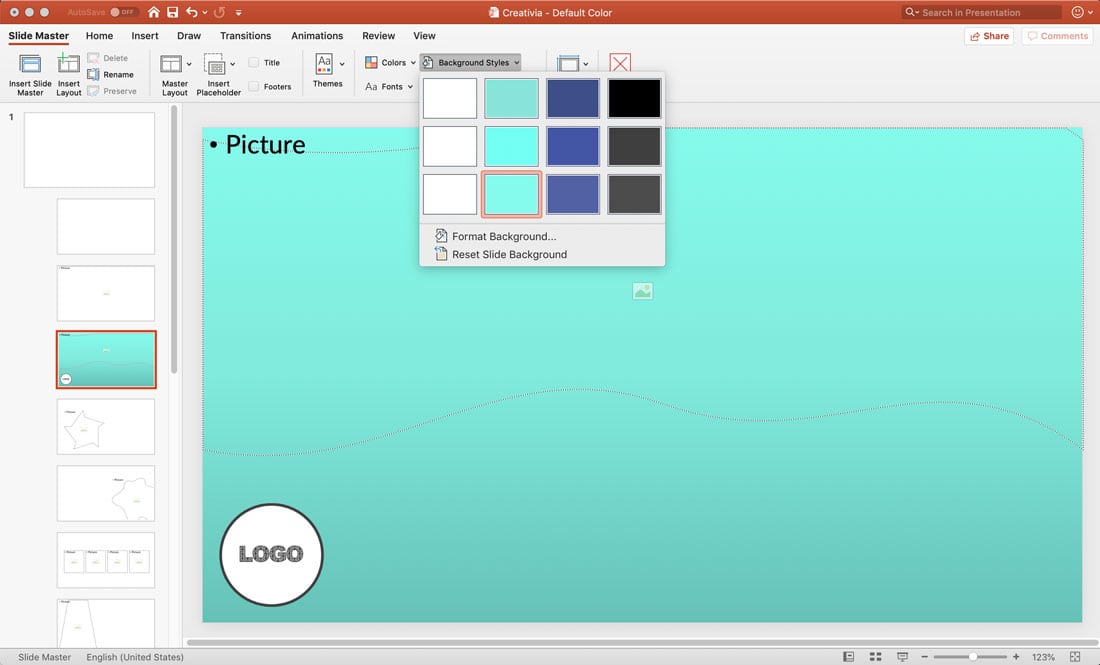
While you have the Slide Master open, make any changes to slides that you want to impact the entire deck. Add a logo or background element.
You might also design or change the text in a footer, or add automatic slide numbering that appears on every slide in the deck.
Close the Slide Master when you are finished. Every slide that you have changed in the master will reflect those changes.

Step 3: Change the Theme
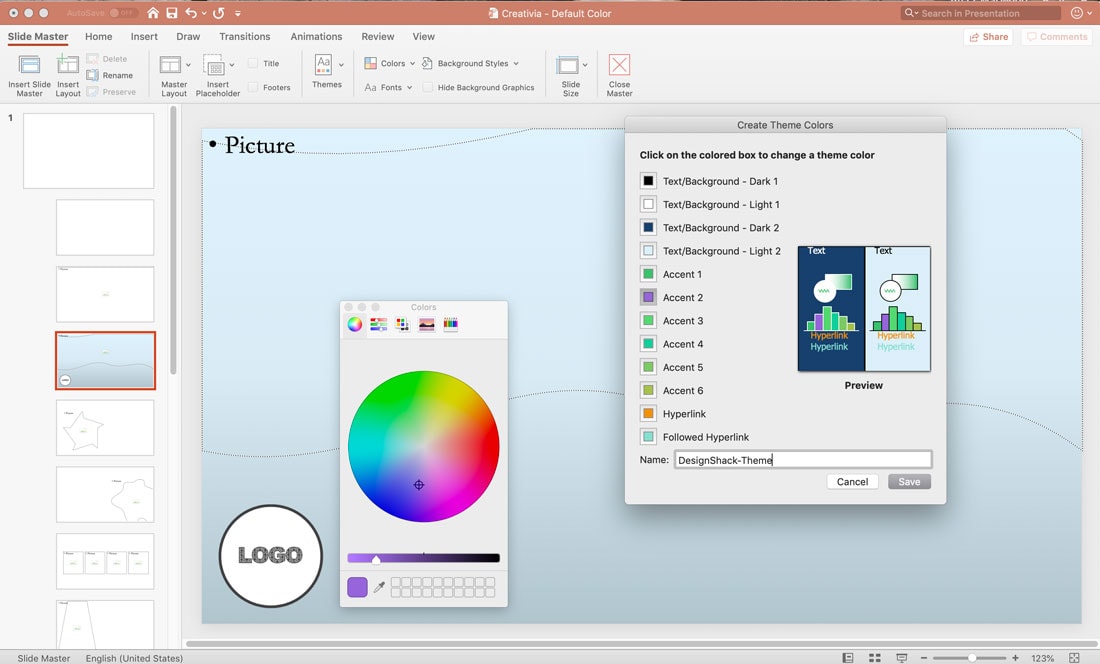
You can change colors and fonts in the Slide Master as well. Changing these elements in the Slide Master will apply them to all slides in the deck so that you don’t have to set custom specification on each individual slide.
Use preset color and font palettes for styles that already match or set your own, based on a specific color or palette.
Change the color palette using the Colors option in the Slide Master. Click customize to set colors specific to each element and give it a name you’ll remember.
Change the font using the Fonts panel.
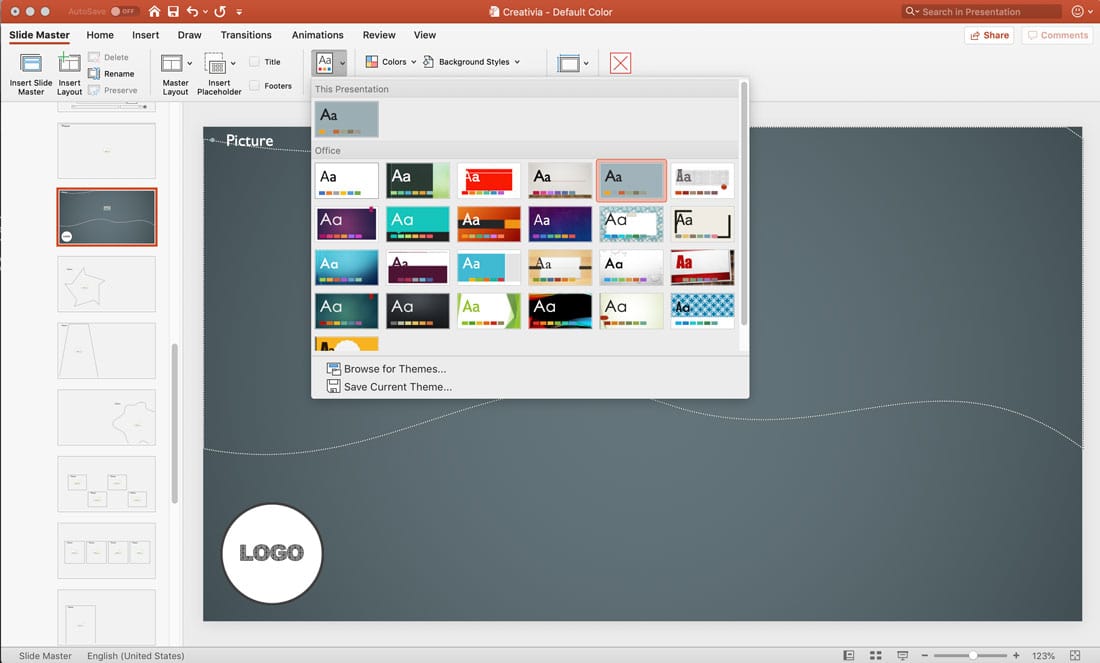
If you are uncertain about making changes on your own, PowerPoint has some presets in the Themes panel. These preset themes may or may not work with your template, proceed with care.
Note that these changes only take effect on the slide they are applied to, unless they are applied to a Slide Master, which impacts all layouts nested therein. That’s why in the example above the changes only affect one slide rather than the entire deck.
Step 4: Change Placeholder Text and Elements
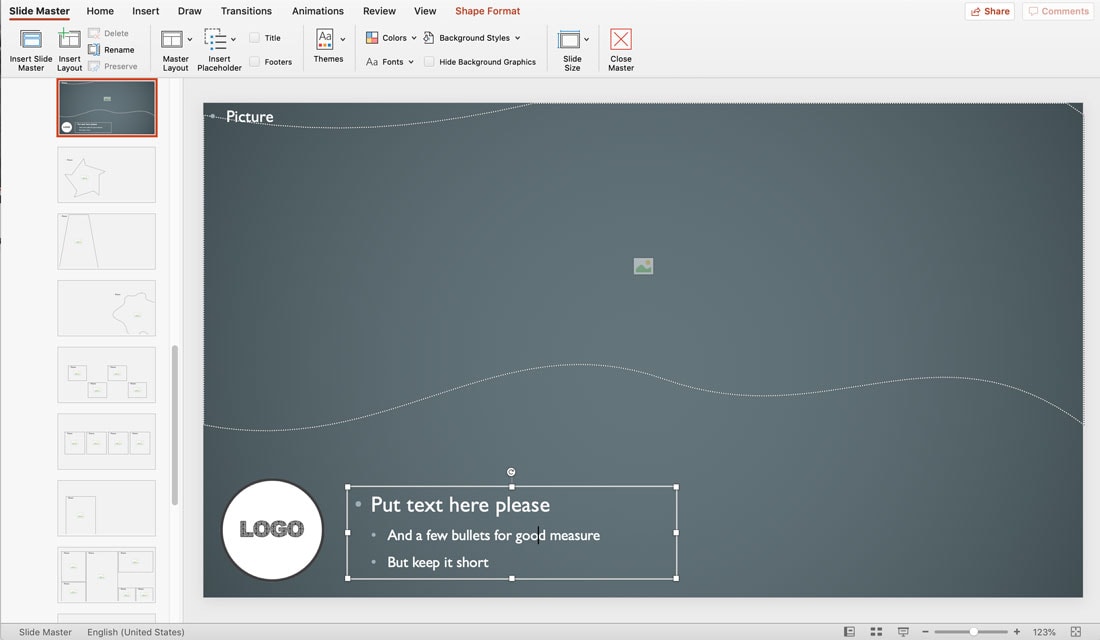
Next, go through the slides and set placeholder elements in a way that makes sense for you. This is most important if multiple people will work from the same PowerPoint template.
Set master text and placeholder elements in the locations and sizes you want them to be. Use easy instructions that tell anyone building a slide how much information they should include.
Close the Slide Master after making the changes and save.
Step 5: Save a New Template
Once you have edited a PowerPoint template and are happy with the design, save the file so it can be loaded and reused. You need to save it as a PowerPoint template file (.potx).
- Navigate to File > Save As (or Save a Copy)
- Choose PowerPoint Template in the Save as Type list (the file will automatically save in the Custom Office Templates folder on your computer)
- Give it a name you will remember
- Select Save
Share a copy of the file with other users and tell them to put in in their Custom Office Templates folder for easy access. To use the new template, select File > New, then Custom > Custom Office Template > [your template name].
Simple! You now have your own custom PowerPoint template that you can share with your team, and use again and again.