How to import data from Shopify to WooCommerce

If you find your current store no longer suitable for your business, it’s time for you to take re-platforming into consideration. Migrating data between eCommerce platforms is a tough task that requires precision.
In case you want to migrate your Shopify store to WooCommerce to experience the open-source nature, look no further because you are in the right place. Shopify and WooCommerce are two of the biggest names in the eCommerce industry. However, due to Shopify’s hosted nature, many merchants find it cumbersome when it comes to customizability, SEO features, or even transaction fees. And WooCommerce – an open-source platform – seems to be an ideal solution at this time. This platform is in the top-list eCommerce platform in the market because of its endless flexibility and customization. Unlike Shopify, WooCommerce allows you to have full control over your website without limitations.
In today’s article, I’ll be showing you how to import from Shopify to WooCommerce in 2 possible ways:
- Manual migration
- Automated migration tool
Read to the end of this article to figure out all the detailed steps to perform the migration from Shopify to WooCommerce!
Table of content
- Manually import Shopify to WooCommerce
- Exporting data from Shopify
- Importing data to WooCommerce
- Import using an automated tool
- Preparation
- Migrate with LitExtension
- Post-migration activities
- Don’t have time to migrate by yourself?
- Final words
1. Manually import from Shopify to WooCommerce
First and foremost, manual migration is the process that you need to import from Shopify to WooCommerce using a CSV file that contains your data. This complicated process requires a high level of technical knowledge, or else, you will probably make some unwanted errors during the migration.
Exporting data from Shopify
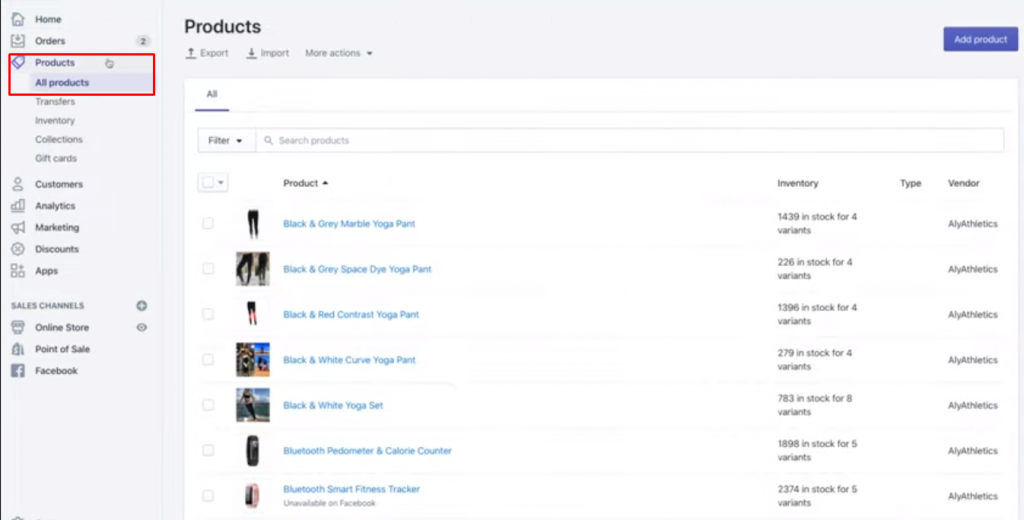
1. From your Shopify main dashboard, go to “Products” and choose “All Products”.
Note: Whenever you want to export only some of your products, you can filter your product list to view and select specific ones for export.
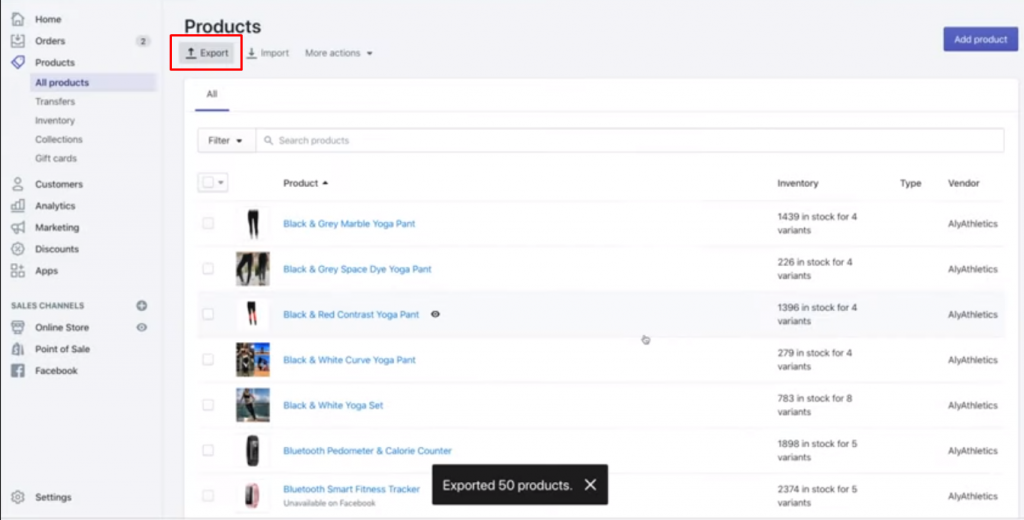
2. Select “Export”.
3. From the dialog box, choose the products you want to export and also the CSV file format which is shown as in the picture below:
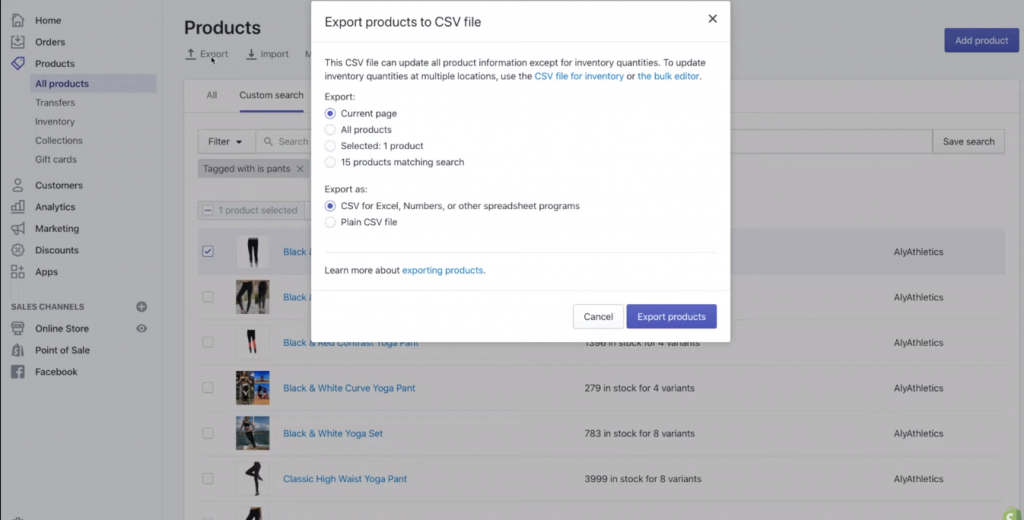
4. Hit the button “Export products”.
After exporting your data, you need to check your product variants or image URLs whether they become separated. You should be careful that when you import a CSV file that has been specifically chosen, it might duplicate your existing products with bad data which cannot be recovered.
Importing data to WooCommerce
Then, you’ve already had your CSV file which contains all the necessary data to import from Shopify to WooCommerce. It’s time to add new products.
1. Go to WooCommerce’s dashboard to select “Products”.

2. On the screen, choose “Import” and there will be an “Upload CSV File”.

3. Select “Choose File” to upload the CSV file in the previous step and click “Continue”.
WooCommerce will automatically undertake to match your CSV to “Fields”.
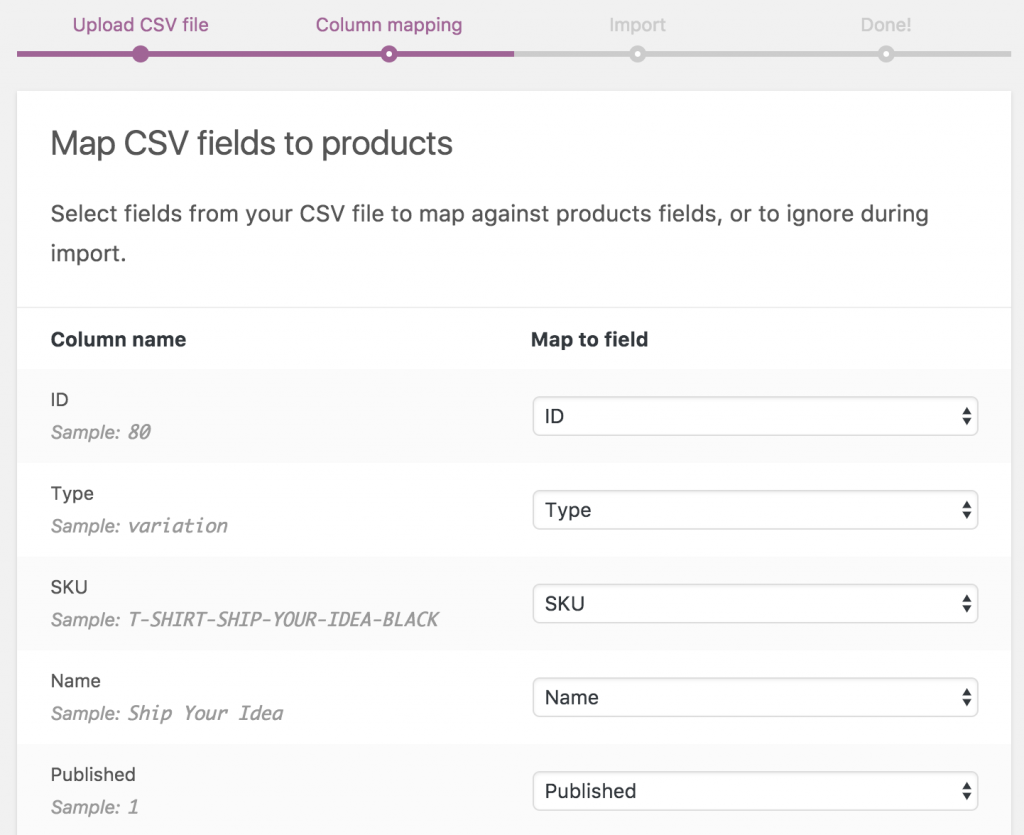
4. Use dropdown menus on the right side as in the picture below to adjust fields or indicate “Do not import”.

5. Click on “Run the Importer”.

6. Wait until the Importer is finished.
Keep in mind that you can’t interrupt the progress by refreshing or touching by all means.

7. The last step is clicking “View products” to check the result.
While choosing manual migration, there’s no worries about the data security or migration fee at all since you have to take care of the migration yourself. However, unless you are tech-savvy, it might take you considerable time and effort to finish. Moreover, you need to understand thoroughly both platforms’ database structures to avoid incompatibility.
Notably, Shopify only allows merchants to export a few specific entities like customers, products, orders, gift card codes, discount codes, and financial information. And WooCommerce doesn’t allow the data type that users can import to. Therefore, if you want to transfer more than just the above-mentioned data, this method is not really a good deal for you.
2. Import using an automated tool
Another solution is to use an automated tool to import from Shopify to WooCommerce. I highly recommend using LitExtension automated tool to transfer all your data including products, customers, orders without a hitch. This is the easiest, fastest, and most secure way to migrate your data from one eCommerce platform to a more robust one. Plus, you can also experience the service with a free demo to see exactly the whole process works.
Here are some benefits that you might get while using LitExtension services:
- Your store’s data is completely safe because LitExtension experts use SSL encryption to run the migration.
- LitExtension offers a very affordable price starting from $29 that you can move up to 100 products, 100 customers, 100 orders.
- The experts assure 0% data loss with the advanced technology system and professional customer service team.
Preparation
Before taking the first step, you need to prepare a few things including backing up your data, installing WordPress, and setting up your WooCommerce store.
1. Create data backup from Shopify
Close attention should be paid to this process, as it can ensure the security of your data in case the migration doesn’t go smoothly. To put all the data into the Shopify stock, you can follow 3 ways:
- Using CSV files to back up store information
- Duplicate a store
- Create a store backup using an app
2. Install and setup WooCommerce store
If you already have a store on Shopify, moving to WooCommerce might be a big obstacle to overcome due to its open-source nature. Nevertheless, following the instructions below can easily get your job done.
Firstly, you need to choose a hosting plan and install WordPress. Many hosting companies offer pre-installs of WordPress, so make sure you check for this option whether it’s available or not. Following this guideline to install and set up your WooCommerce store.
In case you want to manually install WooCommerce using phpMyAdmin and an FTP Client, here’s a detailed tutorial video:
Migration from Shopify to WooCommerce with LitExtension
Step 1: Create a LitExtension account
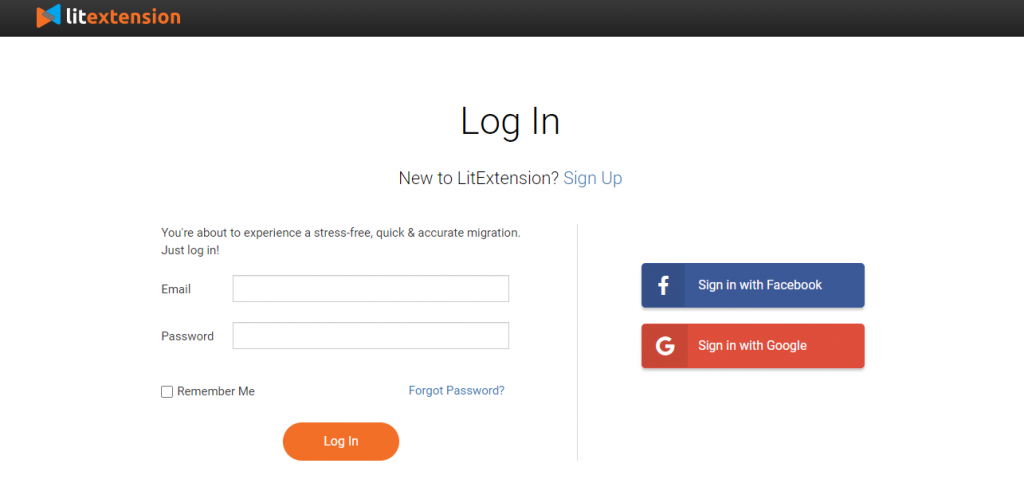
To begin with, you sure need an account. On the LitExtension homepage, you can use your Gmail or Facebook to Register an account to create a new migration.
Step 2: Fill your Shopify and WooCommerce information
After logging in, click Create New Migration at the top right button. In the Source Cart setup step, choose Shopify as Source Cart and fill out the store URL, API key, and password.
LitExtension has detailed instructions to guide you on how to get each information on the right side of the screen.

Next, set up your Target Cart by choosing WooCommerce and provide your store URL. After that, download LitExtension Connector, extract the zip file, and upload it into WooCommerce’s root folder.
Step 3: Configure Shopify to WooCommerce migration
The next step is hitting the button “Next: Configure your Migration”. You can select all entities or just a part of what you want to transfer.

Select entities you want to migrate
Moreover, LitExtension also offers Additional Options to extend the migration possibility. These options include free and paid ones. You can choose every option or select a specific one such as preserving product IDs on the Target store, Strip HTML from the category, product name, and so on.
The merchants can also match Languages, Order Status, and Customer Group to display consistently in the new WooCommerce Target Store.

Step 4: Perform the migration and check results
I suggest that you should try a free demo migration by clicking “Start Demo Migration”. You can only transfer 20 certain entities for your demo migration. If you decide to perform a full migration right away, you will need to make a payment first. After purchasing, your migration will be ready to start.

Once the migration starts, it will run smoothly on the server. You can safely turn off the PC while the data is being transferred. Take a break and you’ll be notified via email when the process is completed.
Step 5: Check results after the migration
Now, you have transferred all your data to the new WooCommerce store, click on the orange button “Check result” to double-check everything.

Please follow the list here:
- Ensure all your data displays correctly on your frontend and backend.
- Make sure all your data appear consistently in the onsite search, catalog, and also under the categories.
- Check out every link in menus, header, footer, and inside the pages.
- Try making a purchase in your new store.
Don’t know how to check the results? Click this article for more information or contact the LitExtension support team.
Post-migration activities
Here is the checklist to finish your new WooCommerce store after the migration.
1. Design themes
Choosing a new look for your new store is the priority which plays a crucial role in grabbing customers’ attention.
Unfortunately, LitExtension can’t migrate your theme and template from your Source Store. Therefore, you need to choose a new theme that looks similar to the old one or apply a completely brand new one. Go to WooCommerce’s theme store to get a suitable theme.
2. Add new extensions
Clearly, extensions can extend your website’s ability, boost your store performance and bring your visitors a better shopping experience.
Up to now, WooCommerce offers over 400 free & paid plugins for you to choose from. For each plugin, you can easily look up the detailed information to install and setup.
3. Migrate newly appearing and edited data
During the migration process, LitExtension still keeps your old Shopify store operating normally. Thus, you still receive new orders and customers while setting up your new WooCommerce store. This is when services such as Recent Data Migration, Smart Update, and Re-migration come to help.
- Recent data migration allows you to migrate newly added entities to the Target Store during or after the first full data migration.
- Smart Update allows you to update data that has been modified and migrate those that recently appear in your Source Store during or after the initial full migration.
- Re-migration service lets you migrate your data all over again.
Don’t have time to migrate by yourself?
In case you don’t have plenty of time to import from Shopify to WooCommerce, there’s another option for you. LitExtension also provides you with the All-in-One migration full service. Your shopping cart project will be well-handled with a Personal Assistant who takes care of every step from beginning to end and supports you whenever needed.
Most importantly, the cost for the All-in-One solution is more reasonable than you might think, check out this estimator to predict the price.
Conclusion
In conclusion, you’ve already known how to import from Shopify to WooCommerce in 2 possible ways. I hope this article will help you to visualize the whole process, and help you get a pleasing experience.
Thanks for reading and good luck!
Photo by Roberto Cortese on Unsplash