How to Make a Picture Transparent in Google Slides
Google Slides is a versatile presentation software that offers a wide array of tools to help you create engaging slides. One such tool is the ability to adjust the transparency of images.
Making a picture transparent in Google Slides can help you blend images with the slide background, overlay images for a layered effect, or simply reduce the prominence of an image.
In this article, we’ll walk you through the steps on how to make a picture transparent in Google Slides and provide some tips to help you effectively use this feature.
How to Make A Picture Transparent in Google Slides
Google Slides doesn’t provide a built-in tool to adjust the transparency of an image directly. However, there’s a workaround that allows you to achieve the desired effect. Here’s how you can do it:
1. Open Your Google Slides Presentation
First, launch Google Slides and open the presentation that contains the image you want to make transparent.
2. Insert an Image
If you haven’t inserted your image yet, go to the menu bar and click on “Insert”, then select “Image.” You can upload an image from your computer, search the web, or choose an image from Google Drive or Photos.
3. Duplicate the Slide
Once you’ve added the image to your slide, right-click on the slide in the left panel and select “Duplicate slide.” This creates a copy of your slide with the image.
4. Adjust the Image on the Duplicate Slide
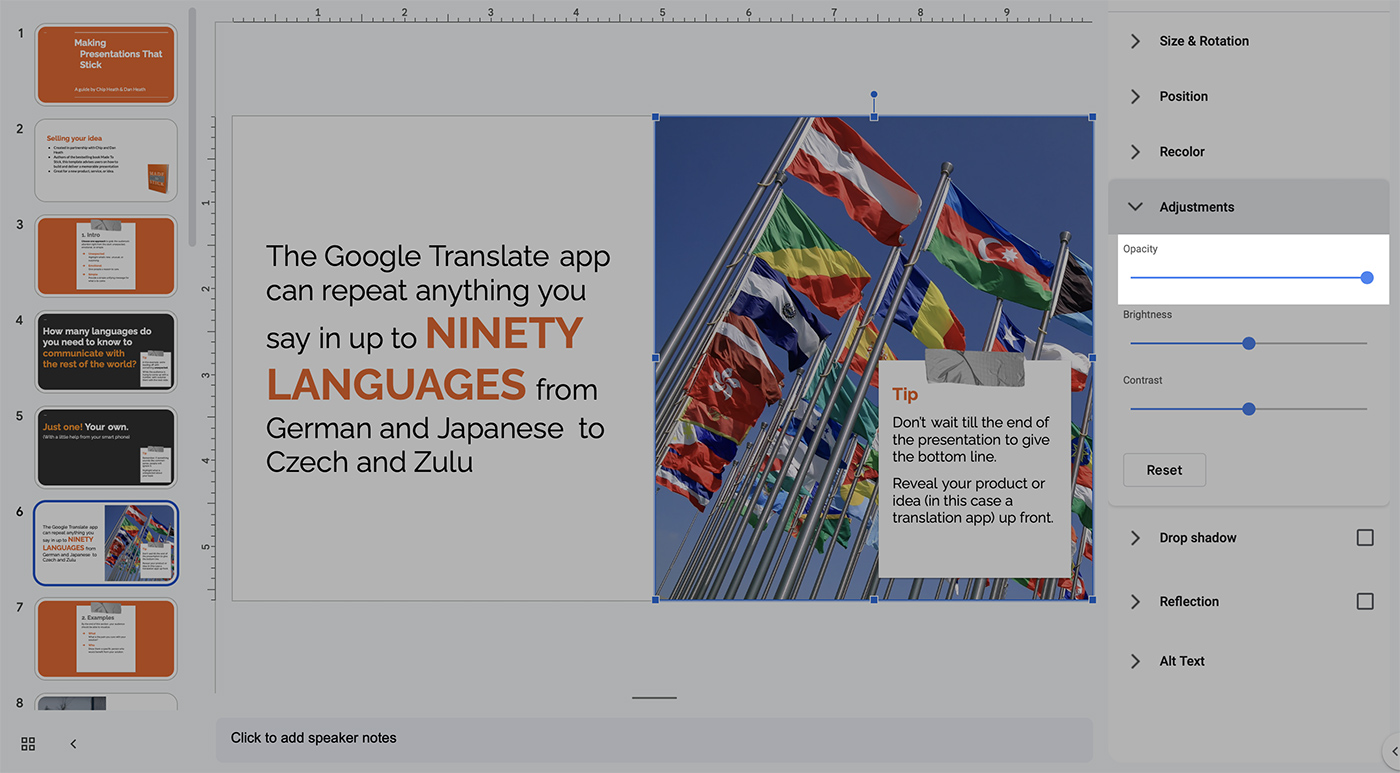
On the duplicated slide, click on the image. Then, click on “Format Options” in the toolbar. Under the “Adjustments” section, you’ll find the “Opacity” slider. Slide it to the right to increase the transparency of the image. Adjust until you achieve the desired level of transparency.
5. Download the Transparent Image
After adjusting the transparency, download the slide as a PNG or JPEG image by going to “File” > “Download” > “PNG image/JPEG image.” This will download the entire slide, including your transparent image.
6. Insert the Transparent Image into the Original Slide
Go back to your original slide and delete the initial image. Then, insert the image you just downloaded. This image will now be transparent.
Tips for Using Transparent Images in Google Slides
Here are some tips to help you enhance your presentations with transparent images:
1. Create Layered Visuals
You can create layered visuals by overlaying transparent images. This can give depth to your slides and make them visually interesting.
2. Blend Images with Background
Transparent images can blend smoothly with the slide background. This is particularly effective if you want the image to subtly complement the textual content without drawing too much attention.
3. Use Transparent Images for Watermarks
If you want to add a watermark or logo to your slides, using a transparent image can be a great way to do this without distracting from the content of the slide.
4. Experiment with Transparency Levels
Don’t hesitate to experiment with different transparency levels. Depending on the background color and other elements on the slide, you might need to adjust the transparency level to achieve the best result.
5. Be Mindful of Readability
While transparent images can enhance the visual appeal of your slides, be careful not to compromise readability. Make sure that text overlaying transparent images is still clear and easy to read.
In conclusion, while Google Slides doesn’t offer a direct tool for adjusting image transparency, the workaround can effectively serve the purpose. With the ability to adjust image transparency, you can create visually engaging presentations that captivate your audience’s attention. Happy designing!