How to Increase Font Size on Mac
Crafting a seamless Mac experience hinges on a variety of factors, and font size is surprisingly one of them. Whether for accessibility, ease of reading, or simply your aesthetic preference, adjusting the font size on your Mac can take your user experience up a notch.
Apple’s macOS is wonderfully intuitive and allows you to increase font size system-wide or in specific apps. Think of it as tailoring your Mac to fit you perfectly, creating an environment that is not only comfortable but uniquely yours.
In this guide, we’ll walk you through the process of increasing font size on your Mac, step by step. From sweeping changes to app-specific tweaks, we’ve got you covered. By the end, your Mac will be optimized for your comfort, and your eyes will thank you.
Increasing System-Wide Font Size on Mac
To adjust the overall font size across the entire system, you can use the Display settings in System Preferences. Here’s how:
1. Open System Preferences
Start by clicking on the Apple menu in the upper-left corner of the screen. From the drop-down list, select “System Preferences.”
2. Navigate to Displays
Within the System Preferences window, locate and click on the “Displays” icon.
3. Select Scaled Resolution
In the Displays preferences, click on the “Display” tab if it isn’t selected already. You’ll find two radio buttons: “Default for display” and “Scaled.” Select “Scaled.”
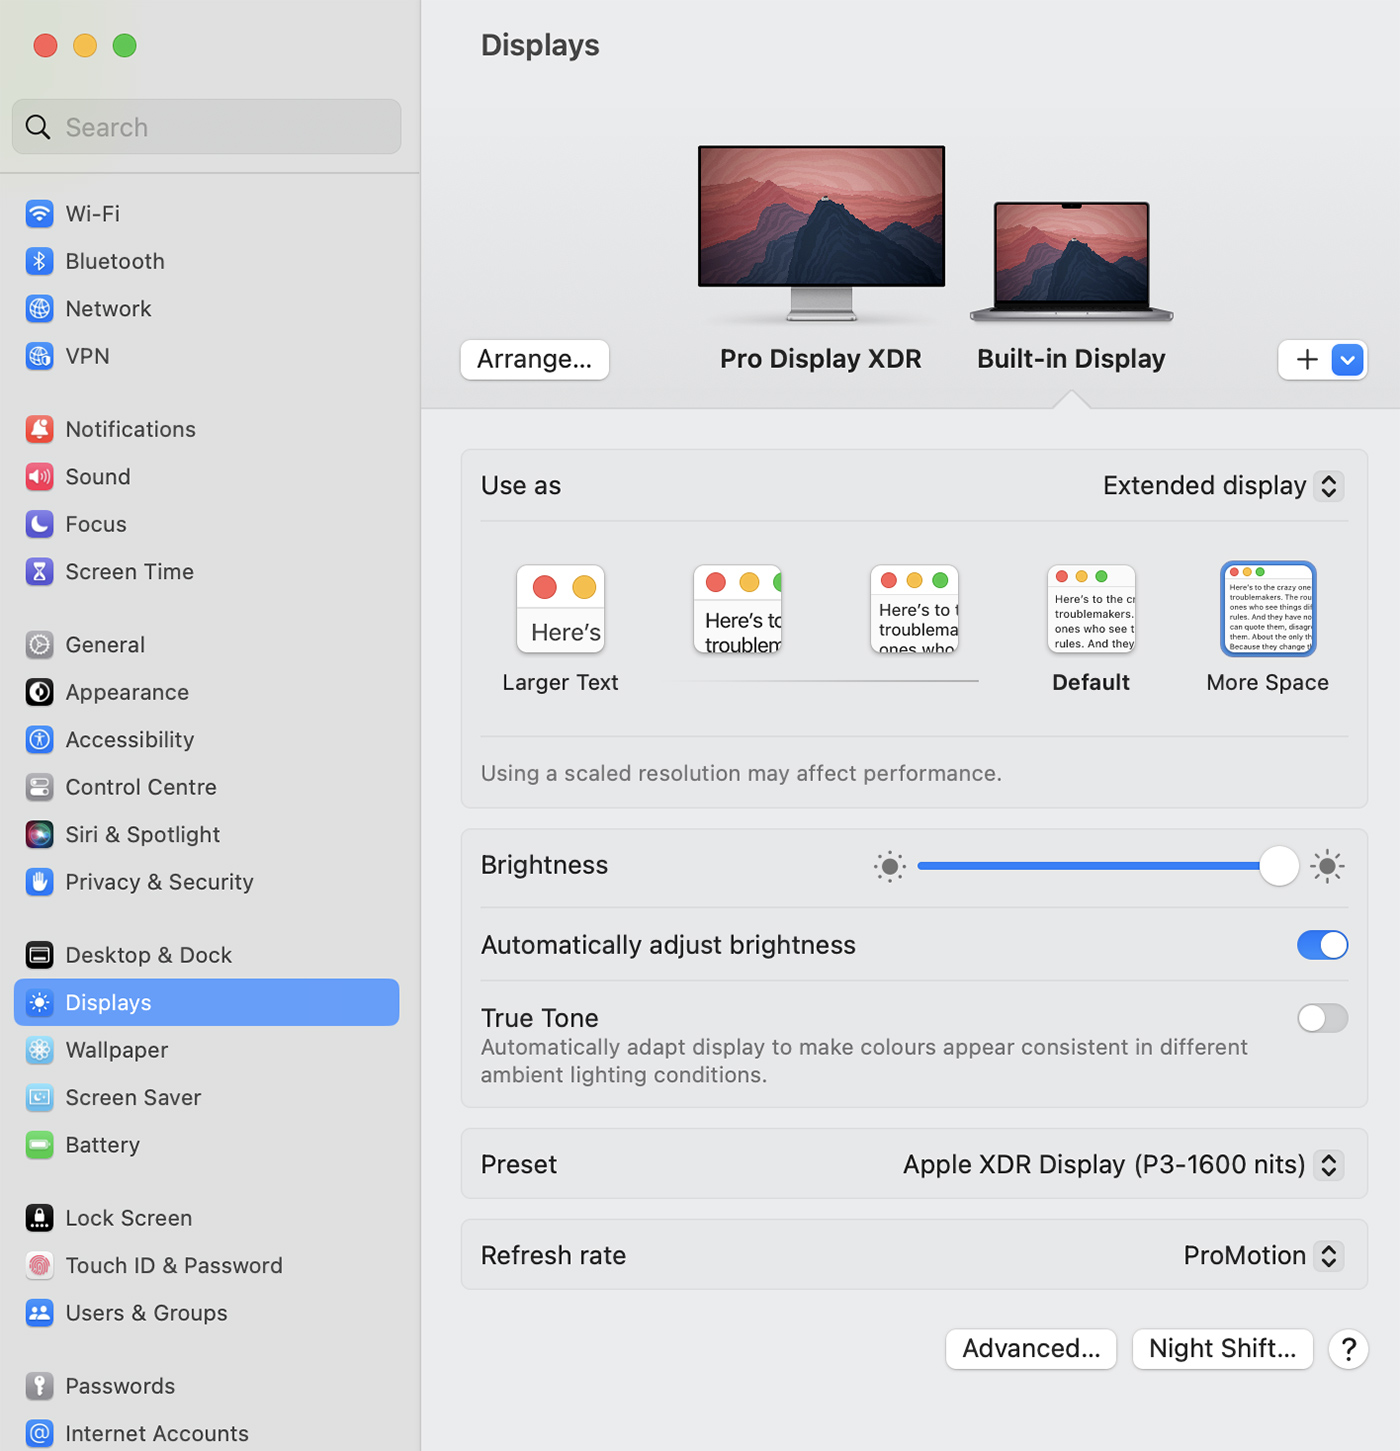
4. Choose Larger Text Option
With the “Scaled” option selected, a range of options will appear, from “Larger Text” to “More Space.” Move the marker towards the “Larger Text” side. This will increase the overall system font size.
Increasing Font Size in Specific Mac Applications
Many applications on Mac also allow you to adjust the font size within the app itself. Let’s take Safari and Finder as examples:
For Safari
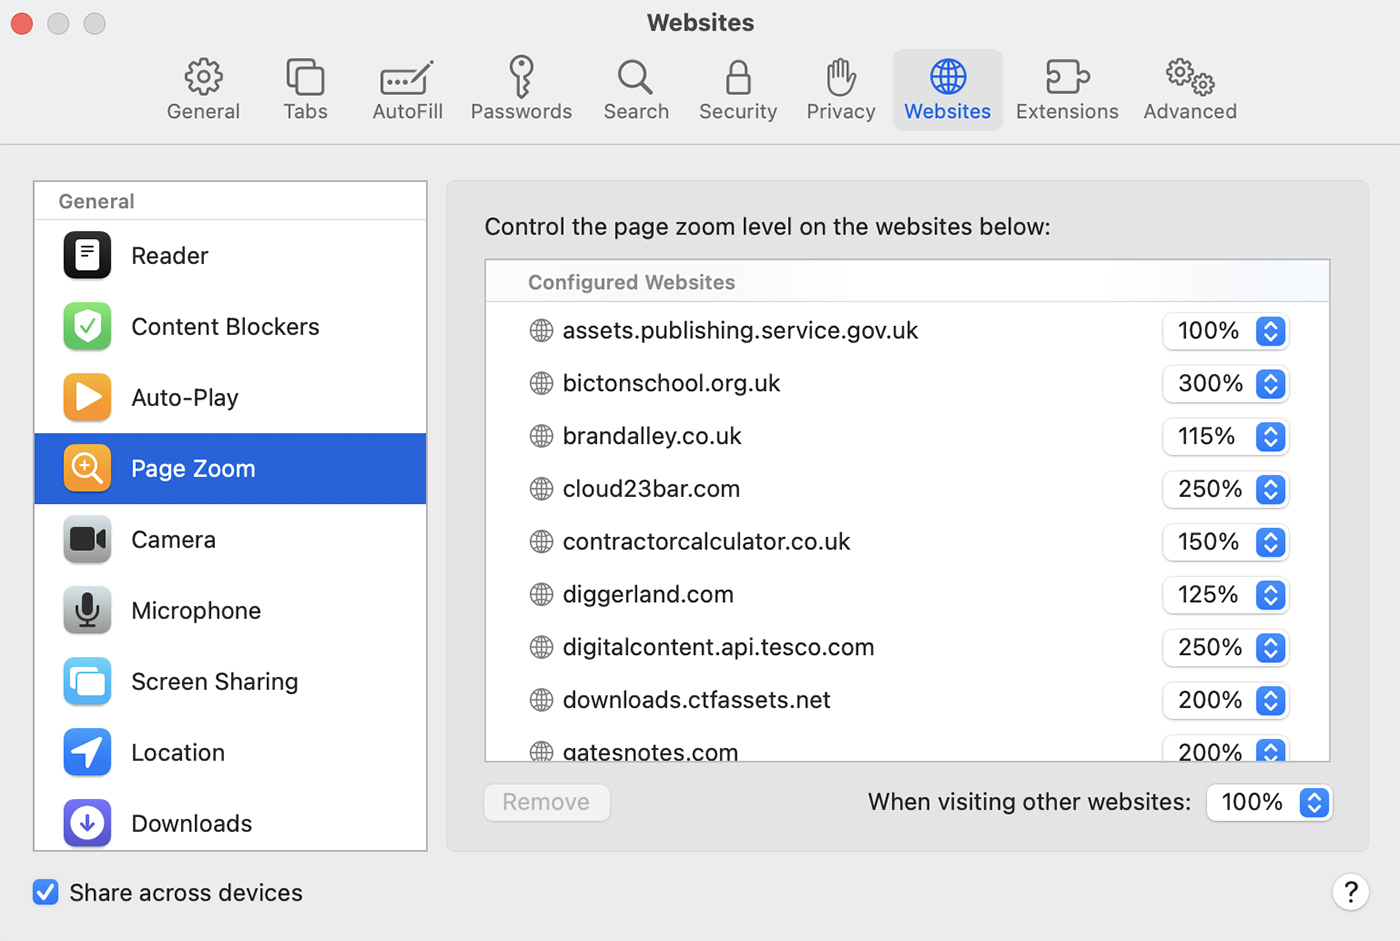
Open Safari and navigate to “Preferences” under the “Safari” menu.
Under the “Websites” tab, locate the “Page Zoom” section. Here, you can adjust the zoom level for specific websites or for all websites.
For Finder
Open a Finder window.
Navigate to “Show View Options” under the “View” menu.
Use the “Text size” drop-down menu to adjust the font size to your preference.
Tips for Adjusting Font Size on Mac
Here are some additional tips for adjusting the font size on your Mac:
1. Use Zoom
If you only occasionally need to enlarge the text, consider using the zoom feature. Press Command and + to zoom in, and Command and – to zoom out.
2. Accessibility Settings
If you have visual impairments, explore the Accessibility settings. They offer a variety of tools and features, such as increased contrast and voice-over functionality.
3. Remember Application Settings
Remember that individual applications may have their own font size settings. Always check within the app’s settings if you’re struggling with small text.
4. Reset if Necessary
If you’re not happy with your changes, you can always reset your display settings. Navigate back to the Display settings in System Preferences, select “Scaled,” and then move the marker to the default position.
5. Retina Display
If you’re using a Retina display Mac, keep in mind that while these screens offer incredible detail, they can sometimes make text appear smaller. Using the above methods to increase font size can help.
Conclusion
Increasing the font size on your Mac can make for a more comfortable and accessible user experience. Whether you need larger text system-wide or in specific applications, macOS provides intuitive settings and features to help you. These steps should assist you in customizing your Mac’s appearance to your preferences. Happy browsing on your Mac!