How to Make a Watermark in Photoshop (Step by Step Guide)
Watermarking is an important part of making a piece of art your own. Whether you’re an artist, designer, or photographer, you should have a unique watermark to protect your work from being stolen.
If you don’t have your own watermark yet, creating one from scratch is very easy. In this short guide, we’ll show you how to make a watermark in Photoshop.
There are three simple ways to create a watermark. You can choose whichever method is appropriate for you. Let’s get started.
What is a Watermark?
Before we get to the tutorial, it’s important to understand what a watermark is and what it does.
A watermark is like a stamp you put on your art, designs, or photos to display that they belong to you. This also protects your work from being stolen or counterfeited.
Your watermark can be your logo, a simple text, or even your signature. And you can use your watermark when sharing your designs and photos on social media. It will prevent people from re-sharing your content without credit or being used without permission.
Tips for Making Effective Watermarks
There are good watermarks then there are bad watermarks. Here are a few tips to make your watermark great.
Use Proper Size
When watermarking a photo or a design, it’s important to know the right size to use for the watermark.
Covering your entire image with a huge watermark is a very unprofessional habit. But using a tiny watermark won’t help either. Use a size that makes it harder for thieves to get rid of. But also one that doesn’t take the attention away from your art.
Include Contact Information
Watermarks used on art usually consist of a signature, sometimes with the date. But, when watermarking your digital designs or photography, especially for sharing on social media, you should use it as a chance to promote yourself.
Many designers and photographers now include their contact information with the watermark, such as their Twitter handle, email, or phone numbers
Add Copyright Symbol
While it’s not required for all types of art, adding a copyright symbol to your watermark will make sure your art is well protected. The copyright symbol solidifies your art as intellectual property and it states that the art should not be used without permission.
Save as a Template
Remember to save your watermark as a template and backed up. Make things as easier as possible to use the watermark, especially when processing multiple files.
How to Create a Watermark in Photoshop
There are a few ways you can create a watermark in Photoshop. We’ll start with the easiest method first.
Method 1: Use a Logo Template
The quickest way to create a watermark is to use your existing logo. If you don’t have a logo yet, you can download a pre-made logo template from a marketplace like Envato Elements.

Once you have a logo template, open it in Photoshop, select the transparent logo, and copy-paste it over to your artwork. Set the opacity of the watermark layer to around 40 to make it blend with the image.
Method 2: Add a Text Watermark
You can also create a watermark just from text and it’s quite easy. But, instead of just adding a text layer, we’ll add a bit more styling to it.

Start by creating a small strip-like shape using the Rectangle Tool. Slightly angle the edge of the shape to give it some style. You can do this while holding down the Control or Command key on the keyboard.

Now create a text layer on top of the shape you’ve just created. Type your name or business name. Make sure to use a great font.
Let’s also add your contact information in a separate text layer.

Finally, select all the layers you’ve created in the Layers panel, right-click and Merge Layers. This will combine all the layers you’ve created into a single layer.
You won’t be able to edit the text after merging layers so make sure to backup your file as PSD before merging the layers.

You’re now all set. You can change the opacity if you want or keep it at 100%.
Method 3: Create a Signature Watermark
If you’re watermarking art or creative designs, you can use your own signature as a watermark.
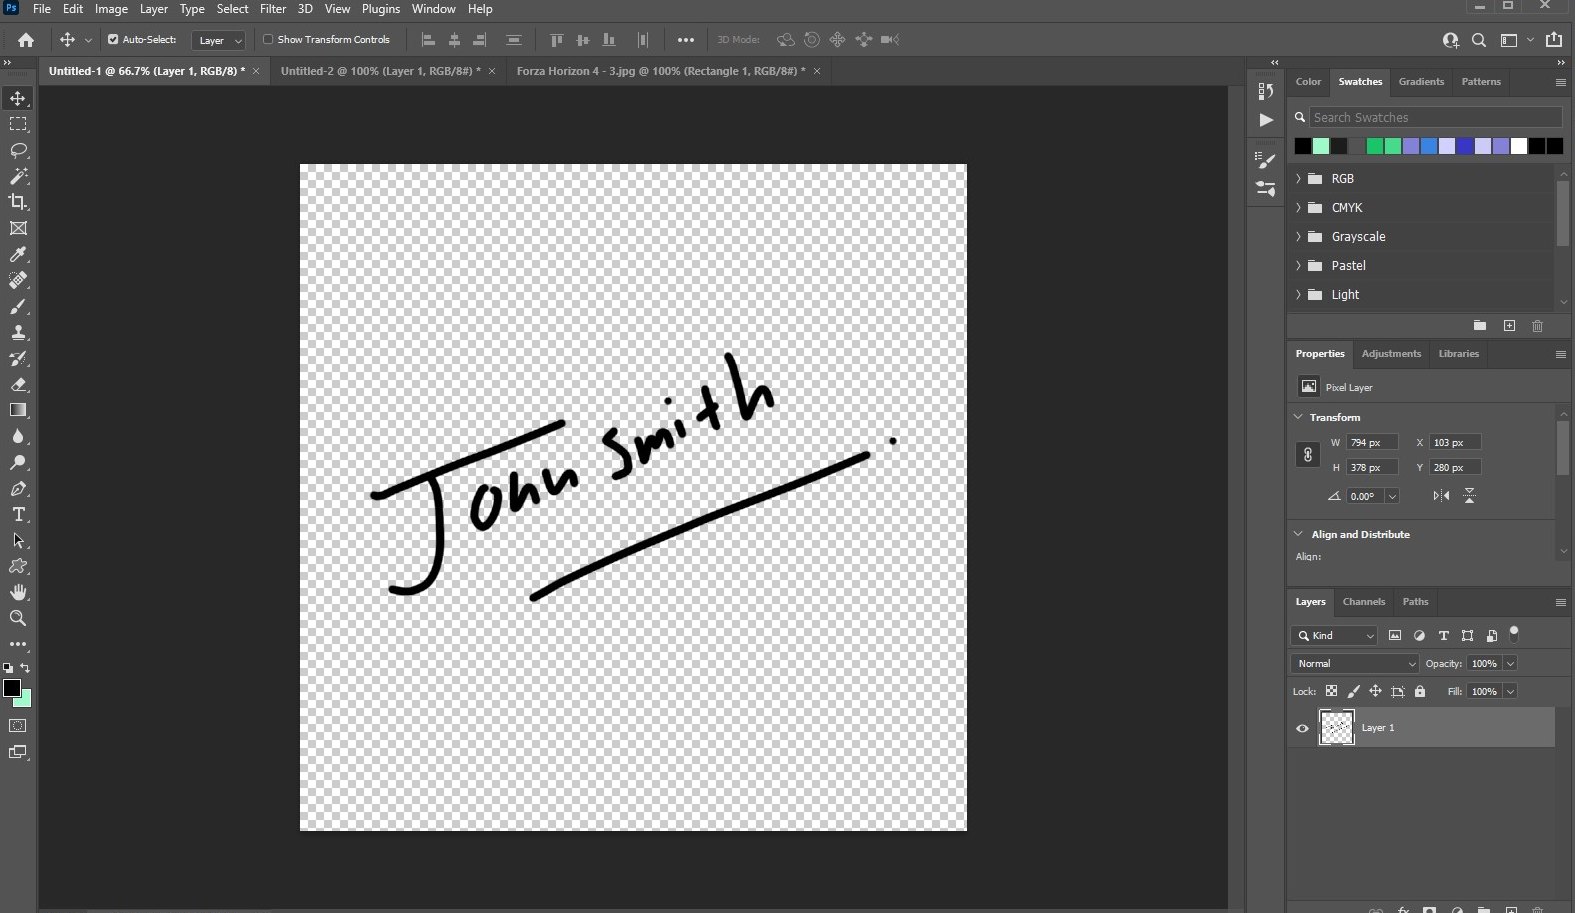
Create a new file in Photoshop with transparent background. Then use your drawing tablet to draw your signature.

You can now use this as your watermark. Let’s take an extra step and turn it into a brush so you can easily watermark your artwork.
Simply go to the Edit menu and select Define Brush Preset. Then give the brush a name and click OK.
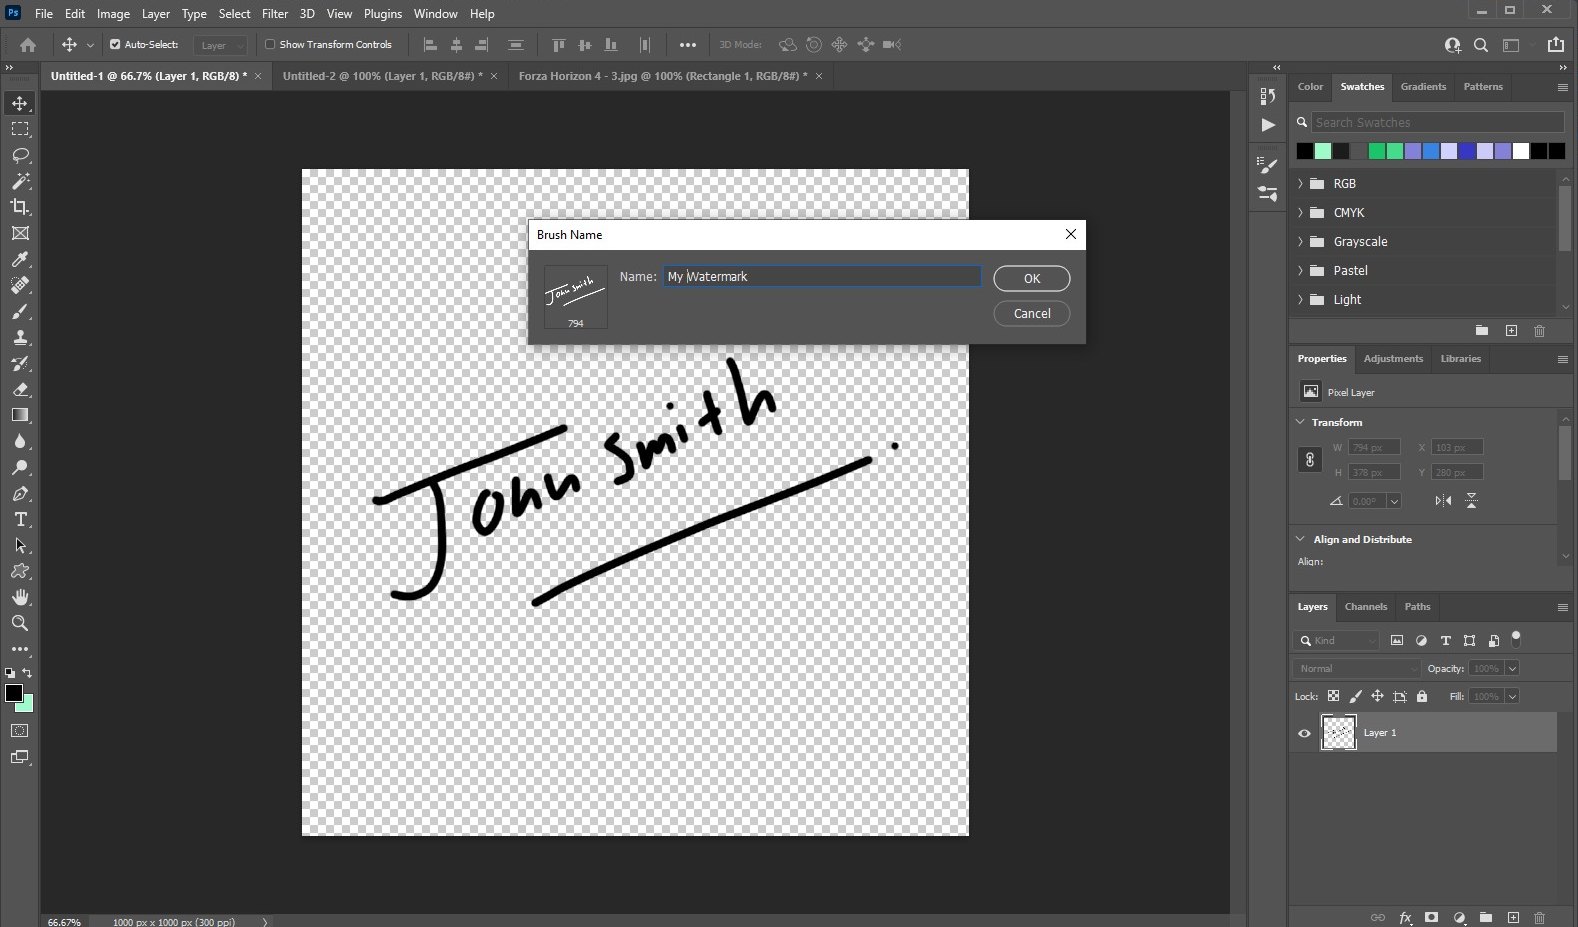
Now your signature watermark will appear as a brush in the brush library.
Conclusion
Hopefully, you’ll now be able to better protect your designs and work. Make sure to use your watermark in every artwork you share online.
Also, if you want to find a great-looking logo for your watermark, check out our best logo templates collection.