How to Make a YouTube Banner: Your Complete Guide
YouTube is the most popular video-sharing website in the world. With over 1 billion hours of content watched on the platform each day, YouTube offers nearly endless opportunities to content creators. Whether you are an entrepreneur, marketer, business owner, or vlogger, creating videos on YouTube is a great way to reach your target audience.
Are you planning on starting your own YouTube channel? If so, you may want to think about the channel art you plan to use. Also known as a banner, YouTube channel art is one of the first things viewers see when they visit your channel. This makes it one of the most important factors to consider other than the videos you upload. Keep reading to learn how to make a great YouTube banner for your channel and why YouTube should be a part of your digital marketing strategy.
Why choose YouTube for digital marketing?
If you aren’t already considering YouTube as an addition to your digital marketing strategy, you should. YouTube is the largest video-sharing platform and can also be considered the Internet’s second-largest search engine. The largest search engine is Google, which also happens to own YouTube. As a result, your YouTube videos are indexed by Google. This means your videos are not only discoverable on YouTube, but in Google’s search engine results pages as well!
Search engines like Google are placing increasing importance on rich content like videos. By uploading videos to YouTube, you are able to either share them across your social media accounts or embed them right on your website. Videos are another way to increase the performance of your website and enhance the user experience.
With over 2 billion logged-in users every month, YouTube has the largest number of potential viewers. More importantly, it is free to use and relatively easy to set up.
How do I make a YouTube banner?
YouTube is a powerful channel for content delivery. The content of a channel’s videos is often what determines the channel’s success, but the way the channel is visually presented to its audience is also an important factor. The channel profile picture and channel art act as a branding method. Your channel’s regular viewers become accustomed to your profile picture and banner, and they begin to be associated with your brand or business as a whole.
Your channel profile picture will almost always be your business or brand logo, so let’s discuss how to make a YouTube banner as you are setting your channel.
Step 1: Know your purpose and your goals
The most important thing to keep in mind when creating any type of content is your channel’s purpose, your goals, and your audience. Whether your videos are for promoting your products, creating how-to guides, or video blogging, the purpose of your channel determines the way you interact with your audience. Your banner should be a good representation of your channel’s purpose.
Step 2: Determining your banner size
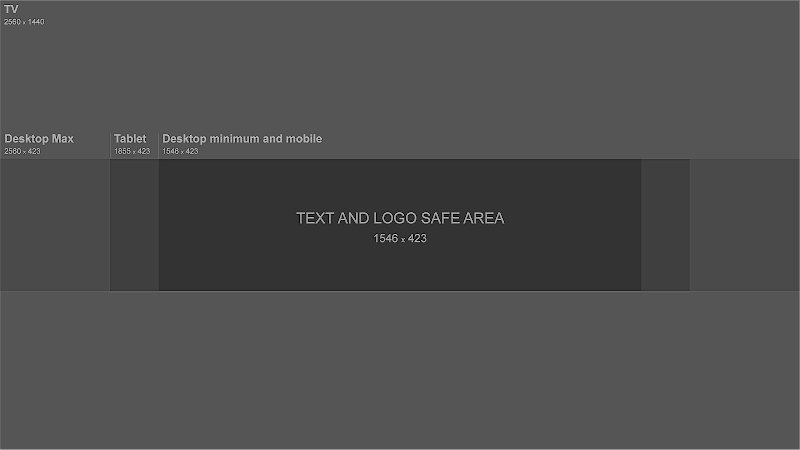
One of the most important steps in making your YouTube banner is choosing the right size image. On YouTube, one image size does not fit all devices. The portion of your banner that is displayed on your channel varies depending on the device the viewer is using. This means your banner will like different on desktop, mobile, tablet, and TV displays. Google has provided recommended guidelines to ensure your banner looks great on all platforms.

- The recommended image size is 2560 x 1440 pixels, and the file size needs to be 6MB or smaller.
- The minimum dimensions for the banner upload are 2048 x 1152 pixels.
- The minimum “safe area” for text and logos is within 1235 x 338 pixels. This means any text or logos you want to be visible on all devices needs to be within that pixel range. If it’s not, there is a risk your viewers won’t be able to see it depending on the type of device they are using.
You can find templates for your channel banner using tools like Canva or Adobe Spark.
Step 3: Choose a design for your banner
Now that you know YouTube’s requirements for channel art sizing, you can start the design process. Here are a few tips to consider.
- Use high-quality images. The banner itself and every image you use to compose it should be high-resolution. Images that are blurry and pixelated make your channel look unprofessional. If you don’t use high-quality images, viewers will suspect your videos aren’t high-quality either and could leave your channel before they even watch your videos.
- Use a design that represents your business or brand well. Make sure you pick a design that is relevant to your business and the content of your videos. Your banner should be a preview of the type of content that is expected on your channel. In addition, make sure the design you choose is consistent with your existing branding and values. This includes fonts, color schemes, slogans, and logos.
Step 4: Upload your banner to YouTube
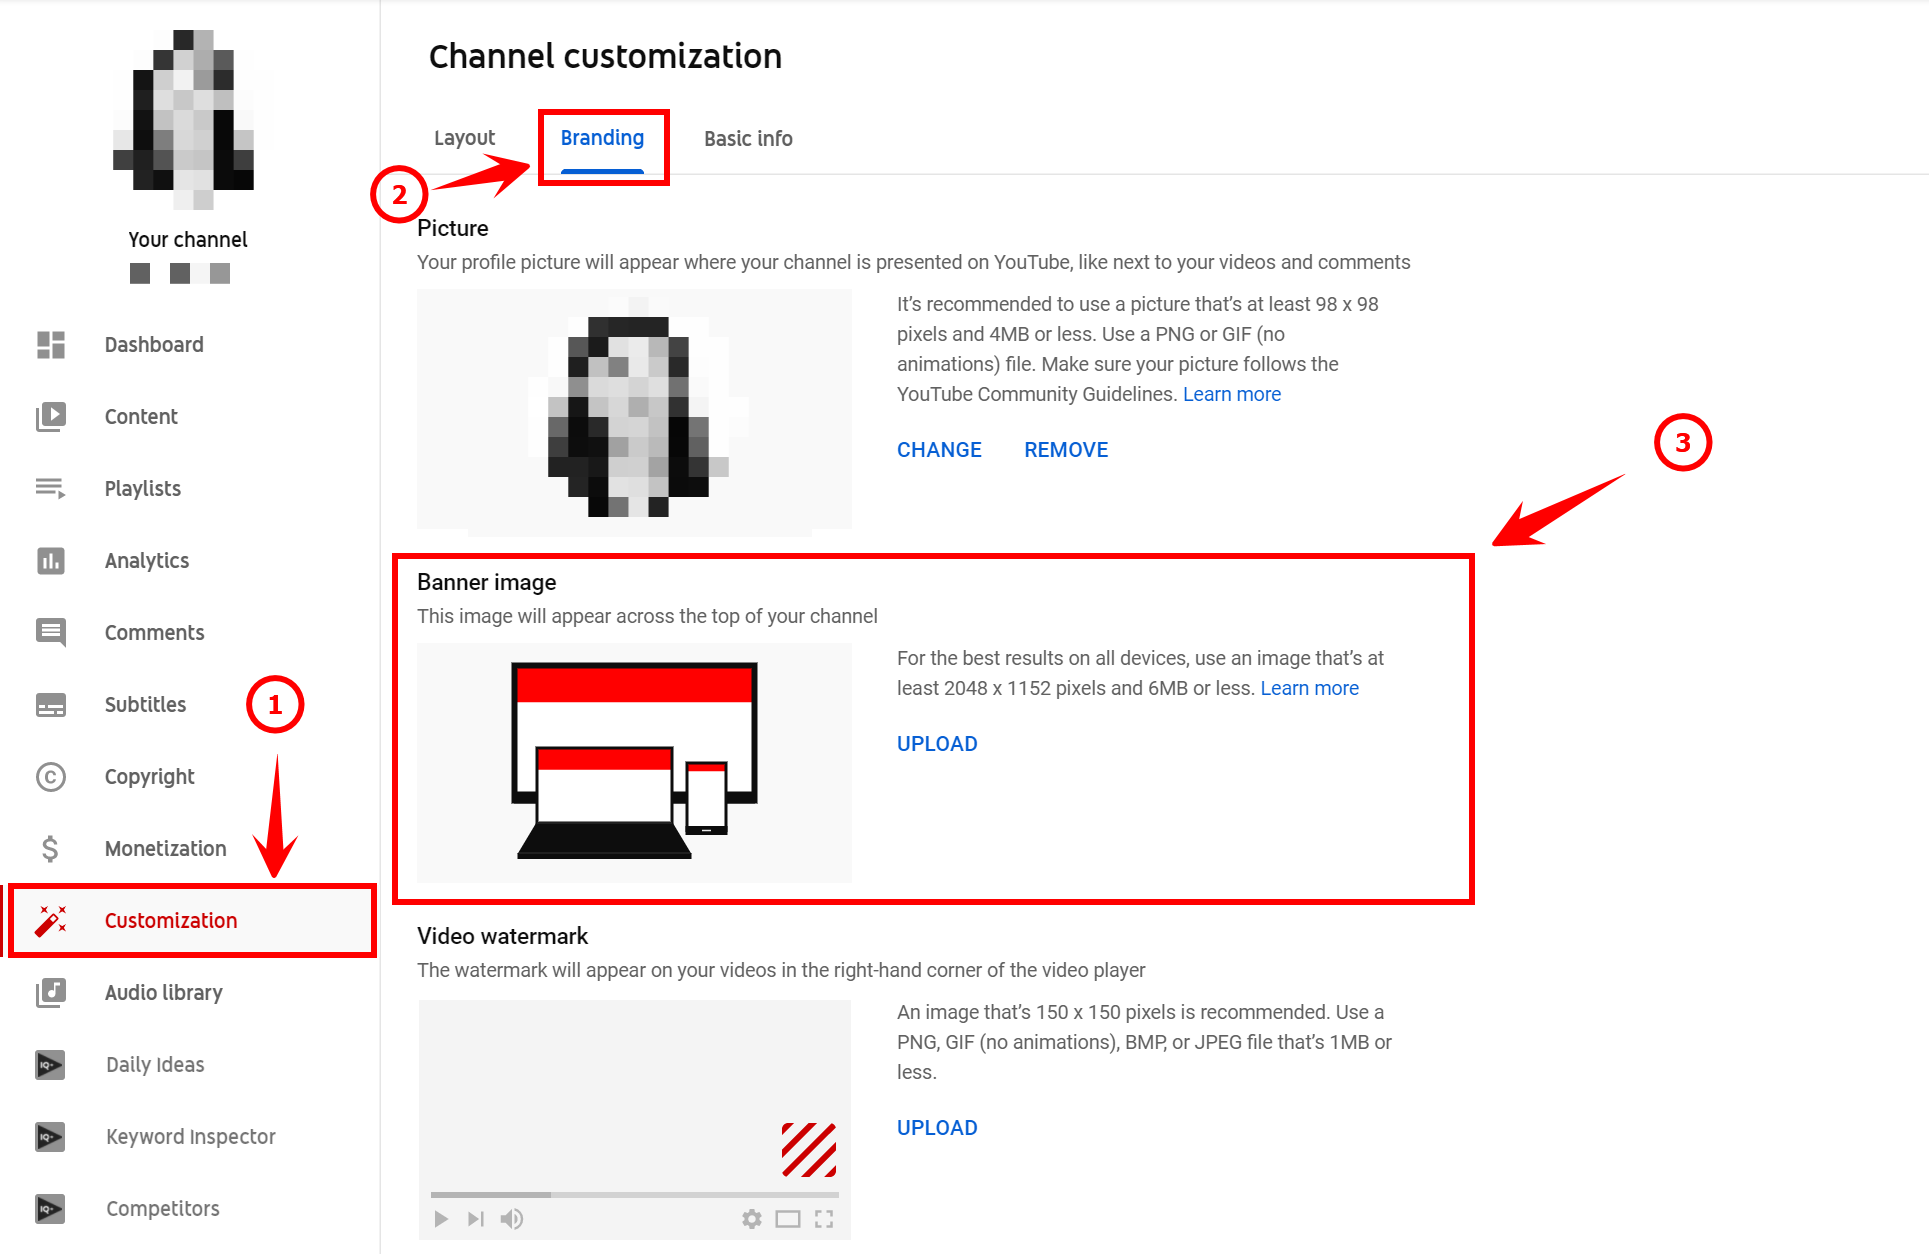
Now that your channel art is created, it is time to upload it to your channel. To do this, sign in to your YouTube account and go to the “Customization” tab in YouTube Studio.
Click the “Branding” tab to get to your channel designs. You will see options to update your profile picture, banner, and watermark.
If you do not already have a banner for your channel, click “Upload” under the “Banner image” section to get started with your new design. If you have a banner but want to change it, click “Change” and choose your new design.

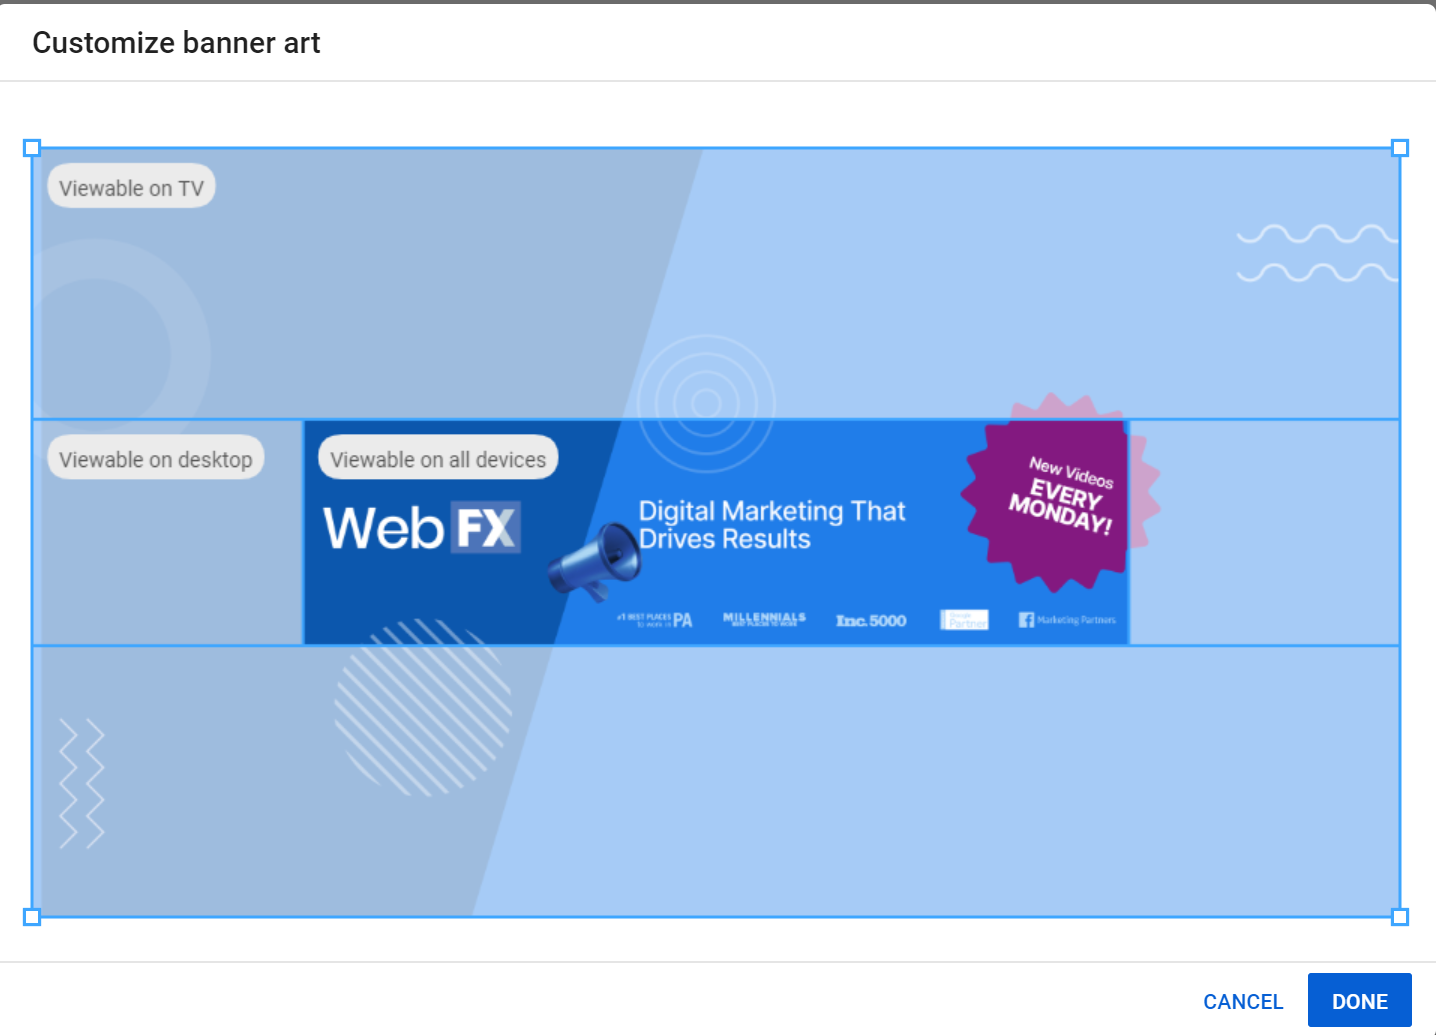
Once uploaded, you will be able to see a preview of how your channel art will appear across different devices.

You can optimize the appearance further by adjusting the crop, which allows you to choose which part of the image will be used across devices. You should then be able to click “Done” and see your newly uploaded banner on your channel.
You are now one step closer to creating your YouTube channel and uploading amazing content for your viewers.