How to Make a Timeline on Google Slides
Timelines are one of the most effective ways to present data in visual form. They also help showcase history, journeys, and projections in a very clear and straightforward way.
In this quick guide, we’ll show you how to make a timeline on Google Slides. There are a few different methods you can use to make timelines and we’ll walk you through them with simple, step-by-step instructions.
Let’s start with the easiest method.
Method 1: Use Diagrams
Google Slides has a set of pre-made timeline designs in the software. They are available through the Diagrams section of the app. Here’s how to access them.
Step 1: Create a New Slideshow Or Add a Blank Slide
If you only want to design a single slide with a timeline design, you should start with a blank slideshow. They are perfect for simple projects and printouts.
You can also add a timeline to an existing slideshow by adding a blank slide. You can add a new slide by going to the Insert menu and clicking the New Slide option. Or simply press the Control + M keys on the keyboard at once.
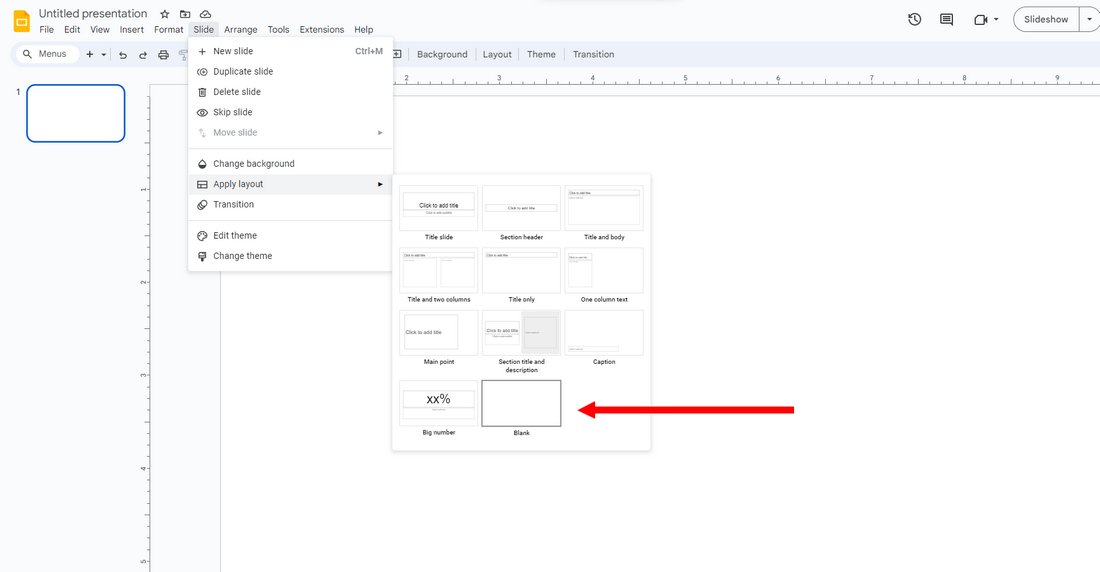
Then go to the Slide menu and then to Apply Layout. From there select the Blank option to remove all the existing elements from the slide.
Step 2: Add a Diagram
Now you can add a timeline to the blank slide you’ve just created.
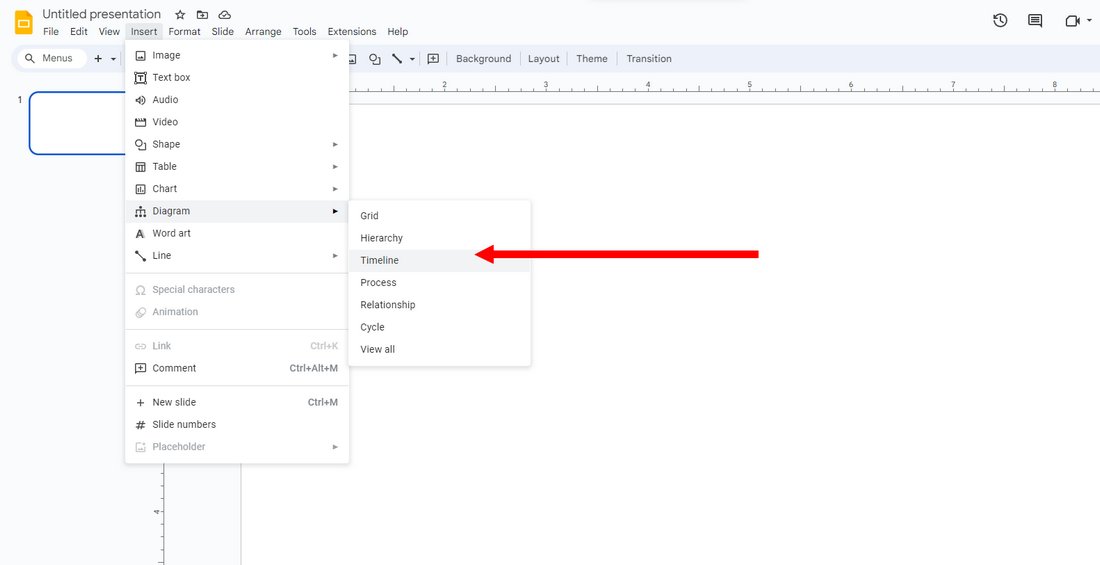
Go back to the Insert menu and navigate to the Diagrams sub-menu. Here, you will see the Timelines option. Selecting it will open the Timeline sidebar on the right-hand side.
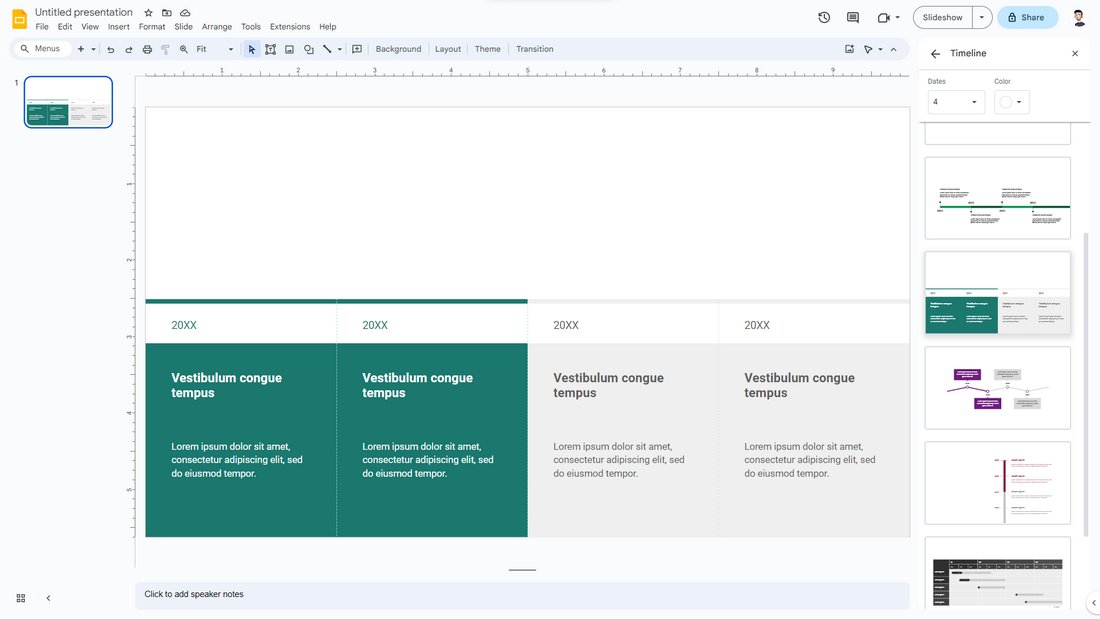
From there, you can select a timeline design that fits your project. Simply click on one design to add it to the slideshow.
Step 3: Customize
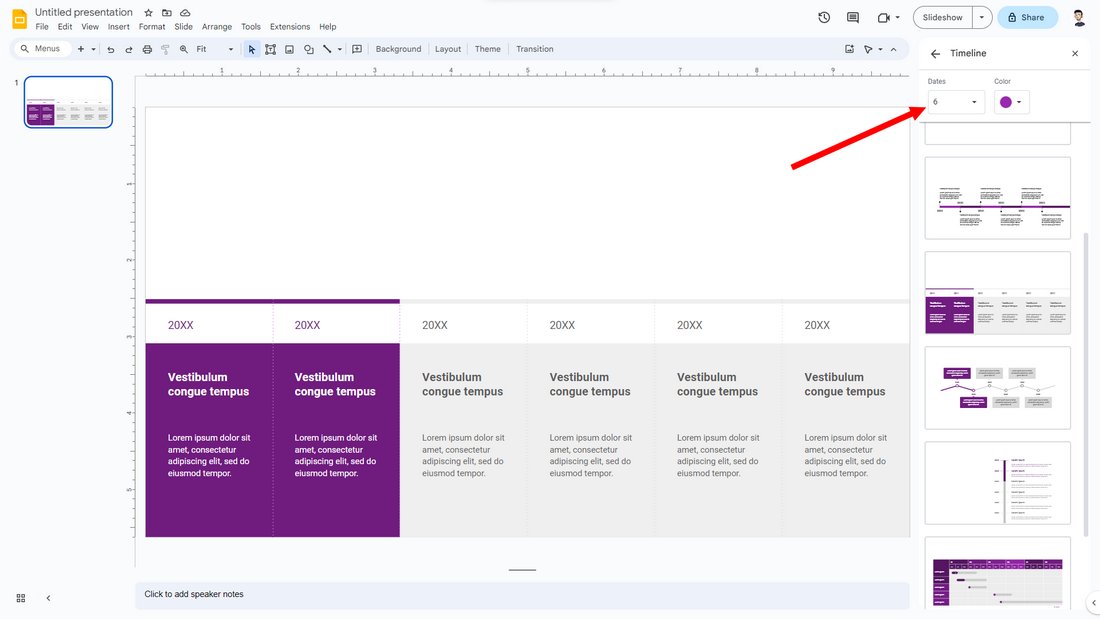
At the top of the Timeline sidebar, you’ll have options to customize the timeline. You can choose how many dates to show on the timeline design. As well as to customize the colors.
Then you can start editing the text to add your content.
This is the easiest method to make a timeline in Google Slides. However, it poses a few limitations. There are only a few timeline designs available on Google Slides by default. And those designs are not that great-looking either. Not to mention that most Google Slides users choose those timeline designs so yours will also look the same. A better alternative is to download a template from a third-party website.
Method 2: Use A Pre-Made Template
There are several benefits to using a pre-made timeline template from a third-party website. It will not only give you more design options to choose from but also make sure your timeline design looks unique.
You can check out our Google Slides timeline presentations section to find a great template for your slideshow. It includes both free and premium templates. You can also find more premium templates on Envato Elements.
Step 1: Download a Template
Select a timeline template you like and download it. The template will come as a .ZIP file.
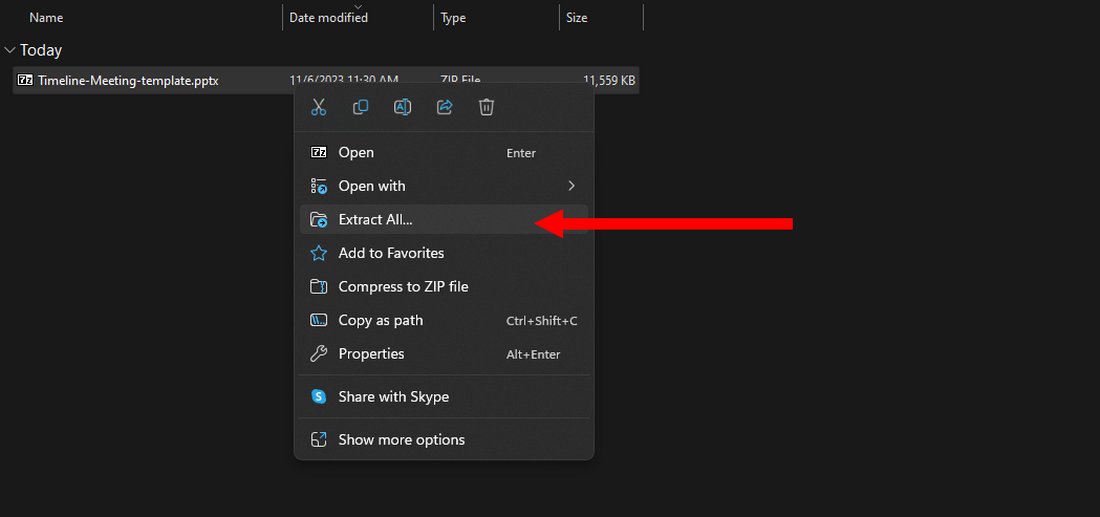
Right-click on the ZIP file to extract it. Then locate the PPTX file.
Google Slides templates come in PowerPoint format. Don’t worry, you can easily convert them to Google Slides format.
Step 2: Upload to Google Drive
Open Google Drive on your browser and find a location to upload the Timeline PPTX template.

Then simply drag and drop the file onto a Google Drive folder to upload it. Once the upload is complete, you can double-click on the PPTX file to open it in Google Slides.
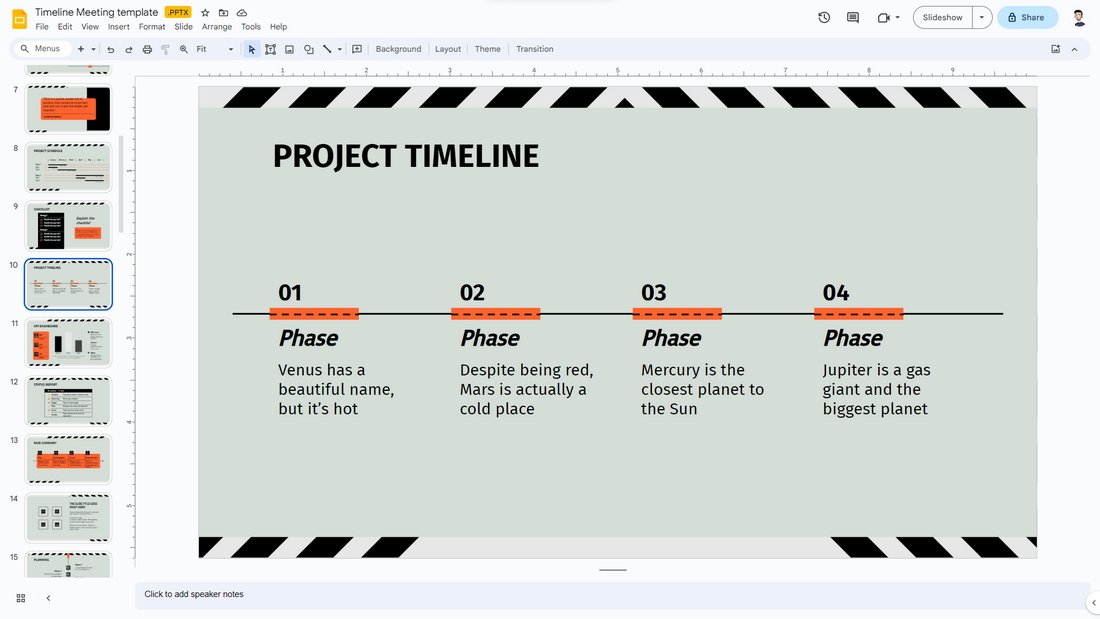
This will open the entire presentation in Google Slides. From here, you can customize this slideshow and use it as your own presentation.
Or, you can copy a specific slide over to an existing slideshow.
Step 3: Copy a Timeline Slide
If you only want to use a single timeline slide in an existing presentation, you can copy a slide from the uploaded template and add it to an existing slideshow.
To do this, simply select the slide you want to copy from the navigation panel on the left-hand side and right-click on it. Then select Copy.
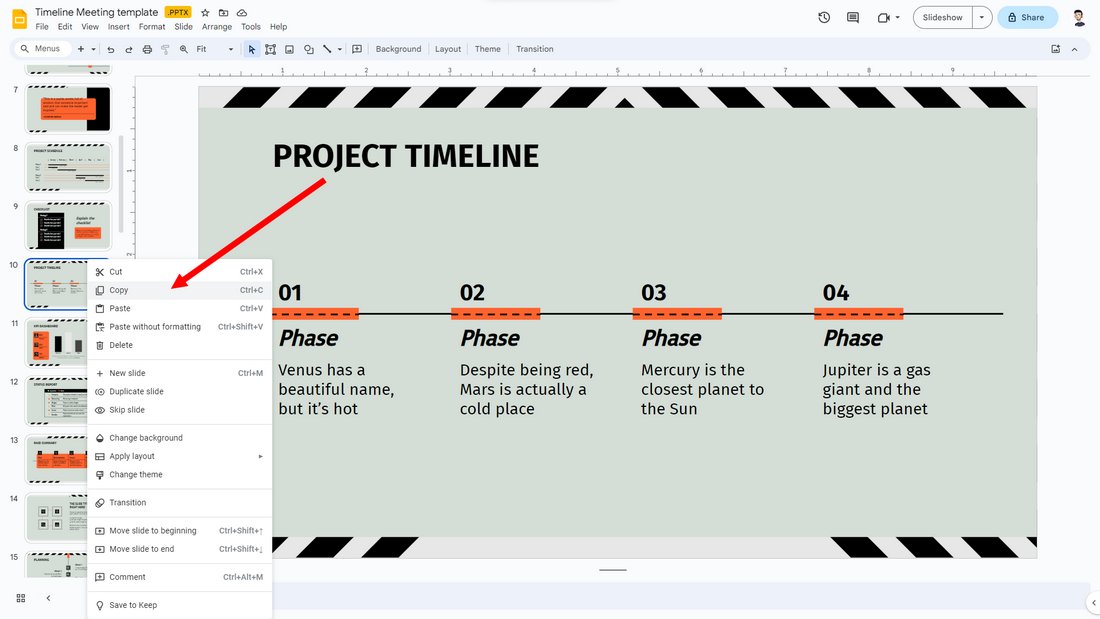
Now head over to your existing slideshow and select where you want to add the timeline slide. Then right-click and select the Paste option.
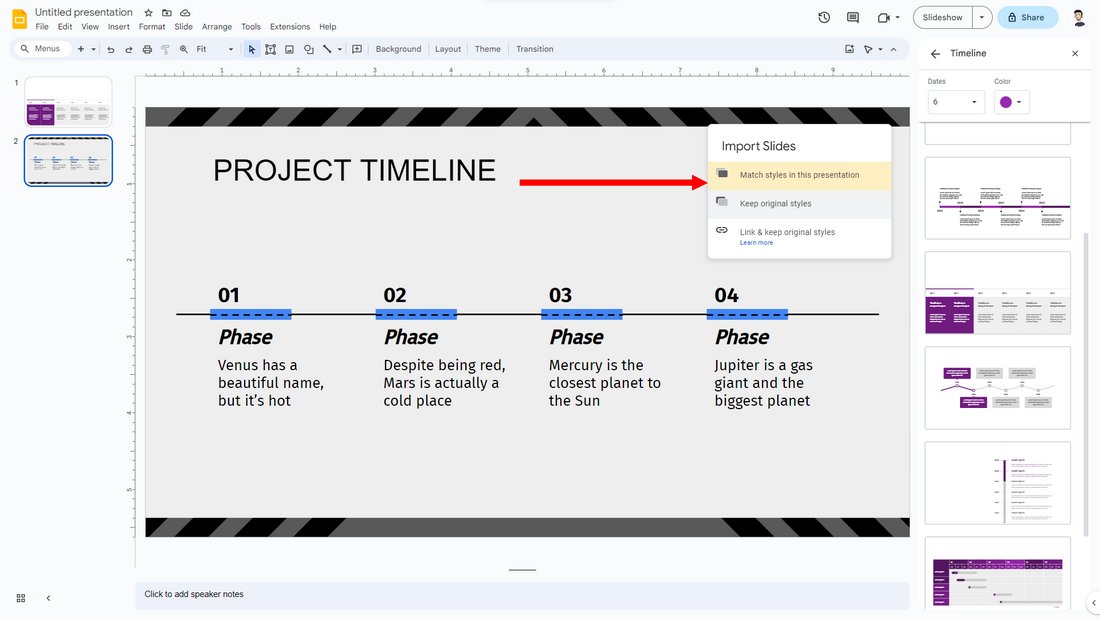
Now, you have two options to add the timeline slide. You can either add this new timeline slide to match the existing Google Slides theme design. Or you can choose to keep the original design of the slide that you’ve copied. It’s totally up to you!
Method 3: Design a Timeline from Scratch
Designing a timeline from scratch takes a lot of work. But, if you have experience in Google Slides or PowerPoint, you can easily create a custom timeline slide in Google Slides using shapes, charts, and diagram tools.
We can’t cover such an extended tutorial here. Instead, we recommend you check out this video tutorial.
It covers all the steps to help you learn how to make a custom timeline design in PowerPoint with animations. But those steps can also be used in Google Slides. The instructions are very easy to understand as well.
Conclusion
Even though using the built-in diagram tool is the easiest way to add a timeline in Google Slides, we recommend using a pre-made template to make a timeline that stands out from the crowd.
You can easily find free timeline templates from many websites. Of course, a premium template will make your presentations look more professional.
5 Tips for Designing Better Timelines
Here are a few tips you should keep in mind when designing timeline slides.
1. Use Short Sentences
A timeline is a visual presentation of data and progress. It should only include short sentences that add context to each section. Avoid adding too much information and long paragraphs.
2. Choose Contrasting Colors
Make sure the times, dates, or years in the timeline stand out from the descriptions. The easiest way to do this is to use contrasting colors that effectively highlight the different sections. Also, make sure the colors don’t affect the readability of the text.
3. Create a Consistent Look
Customize the timeline design to ensure it fits perfectly with the overall design of your slideshow. Adjust its shapes and colors to match the rest of the presentation.
4. Use Icons
You can also use icons to highlight specific parts of the timeline. It will make the design look more creative as well. This is especially useful when creating timelines for projects and product launches.
5. Use Better Fonts
Pay special attention to the readability of the timeline text. Use a font that’s easier to read, especially since timelines have small text and paragraphs.