Advanced GraphQL Usage In Gatsby Websites
Before the release of GraphQL in 2015, Representational State Transfer (REST) was the main way to interface with an API. The introduction of GraphQL was therefore a major change in software development.
As a modern static site generator, Gatsby leverages GraphQL to provide a concise methodology for bringing in and manipulating data into the framework. In this article, we will take a closer look at GraphQL and how we can integrate it into a Gatsby website by building and implementing advanced data sourcing and transformation in Gatsby. The result is a publisher’s blog that could be used by any publishing firm to share content of their authors.
What Is GraphQL?
Going by the _QL_ in its name, GraphQL is a query language combined with a set of tools created to provide flexibility and efficiency in the way we pull data from a source. With GraphQL, a client/consumer can request exactly the data it requires. The server/provider responds with a JSON response signature matching the requirements specified in the query. It allows us to express our data needs declaratively.
Why Use GraphQL?
As a static site generator, Gatsby stores static files, which makes querying data close to impossible. There are often page components that have to be dynamic like the single blog post page, so the need to pull data from a source and transform it to the needed format would arise, just like having blog posts stored in markdown files. Some plugins provide data from various sources, which leaves you with querying and transforming the required data from a source.
According to a list on gatsby.org, GraphQL is useful in Gatsby to:
- Eliminate boilerplate
- Push frontend complexities into queries
- Provide a perfect solution for the always complex data of a modern-day application
- Finally, to remove code bloat, thereby improving performance.
GraphQL Concepts
Gatsby maintains the same ideas of GraphQL as widely used; some of these concepts are:
Schema Definition Language
GraphQL SDL is a type system incorporated into GraphQL, and you can use it to create new types for your data.
We can declare a type for a country, and its attributes could include a name, continent, population, gdp and number of states.
As an example below, we have created a new type with the name of Aleem. It has hobbies which is an array of strings and are not required, but country, marital status, and posts are needed due to the ! they include, also posts references another type, Post.
type Authors {
  name: String!,
  hobbies: [String]
  country: String!
  married: Boolean!
  posts: [Post!]
}

type Post {
  title: String!
  body: String!
}

type Query {
  author: Author
}

schema {
  query: Query
}
Queries
We can use Queries to pull data from a GraphQL source.
Considering a data set like the below
{
  data: {
    author: [
      {
        hobbies: ["travelling", "reading"],
        married: false,
        country: "Nigeria",
        name: "Aleem Isiaka",
        posts: [
          {
            title: "Learn more about how to improve your Gatsby website",
          },
          {
            title: "The ultimate guide to GatsbyJS",
          },
          {
            title: "How to start a blog with only GatsbyJS",
          },
        ],
      },
    ],
  },
};
We can have a query that to fetch the country and posts from the data:
query {
  authors {
    country,
    posts {
      title
    }
  }
}
The response that we will get should contain JSON data of blog posts with just the title and nothing more:
[
  { country: “Nigeria”, posts: [{...}, {...}, {...}] },
  { country: “Tunisia”, posts: [] },
  { title: “Ghana”, posts: []},
]
We can also use arguments as conditions for a query:
query {
  authors (country: “Nigeria”) {
    country,
    posts {
      title
    }
  }
}
Which should return
[
  { country: “Nigeria”, posts: [{...}, {...}, {...}] }
]
Nested fields can also be queried, like the posts with the Post type, you can ask for just the titles:
query {
  authors(country: ‘Nigeria’) {
    country,
    posts {
      title
    }
  }
}
And it should return any Author type matching Nigeria returning the country and posts array containing objects with just the title field.
Gatsby with GraphQL
To avoid the overhead of having a server/service that serves data that GraphQL can transform, Gatsby executes GraphQL queries at build time. Data is provided to the components during the build process, making them readily available inside the browser without a server.
Still, Gatsby can run as a server that can be queried by other GraphQL clients, like GraphiQL, in a browser.
Gatsby Ways Of Interacting With GraphQL
There are two places where Gatsby can interact with GraphQL, through a gatsby-node.js API file, and through page components.
gatsby-node.js
The createPage API can be configured as a function which will receive a graphql helper as part of the items in the first argument passed to the function.
// gatsby-node.js source: https://www.gatsbyjs.org/docs/node-apis/#createPages
exports.createPages = async ({ graphql, actions }) => {
  const result = await graphql(query loadPagesQuery ($limit: Int!) {
      allMarkdownRemark(limit: $limit) {
        edges {
          node {
            frontmatter {
              slug
            }
          }
        }
      }
    })
}
In the above code, we have used the GraphQL helper to fetch markdown files from Gatsby’s data layer. And we can inject this to create a page and modify existing data inside the Gatsby data layer.
Page Components
Page components inside of /pages directory or templates rendered by the createPage API action can import graphql from the gatsby module and export a pageQuery. In turn, Gatsby would inject a new prop data into the props of the page component containing the resolved data.
import React from "react";
import { graphql } from "gatsby";

const Page = props => {
  return {JSON.stringify(props.data)};
};

export const pageQuery = graphql`
  query { ... }
`;

export default Page;
In Other Components
Other components can import graphql and StaticQuery components from the gatsby module, render the <StaticQuery/> passing query props that implement the Graphql helper and render to get the returned data.
import React from "react";
import { StaticQuery, graphql } from "gatsby";

const Brand = props => {
  return (
    <div>
      <h1>{data.site.siteMetadata.title}</h1>
    </div>
  );
};

const Navbar = props => {
  return (
    <StaticQuery
      query={graphql`
        query {
          site {
            siteMetadata {
              title
            }
          }
        }
      `}
      render={data => <Brand data={data} {...props} />}
    />
  );
};

export default Navbar;
Building A Modern And Advanced Gatsby Publishing Blog
In this section we will walk through a process of creating a blog that supports tagging, categorization, pagination and grouping articles by authors. We will use plugins of Gatsby’s ecosystem to bring in some features and use logics in GraphQL queries to make a publisher’s blog that is ready for multiple author publications.
The final version of the blog we will build can be found here, also the code is hosted on Github.
Initializing The Project
Like any Gatsby website, we initialize from a starter, here we will be using the advanced starter but modified to cater for our use case.
First clone this Github repo, change the working branch to the dev-init, and then run npm run develop from the project’s folder to start the development server making the site available at http://localhost:8000.
git clone git@github.com:limistah/modern-gatsby-starter.git
cd modern-gatsby-starter
git checkout dev-init
npm install
npm run develop
Visiting http://localhost:8000 will show the default homepage for this branch.
Creating Blog Posts Content
Some post content included in the project repository could be accessed at the dev-blog-content branch. The organization of the content directory looks like this /content/YYYY_MM/DD.md, which group posts by the created month of a year.
The blog post content has title, date, author, category, tags as its frontmatter, which we will use to distinguish a post and do some further processing on, while the rest of the content is the body of the post.
title: "Bold Mage"
date: "2020-07-12"
author: "Tunde Isiaka"
category: "tech"
tags:
  - programming
  - stuff
  - Ice cream
  - other
---

# Donut I love macaroon chocolate bar

Oat cake marshmallow lollipop fruitcake I love jelly-o. Gummi bears cake wafer chocolate bar pie. Marshmallow pastry powder chocolate cake candy chupa chups. Jelly beans powder soufflé biscuit pie macaroon chocolate cake. Marzipan lemon drops chupa chups sweet cookie sesame snaps jelly halvah.
Displaying Post Content
Before we can render our Markdown posts in HTML, we have to do some processing. First, loading the files into the Gatsby storage, parsing the MD to HTML, linking image dependencies, and likes. To ease this, we will use a host of plugins by the Gatsby ecosystem.
We can use these plugins by updating the gatsby-config.js at the root of the project to look like this:
module.exports = {
  siteMetadata: {},
  plugins: [
    {
      resolve: "gatsby-source-filesystem",
      options: {
        name: "assets",
        path: `${__dirname}/static/`,
      },
    },
    {
      resolve: "gatsby-source-filesystem",
      options: {
        name: "posts",
        path: `${__dirname}/content/`,
      },
    },
    {
      resolve: "gatsby-transformer-remark",
      options: {
        plugins: [
          {
            resolve: `gatsby-remark-relative-images`,
          },
          {
            resolve: "gatsby-remark-images",
            options: {
              maxWidth: 690,
            },
          },
          {
            resolve: "gatsby-remark-responsive-iframe",
          },
          "gatsby-remark-copy-linked-files",
          "gatsby-remark-autolink-headers",
          "gatsby-remark-prismjs",
        ],
      },
    },
  ],
};
We have instructed gatsby to include the plugins to assist us in carrying out some actions, notably pulling files from the /static folder for static files and /content for our blog posts. Also, we have included a remark transformer plugin to transform all files ending with .md or .markdown into a node with all the fields of remark for rendering markdown as HTML.
Lastly, we included plugins in operating on the nodes generated by gatsby-transformer-remark.
Implementing The gatsby-config.js API File
Moving forward, inside of gatsby-node.js in the project root, we can export a function named createPage and have the content of the function to use the graphQL helper to pull nodes from the content layer of GatsbyJS.
The first update to this page would include ensuring that we have a slug set on the MarkDown remark nodes. We will listen to the onCreateNode API and get the node created to determine if it is a type of MarkdownRemark before we update the node to include a slug and date accordingly.
const path = require("path");
const _ = require("lodash");
const moment = require("moment");

const config = require("./config");

// Called each time a new node is created
exports.onCreateNode = ({ node, actions, getNode }) => {
  // A Gatsby API action to add a new field to a node
  const { createNodeField } = actions;
  // The field that would be included
  let slug;
  // The currently created node is a MarkdownRemark type
  if (node.internal.type === "MarkdownRemark") {
    // Recall, we are using gatsby-source-filesystem?
    // This pulls the parent(File) node,
    // instead of the current MarkdownRemark node
    const fileNode = getNode(node.parent);
    const parsedFilePath = path.parse(fileNode.relativePath);
    if (
      Object.prototype.hasOwnProperty.call(node, "frontmatter") &&
      Object.prototype.hasOwnProperty.call(node.frontmatter, "title")
    ) {
      // The node is a valid remark type and has a title,
      // Use the title as the slug for the node.
      slug = /${_.kebabCase(node.frontmatter.title)};
    } else if (parsedFilePath.name !== "index" && parsedFilePath.dir !== "") {
      // File is in a directory and the name is not index
      // e.g content/2020_02/learner/post.md
      slug = /${parsedFilePath.dir}/${parsedFilePath.name}/;
    } else if (parsedFilePath.dir === "") {
      // File is not in a subdirectory
      slug = /${parsedFilePath.name}/;
    } else {
      // File is in a subdirectory, and name of the file is index
      // e.g content/2020_02/learner/index.md
      slug = /${parsedFilePath.dir}/;
    }

    if (Object.prototype.hasOwnProperty.call(node, "frontmatter")) {
      if (Object.prototype.hasOwnProperty.call(node.frontmatter, "slug"))
        slug = /${_.kebabCase(node.frontmatter.slug)};
      if (Object.prototype.hasOwnProperty.call(node.frontmatter, "date")) {
        const date = moment(new Date(node.frontmatter.date), "DD/MM/YYYY");
        if (!date.isValid)
          console.warn(WARNING: Invalid date., node.frontmatter);
        // MarkdownRemark does not include date by default

        createNodeField({ node, name: "date", value: date.toISOString() });
      }
    }
    createNodeField({ node, name: "slug", value: slug });
  }
};
The Post Listing
At this point, we can implement the createPages API to query for all markdowns and create a page with the path as the slug we have created above. See it on Github.
//gatsby-node.js
// previous code

// Create Pages Programatically!
exports.createPages = async ({ graphql, actions }) => {
  // Pulls the createPage action from the Actions API
  const { createPage } = actions;

  // Template to use to render the post converted HTML
  const postPage = path.resolve("./src/templates/singlePost/index.js");

  // Get all the markdown parsed through the help of gatsby-source-filesystem and gatsby-transformer-remark
  const allMarkdownResult = await graphql({
      allMarkdownRemark {
        edges {
          node {
            fields {
              slug
            }
            frontmatter {
              title
              tags
              category
              date
              author
            }
          }
        }
      }
    });

  // Throws if any error occur while fetching the markdown files
  if (allMarkdownResult.errors) {
    console.error(allMarkdownResult.errors);
    throw allMarkdownResult.errors;
  }

  // Items/Details are stored inside of edges
  const postsEdges = allMarkdownResult.data.allMarkdownRemark.edges;

  // Sort posts
  postsEdges.sort((postA, postB) => {
    const dateA = moment(
      postA.node.frontmatter.date,
      siteConfig.dateFromFormat
    );

    const dateB = moment(
      postB.node.frontmatter.date,
      siteConfig.dateFromFormat
    );

    if (dateA.isBefore(dateB)) return 1;
    if (dateB.isBefore(dateA)) return -1;

    return 0;
  });

  // Pagination Support for posts
  const paginatedListingTemplate = path.resolve(
    "./src/templates/paginatedListing/index.js"
  );

  const { postsPerPage } = config;
  if (postsPerPage) {
    // Get the number of pages that can be accommodated
    const pageCount = Math.ceil(postsEdges.length / postsPerPage);

    // Creates an empty array
    Array.from({ length: pageCount }).forEach((value, index) => {
      const pageNumber = index + 1;
      createPage({
        path: index === 0 ? /posts : /posts/${pageNumber}/,
        component: paginatedListingTemplate,
        context: {
          limit: postsPerPage,
          skip: index * postsPerPage,
          pageCount,
          currentPageNumber: pageNumber,
        },
      });
    });
  } else {
    // Load the landing page instead
    createPage({
      path: /,
      component: landingPage,
    });
  }
};
In the createPages function, we use the graphql helper provided by Gatsby to query data from the content layer. We used a standard Graphql query to do this and passed a query to get content from allMarkdownRemark type. Then moved forward to sort the posts by the created date.
We then pulled a postPerPage property from an imported config object, which is used to chunk down the total posts to the specified number of posts for a single page.
To create a listing page that supports pagination, we need to pass in the limit, pageNumber, and the number of pages to skip to the component that would be rendering the list. We are achieving this using the context property of the createPage config object. We will be accessing these properties from the page to make another graphql query to fetch posts within the limit.
We can also notice that we use the same template component for the listing, and only the path is changing utilizing the index of the chunk array we had defined ahead. Gatsby will pass the necessary data for a given URL matching /{chunkIndex}, so we can have / for the first ten posts, and /2 for the next ten posts.

Rendering Post Listing
The component rendering these pages could be found at src/templates/singlePost/index.js of the project folder. It also exports a graphql helper which pulls the limit and page query parameter it received from the createPages process to query gatsby for posts within the range of the current page.
import React from "react";
import { graphql, Link } from "gatsby";
import Layout from "../../layout";
import PostListing from "../../components/PostListing";
import "./index.css";

const Pagination = ({ currentPageNum, pageCount }) => {
  const prevPage = currentPageNum - 1 === 1 ? "/" : /${currentPageNum - 1}/;
  const nextPage = /${currentPageNum + 1}/;
  const isFirstPage = currentPageNum === 1;
  const isLastPage = currentPageNum === pageCount;

  return (
    <div className="paging-container">
      {!isFirstPage && <Link to={prevPage}>Previous</Link>}
      {[...Array(pageCount)].map((_val, index) => {
        const pageNum = index + 1;
        return (
          <Link
            key={listing-page-${pageNum}}
            to={pageNum === 1 ? "/" : /${pageNum}/}
          >
            {pageNum}
          </Link>
        );
      })}
      {!isLastPage && <Link to={nextPage}>Next</Link>}
    </div>
  );
};

export default (props) => {
  const { data, pageContext } = props;
  const postEdges = data.allMarkdownRemark.edges;
  const { currentPageNum, pageCount } = pageContext;

  return (
    <Layout>
      <div className="listing-container">
        <div className="posts-container">
          <PostListing postEdges={postEdges} />
        </div>

        <Pagination pageCount={pageCount} currentPageNum={currentPageNum} />
      </div>
    </Layout>
  );
};

/* eslint no-undef: "off" */
export const pageQuery = graphqlquery ListingQuery($skip: Int!, $limit: Int!) {
    allMarkdownRemark(
      sort: { fields: [fields___date], order: DESC }
      limit: $limit
      skip: $skip
    ) {
      edges {
        node {
          fields {
            slug
            date
          }
          excerpt
          timeToRead
          frontmatter {
            title
            tags
            author
            category
            date
          }
        }
      }
    }
  };
The Post Page
To view the content of a page, we need to programmatically create the page inside the gatsby-node.js API File. First, we have to define a new component to render the content with, for this, we have src/templates/singlePost/index.jsx.
import React from "react";
import { graphql, Link } from "gatsby";
import _ from "lodash";
import Layout from "../../layout";
import "./b16-tomorrow-dark.css";
import "./index.css";
import PostTags from "../../components/PostTags";

export default class PostTemplate extends React.Component {
  render() {
    const { data, pageContext } = this.props;
    const { slug } = pageContext;
    const postNode = data.markdownRemark;
    const post = postNode.frontmatter;
    if (!post.id) {
      post.id = slug;
    }

    return (
      <Layout>
        <div>
          <div>
            <h1>{post.title}</h1>
            <div className="category">
              Posted to{" "}
              <em>
                <Link
                  key={post.category}
                  style={{ textDecoration: "none" }}
                  to={/category/${_.kebabCase(post.category)}}
                >
                  <a>{post.category}</a>
                </Link>
              </em>
            </div>
            <PostTags tags={post.tags} />
            <div dangerouslySetInnerHTML={{ __html: postNode.html }} />
          </div>
        </div>
      </Layout>
    );
  }
}

/* eslint no-undef: "off" */
export const pageQuery = graphqlquery BlogPostBySlug($slug: String!) {
    markdownRemark(fields: { slug: { eq: $slug } }) {
      html
      timeToRead
      excerpt
      frontmatter {
        title
        date
        category
        tags
      }
      fields {
        slug
        date
      }
    }
  };
Again, we are using a graphQL helper to pull out a page by a slug query that would be sent to the page through the createPages API.
Next, we should have the below code added to gatsby-node.js at the end of the createPages API function.
// Template to use to render the post converted HTML
  const postPage = path.resolve("./src/templates/singlePost/index.jsx");

// Loops through all the post nodes
postsEdges.forEach((edge, index) => {
  // Create post pages
  createPage({
    path: edge.node.fields.slug,
    component: postPage,
    context: {
      slug: edge.node.fields.slug,
    },
  });
});
And we could visit ‘/{pageSlug}’ and have it render the content of the markdown file for that page as HTML. As an example, http://localhost:8000/the-butterfly-of-the-edge should load the converted HTML for the markdown at: content/2020_05/01.md, similar to all valid slugs. Great!

Rendering Categories And Tags
The single post template component has a link to a page in the format /categories/{categoryName} to list posts with similar categories.
We can first catch all the categories and tags as we build the single post page in the gatsby-node.js file, then create pages for each caught category/tag passing the category/tag name.
A modification to the section for creating single post page in the gatsby-node.js looks like this:
const categorySet = new Set();
const tagSet = new Set();


const categoriesListing = path.resolve(
  "./src/templates/categoriesListing/index.jsx"
);
// Template to use to render posts based on categories
const tagsListingPage = path.resolve("./src/templates/tagsListing/index.jsx");

// Loops through all the post nodes
postsEdges.forEach((edge, index) => {
  // Generate a list of categories
  if (edge.node.frontmatter.category) {
    categorySet.add(edge.node.frontmatter.category);
  }

  // Generate a list of tags
  if (edge.node.frontmatter.tags) {
    edge.node.frontmatter.tags.forEach((tag) => {
      tagSet.add(tag);
    });
  }

  // Create post pages
  createPage({
    path: edge.node.fields.slug,
    component: postPage,
    context: {
      slug: edge.node.fields.slug,
    },
  });
});
And inside the component for listing posts by tags, we can have the pageQuery export query graphql for posts, including that tag in its tags list. We will use the filter function of graphql and the $in operator to achieve this:
// src/templates/tagsListing/

import React from "react";
import { graphql } from "gatsby";
import Layout from "../../layout";
import PostListing from "../../components/PostListing";

export default ({ pageContext, data }) => {
  const { tag } = pageContext;
  const postEdges = data.allMarkdownRemark.edges;
  return (
    <Layout>
      <div className="tag-container">
        <div>Posts posted with {tag}</div>
        <PostListing postEdges={postEdges} />
      </div>
    </Layout>
  );
};

/* eslint no-undef: "off" */
export const pageQuery = graphql`
  query TagPage($tag: String) {
    allMarkdownRemark(
      limit: 1000
      sort: { fields: [fields___date], order: DESC }
      filter: { frontmatter: { tags: { in: [$tag] } } }
    ) {
      totalCount
      edges {
        node {
          fields {
            slug
            date
          }
          excerpt
          timeToRead
          frontmatter {
            title
            tags
            author
            date
          }
        }
      }
    }
  }
`;
And we have the same process in the categories listing component, and the difference is that we only need to find where the categories match precisely with what we pass to it.
// src/templates/categoriesListing/index.jsx
import React from "react";
import { graphql } from "gatsby";
import Layout from "../../layout";
import PostListing from "../../components/PostListing";

export default ({ pageContext, data }) => {
  const { category } = pageContext;
  const postEdges = data.allMarkdownRemark.edges;
  return (
    <Layout>
      <div className="category-container">
        <div>Posts posted to {category}</div>
        <PostListing postEdges={postEdges} />
      </div>
    </Layout>
  );
};

/* eslint no-undef: "off" */
export const pageQuery = graphql`
  query CategoryPage($category: String) {
    allMarkdownRemark(
      limit: 1000
      sort: { fields: [fields___date], order: DESC }
      filter: { frontmatter: { category: { eq: $category } } }
    ) {
      totalCount
      edges {
        node {
          fields {
            slug
            date
          }
          excerpt
          timeToRead
          frontmatter {
            title
            tags
            author
            date
          }
        }
      }
    }
  }
`;
Noticeable, inside both of the tags and categories components, we render links to the single post page for further reading of a post’s content.

Adding Support For Authors
To support multiple authors, we have to make some modifications to our post content and introduce new concepts.
Load JSON Files
First, we should be able to store the content of authors in a JSON file like this:
{
  "mdField": "aleem",
  "name": "Aleem Isiaka",
  "email": "aleem.isiaka@gmail.com",
  "location": "Lagos, Nigeria",
  "avatar": "https://api.adorable.io/avatars/55/abott@adorable.png",
  "description": "Yeah, I like animals better than people sometimes... Especially dogs. Dogs are the best. Every time you come home, they act like they haven’t seen you in a year. And the good thing about dogs... is they got different dogs for different people.",
  "userLinks": [
    {
      "label": "GitHub",
      "url": "https://github.com/limistah/modern-gatsby-starter",
      "iconClassName": "fa fa-github"
    },
    {
      "label": "Twitter",
      "url": "https://twitter.com/limistah",
      "iconClassName": "fa fa-twitter"
    },
    {
      "label": "Email",
      "url": "mailto:aleem.isiaka@gmail.com",
      "iconClassName": "fa fa-envelope"
    }
  ]
}
We would be storing them in an author’s directory in the root of our project as /authors. Notice that the author JSON has mdField that would be the unique identifier to the author field we will be introducing to the markdown blog content; this ensures that authors can have multiple profiles.
Next, we have to update gatsby-config.js plugins instructing gatsby-source-filesystem to load the content from the authors/ directory into the Files Node.
// gatsby-config.js
{
  resolve: `gatsby-source-filesystem`,
  options: {
    name: "authors",
    path: `${__dirname}/authors/`,
  },
}
Lastly, we will install gatsby-transform-json to transform JSON files created for easy handling and proper processing.
npm install gatsby-transformer-json --save
And include it inside the plugins of gatsby-config.js,
module.exports = {
  plugins: [
    // ...other plugins
    `gatsby-transformer-json`
  ],
};
Querying And Creating Authors Page
To begin with, we need to query all of the authors in our authors/ directory inside of gatsby-config.js that have been loaded into the data layer, we should append the code below to createPages API function
const authorsListingPage = path.resolve(
  "./src/templates/authorsListing/index.jsx"
);

const allAuthorsJson = await graphql(`
  {
    allAuthorsJson {
      edges {
        node {
          id
          avatar
          mdField
          location
          name
          email
          description
          userLinks {
            iconClassName
            label
            url
          }
        }
      }
    }
  }
`);

const authorsEdges = allAuthorsJson.data.allAuthorsJson.edges;
authorsEdges.forEach((author) => {
  createPage({
    path: `/authors/${_.kebabCase(author.node.mdField)}/`,
    component: authorsListingPage,
    context: {
      authorMdField: author.node.mdField,
      authorDetails: author.node,
    },
  });
});
In this snippet, we are pulling all the authors from the allAuthorsJson type, then, calling forEach on the nodes to create a page where we pass the mdField to distinguish the author and the authorDetails for full information about the author.
Rendering Author’s Posts
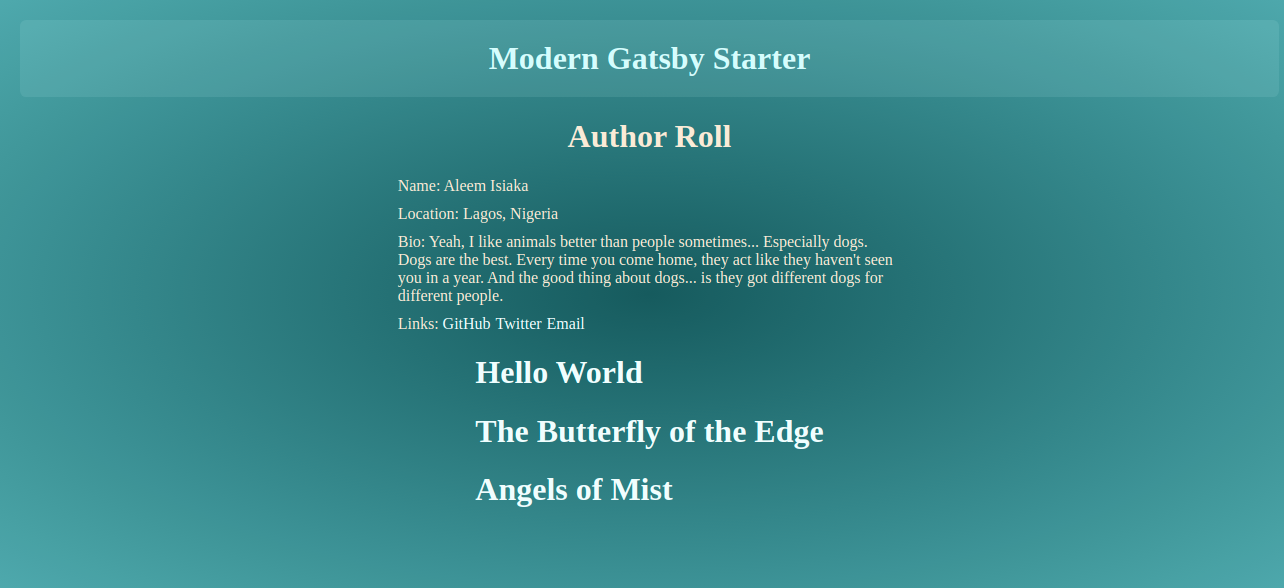
In the component rendering the page which could be found at src/templates/authorsListing/index.jsx, we have the below content for the file
import React from "react";
import { graphql } from "gatsby";
import Layout from "../../layout";
import PostListing from "../../components/PostListing";
import AuthorInfo from "../../components/AuthorInfo";

export default ({ pageContext, data }) => {
  const { authorDetails } = pageContext;
  const postEdges = data.allMarkdownRemark.edges;
  return (
    <Layout>
      <div>
        <h1 style={{ textAlign: "center" }}>Author Roll</h1>
        <div className="category-container">
          <AuthorInfo author={authorDetails} />
          <PostListing postEdges={postEdges} />
        </div>
      </div>
    </Layout>
  );
};

/* eslint no-undef: "off" */
export const pageQuery = graphql`
  query AuthorPage($authorMdField: String) {
    allMarkdownRemark(
      limit: 1000
      sort: { fields: [fields___date], order: DESC }
      filter: { frontmatter: { author: { eq: $authorMdField } } }
    ) {
      totalCount
      edges {
        node {
          fields {
            slug
            date
          }
          excerpt
          timeToRead
          frontmatter {
            title
            tags
            author
            date
          }
        }
      }
    }
  }
`;
In the above code, we exported the pageQuery like we do, to create a GraphQL query to fetch posts matched by an author, we are using the $eq operator to achieve this are generating links to a single post page for further reading.
Conclusion
In Gatsby, we can query any data that exists inside of its data access layer with the use of GraphQL query and pass variables around using some constructs defined by the architecture of Gatsby. we have seen how we could use the graphql helper in various places and understand widely used patterns for querying data in Gatsby’s websites with the help of GraphQL.
GraphQL is very powerful and could do other things like data mutation on a server. Gatsby does not need to update its data at runtime, so it does not support the mutation feature of GraphQL.
GraphQL is a great technology, and Gatsby makes it very interesting to use in their framework.
References
- Gatsby support for GraphQL
- Why Gatsby uses GraphQL
- GraphQL concepts in Gatsby
- How To GraphQL: Basic Concepts
- Schema Definition Language In GraphQL
- An Introduction To GraphQL
- Gatsby Advanced Starter