How to Uninstall Fonts on Windows & Mac
It’s easy to get lost in an ocean of fonts when you keep downloading and installing fonts on your computer.
Let’s face it, as a designer, you can’t help but get new fonts at every chance you get. You’ll never stop hoarding fonts and that’s okay too. Because we all have the same addiction.
There’s no such thing as having too many fonts. But you should learn to organize your fonts. Otherwise, it will start affecting your work and productivity.
In this quick guide, we’ll show you how to uninstall fonts that you never really use to make space for shiny new fonts.
Importance of Organizing Fonts
Imagine working on a design project and you’re crafting a great title. You remember that cool font you used a while back which would be a perfect fit for this title. You start browsing the fonts list but can’t find it.
We’ve all been there. This happens when you keep installing new fonts and forgets to organize. Don’t let it affect your productivity.
It’s okay to get rid of the fonts that you never use. As long as you keep them backed up in a separate folder, you can always install them again if you ever need to.
When uninstalling fonts, you should try to follow the Marie Kondo method. If a font no longer sparks joy, just get rid of it.
How to Uninstall Fonts on Windows
There are multiple ways you can uninstall fonts on Windows. We’ll start with the easiest method.
Note: Before deleting any fonts, we recommend that you backup your fonts. See method 3 to find out how to backup fonts.
Method 1: Delete From Font Settings Page
If you’re using Windows 10, you can easily delete fonts directly from the fonts page. Here’s how.
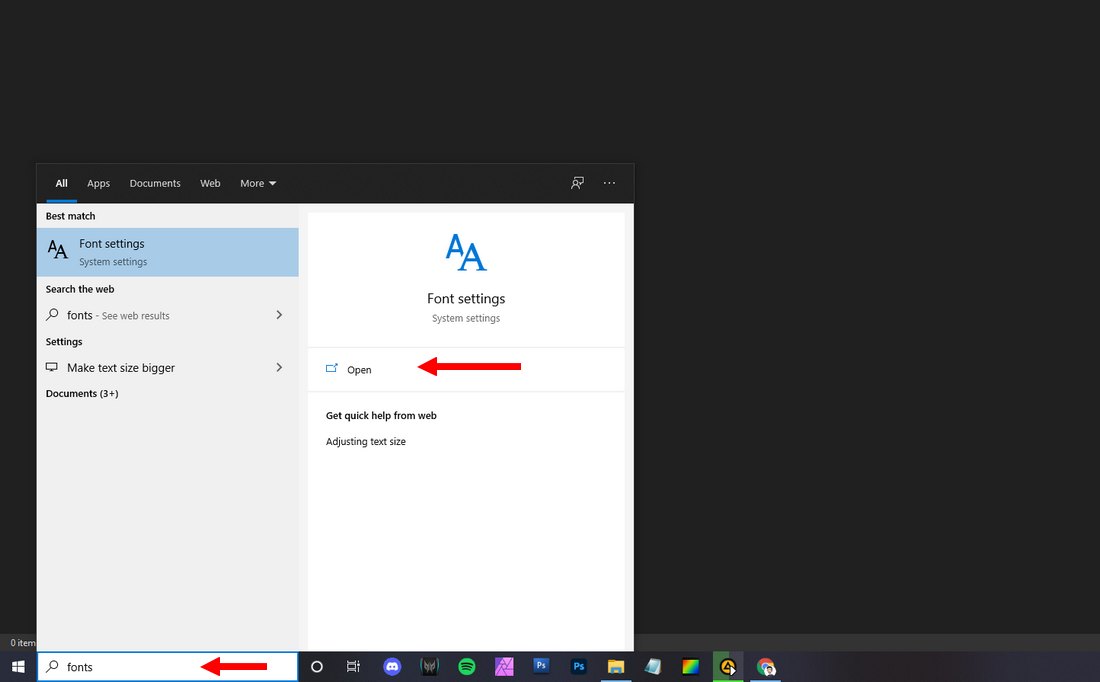
On the search bar, type “fonts” and open the Font Settings page.
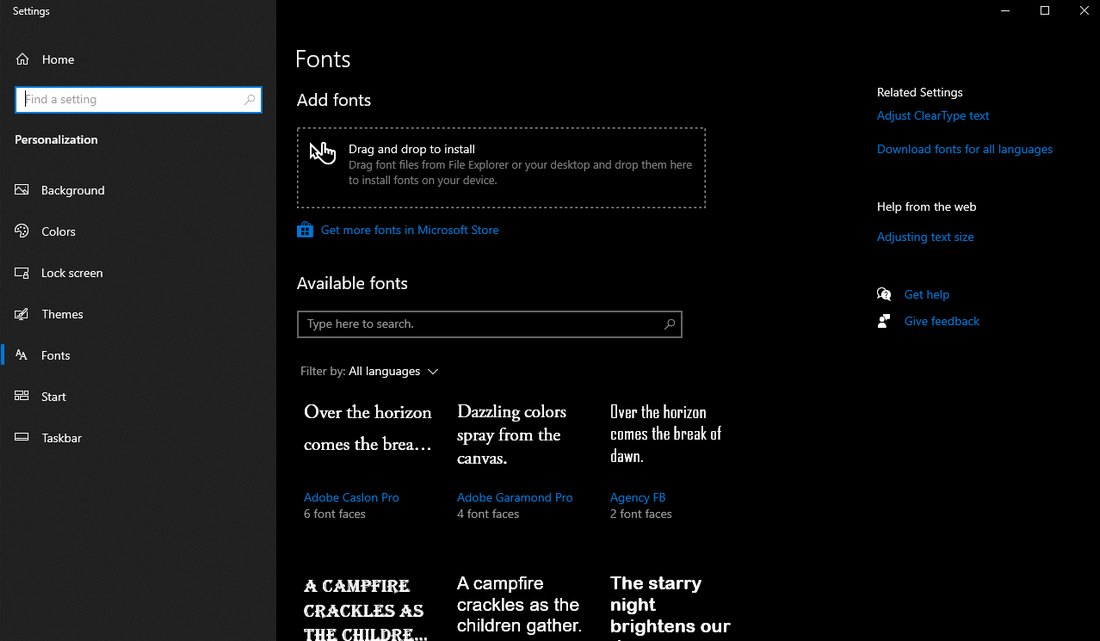
From there, find the font you want to delete and open the font page.
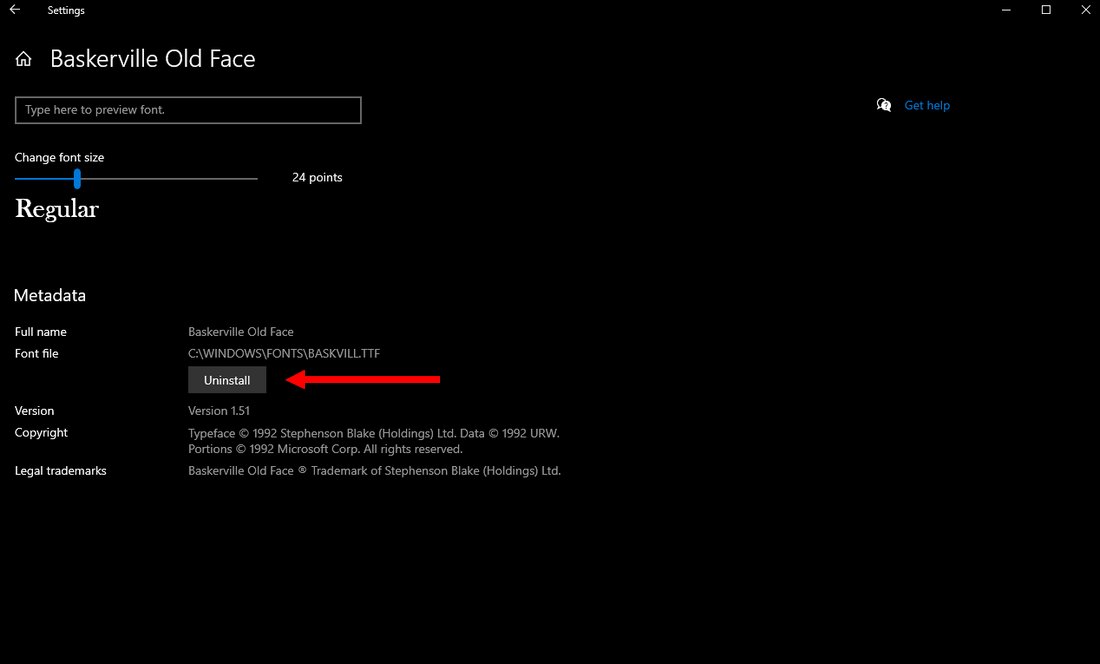
Here you’ll see an Uninstall button. Simply click it to delete the font.
Method 2: Use the Control Panel
You can also access the Fonts page from the Control Panel. It’s the more convenient option if you’re using an older version of Windows.
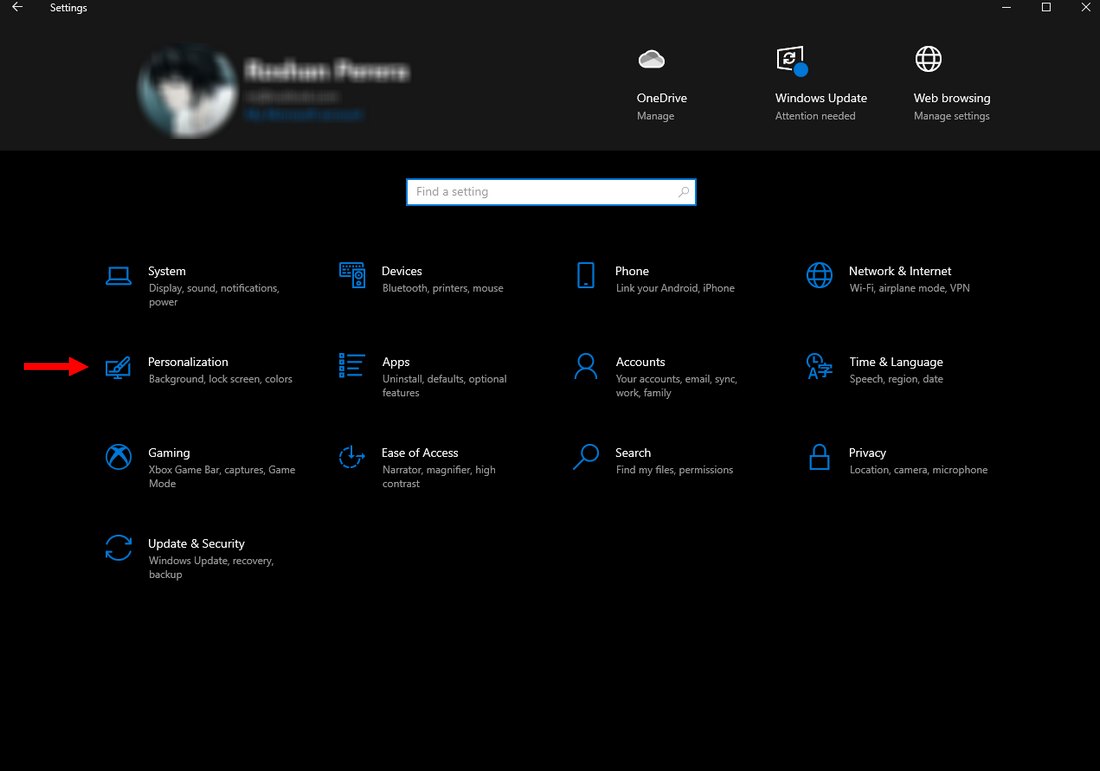
Simply open the Control Panel and go to Personalization >> Fonts. If you’re on Windows 7, it will be Appearance and Personalization.
Select a font and click the Delete button.
Method 3: Delete From Fonts Directory
While the above methods are easier, we recommend that you directly access your fonts directory to better organize and manage your fonts collection.
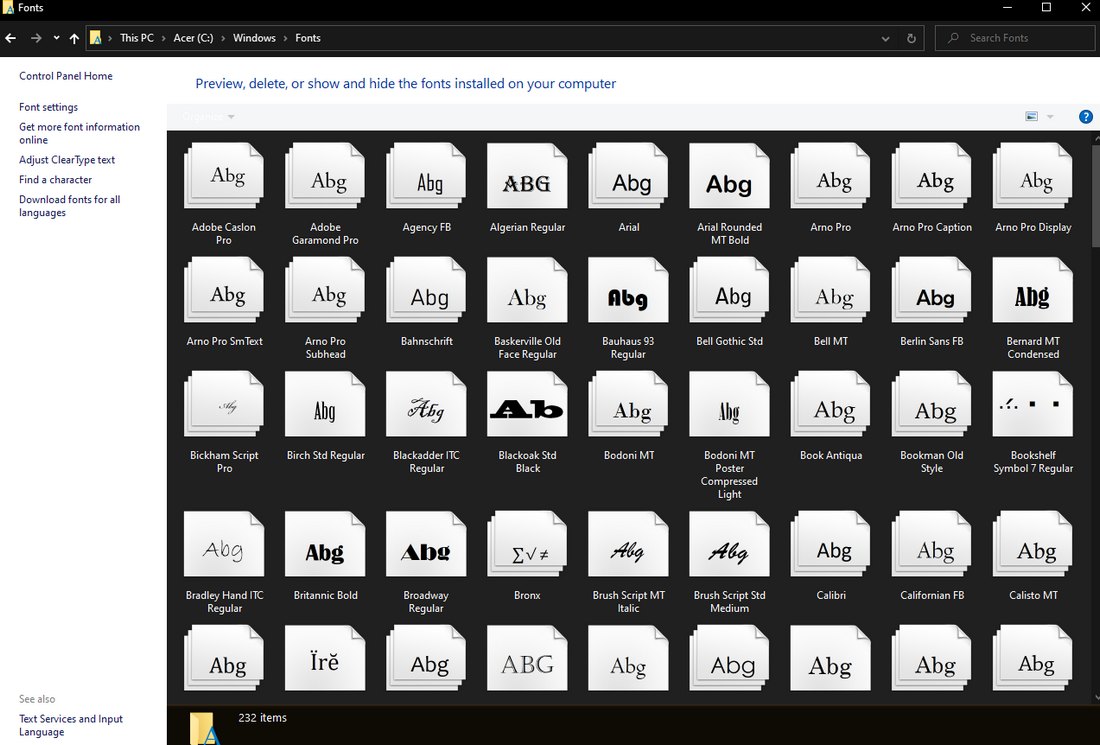
Go to your Windows directory. Inside the Windows directory, you’ll find a folder for Fonts. It’s usually located at C:\Windows\Fonts.
This folder contains all of your installed fonts. From here, you can directly delete fonts. As well as hide fonts.
You can also backup your fonts from this folder. Simply copy any font and paste it into another folder to create a backup copy.
How to Uninstall Fonts on Mac
If you’re a Mac user, there are ways you can both disable and uninstall fonts. Here’s how it works.

Go to Applications and open Font Book.
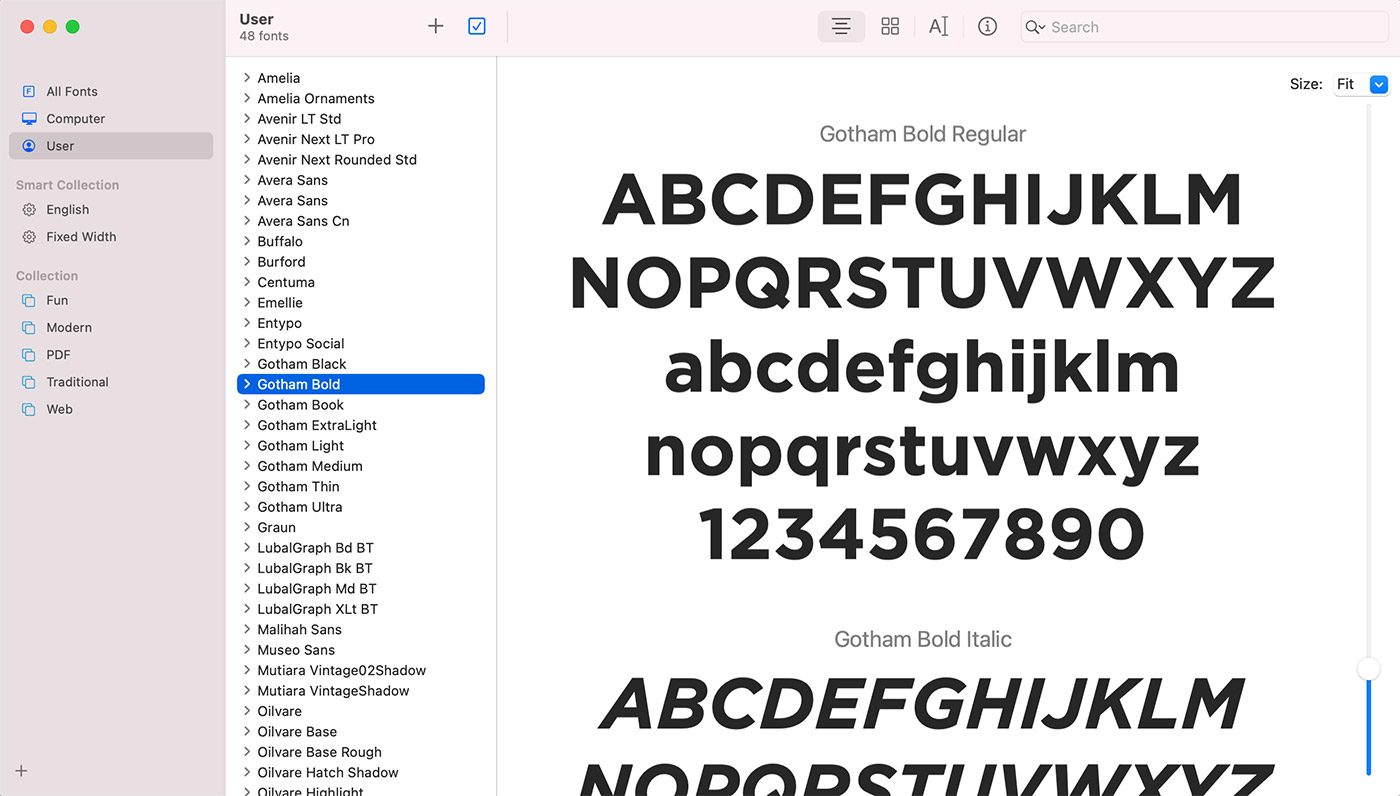
Search and select the font you want to uninstall and press the Delete key on the keyboard. This will completely remove the font from the Font Book.
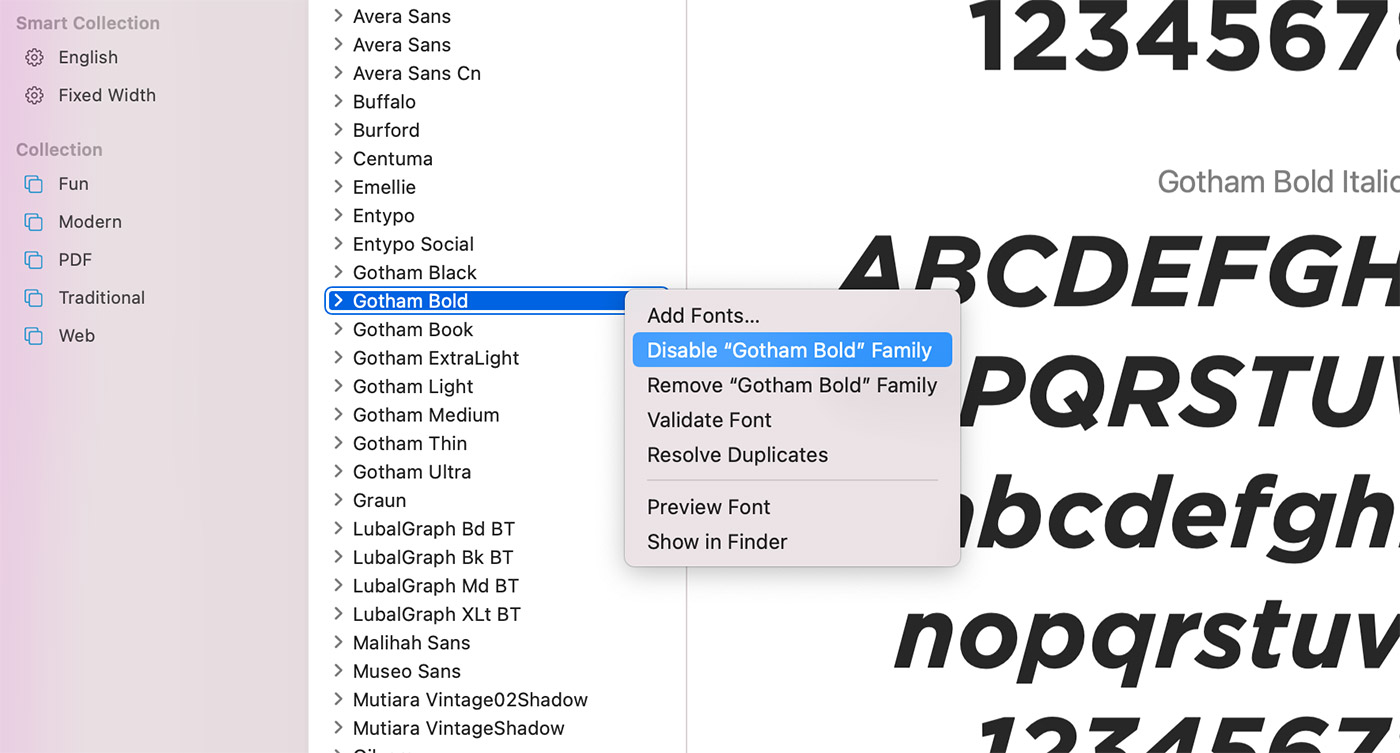
If you want to disable a font, select the font you want to disable and click the Disable checkbox in the toolbar. When you disable a font, it will appear dimmed in the font lists. You can enable them back whenever you want.
In Conclusion
Now that you have decluttered your fonts collection, be mindful of what you add to this collection next. Make sure to add only the best fonts that you think are useful to your work.
You can start by checking out our handpicked fonts collections to find best of the best fonts for designers.
FAQs About Using Custom Fonts
If you’re new to using custom fonts, these frequently asked questions will come in handy.
How to Get Custom Fonts?
There are many ways you can get custom fonts. You can download fonts for free from websites like Google Fonts. Or you can get premium fonts for professional designs from marketplaces like Envato Elements.
How to Install Custom Fonts On Windows 10?
We talked about how to uninstall fonts but how exactly do you install fonts? Well, it’s easy. After downloading a font, copy the font file, then open the Font Settings page and paste the font. That’s it! Refer to the guide above to see how to access the Font Settings page.
How to Add Custom Fonts to Photoshop?
You don’t have to follow any special steps to add fonts to Photoshop. When you add a font to your system fonts collection, it will automatically appear in the Photoshop fonts list. So simply follow the steps in the previous section to install fonts.
How to Export Fonts in Windows?
The best way to export fonts in Windows is to use the Fonts directory. Go to C:\Windows\Fonts folder to access all your installed fonts. Then copy any of the fonts to a different folder to export them. Now you can share the fonts with your friends or keep a backup copy.
What is Font Licensing?
Font license gives you the permissions you’ll need to use the fonts in your projects. There are many different types of font licenses but mainly they all come down to personal use and commercial use licenses.
Most free fonts are only available for personal use and often you’ll have to give credit to their authors. Premium fonts have commercial licenses and you can use them with your client projects and promotional materials.