Get Up And Running With Craft CMS
Craft CMS is brought to you by the talented folks at Pixel & Tonic. It is actively maintained and kept in line with the changes in the modern web development world and is rising in popularity amongst CMS’s — with an impressive client list such as Netflix. It also has a very active Discord server, growing to over 5,000 members in just a year of it being live.
Why Use Craft CMS?
Craft CMS has been our go-to CMS for around four years now; we’ve built client websites and even our own business on Craft. As a company, we’re constantly checking the CMS market and have always landed back at Craft. So, let’s go into the reasons we chose Craft CMS over the others on the market:
- Interface familiarity, making it fairly easy for anyone coming from WordPress.
- Active development community.
- Flexible fields, giving you control over how your content is structured.
- No lock-ins or monthly fees. Just a one-off fee if you’re going Pro/eCommerce.
- Extensibility with Craft’s growing plugin store.
So, with the introduction out of the way, I’m going to show you how to get up and running with a fully set up Craft CMS local environment in around fifteen minutes. Once we’ve completed the following steps, you should have a great foundation to start your next web project, and, hopefully, be ready to move away from WordPress for good.
Installing our Development Environment
Craft CMS ships with a very handy tool to get your local environment set up. This tool is called Craft Nitro and makes setting up a Craft CMS environment simple. It’s new to the Craft scene but helps a great deal.
Setting Up Multipass
Craft Nitro requires something called Multipass which creates a Ubuntu virtual machine on your system. (Don’t worry, you won’t need to set up or ever open Ubuntu.)
- Download the latest Multipass installer for your operating system from the official website.
- Once downloaded, run the installer. When this is complete you should be ready to move on to the next step.
Setting Up Craft Nitro
The Craft Nitro setup is straightforward and involves one command line script to get it installed on macOS and Linux, but for Windows it’s a bit different. I’ll be going through how to set it up for both types of operating system below. The good news is that once it’s set up it’s done, and you’ll be able to easily create new Craft installs without going through this again.
Installing on macOS and Linux
Open your Terminal and paste the following script line. Once pasted, follow the option prompts on the command line to create your virtual machine with the presets that Craft Nitro has. This should be perfectly fine, but if you fancy fine-tuning, go for it. Just keep in mind that Craft has minimum requirements to run smoothly.
Run the following line in Terminal:
bash Installing on Windows 10 Pro
Installing on Windows is fairly complex, but shouldn’t take too much time to get up and running. Just make sure you have Hyper-V enabled. Unfortunately, Hyper-V cannot be installed on the Home Edition version of Windows.
- Make sure Hyper-V is enabled (more details here);
- Download
nitro_windows_x86_64.zipfrom the latest release; - Create a Nitro folder in your
homefolder if it does not already exist (i.e.C:\Users\<username>\Nitro); - Extract the zip file and copy
nitro.exeinto the Nitro folder you just created in your home folder; - If this is your first installation, run this from the command line to add Nitro to your global path:
setx path "%PATH%;%USERPROFILE%\Nitro" - Start the Windows terminal (
cmd.exe) with administrator permissions and run Nitro in it.
Once you have completed the above, follow the terminal instructions to create your first machine. The default presets Craft Nitro sets out should be perfectly fine for your environment.
Installing Craft CMS
So far we’ve installed Craft Nitro and created our virtual machine, and we’re now ready to install Craft CMS. In the following instructions, we’re going to download Craft and “mount” our files, allowing us to develop in our current system and see the changes reflected in our Ubuntu virtual machine. We’re also going to set up our initial database and get a local domain we can use, e.g. myfancyproject.test. Let’s get going:
Creating A New Project
- Create a new folder where you’d like to develop/install Craft;
- Download Craft CMS from the latest release (via Composer or Zip);
- Unzip/Move contents into the folder we just created;
- Open Terminal/Command Line;
- Go to our created folder.
$ cd /path/to/project; - Run
nitro add; - Follow the on-screen command line prompts. (The presets are usually fine but modify as you wish.)
Tip: If you’re seeing "Not Readable" issues on macOS, then Multipass needs to have full disk access. To do this, ensure multipassd is checked under System Preferences → Security & Privacy → Privacy → Full Disk Access.
Connecting To Our Database
We should now have a test domain and our project files mounted — I know, pretty easy so far, and that’s the hard bit complete. Connecting to our database requires us to add our database details for our newly created site in our project’s .env file.
- Open up our project’s .env file (located in the root folder);
- Change the database details to the following:
DB_USER="nitro"
    DB_PASSWORD="nitro"
    # 'nitro' is the default database
    DB_DATABASE="nitro"
Tip: If you’d like to open the database in your SQL program of choice, all you have to do is run nitro info in your command line, and you’ll see your database IP address under “IPV4”. Use the above username and password (along with the port you selected during setup) to connect.
Install Craft CMS
We’ve set up our virtual machine, set our test domain, and got our database ready to go. Now it’s time to actually install Craft CMS and get into the admin section — it should all be smooth sailing from here. So let’s get to it.
- Head to the test domain you set during setup followed by
/admin(e.g.testdomainyouset.test/admin); - You should see Craft CMS’s install screen (Hooray!);
- Follow the on-screen installer instructions;
- Once finished, you should be redirected to your new admin panel.
Tip: If you didn’t install Craft via Composer, then you may be prompted for a security key. To generate a cryptographically secure key, use a password manager like 1Password / LastPass. (There’s no length limit so it can be as complex as you’d like). Open up our .env file once more, find the following line SECURITY_KEY="", paste your generated key inside the quotes and save.

You should now have a fully set up local development environment for Craft CMS, which will provide a great jumping-off point for anything you’re trying to develop, whether that be moving your cat blog from WordPress or creating an eCommerce store. Just remember to turn off your server once finished using nitro stop in your command line.
Here are a few helpful commands for Craft’s Nitro that will help you during development:
nitro start(starts the development server)nitro stop(stops the development server)nitro context(shows you information about the environments installed)nitro info(information about the current environment, PHP version, etc.)
Setting Up Our Cat Blog
Now that we’ve got Craft up and running, we can make a start on our cat blog, and start enjoying the power that Craft offers up to us. In this section, we’re going to be setting up our content model, creating our base theme template and building out our homepage and inner-post pages.
Content models sound scary, but in Craft it’s the opposite; there’s an easy-to-use GUI system — no need for complex code around here! For our cat blog, we need to set up a section called “Cats” which needs the cat’s name, photo and a small description, and then a single page “Homepage”.
How To Create Sections And Pages How To Create A Cat Post
How To Create Sections And Pages
We’re going to create our “Cats” section and our homepage which will be a classed as a “single” within Craft’s language. Sections are exactly what they sound like — sections of your website — and Pages are also self explanatory, single pages of your website such as legals and our homepage.
Creating Our Cats Section
- Go to Settings in the left hand menu;
- Click “Sections”;
- Click “New Section”;
- In the “Name” put
Cats; - Section Type
Channel
(Channels are used for streams of similar content, just like our cats.) - Within “Entry URI Format” we’re going to make sure it’s
/cats/{slug}; - Within “Template” we’re going to put
cat; - Save.
What we’ve done above is tell Craft that we’d like any post within the Cats section to have a URL format like so: ourtestdomain.test/cats/fluffy, and the template we’d like to use is cats.twig.
Creating Our Homepage
- Within “Sections”, click “New Section”;
- In the “Name”, put
Homepage; - Section type
Single; - Tick the “Homepage” checkbox;
- Within “Template” we’re going to put
index; - Save.
Creating Fields
Craft comes with no preconceptions of what you want to build; it gives you a completely blank slate. We create exactly what we want our post’s structure to be by generating our own “Fields”. Let’s create our cat’s “Fields” for the following name, description and photo.
- Head to the admin section of your site by visiting
yourchosendomain.test/admin; - Navigate to Settings in the left hand menu;
- Click “Fields”;
- In the top right click “New Field”.

Setting Up The Cat’s Name
We’re going to need a name for our cats, so let’s create a name field.
- In the Name put “Cat’s Name”;
- Choose “Plain Text” in the Field Type;
- Now Save.
Setting Up The Cat’s Description
Our cats also need a description, but let’s cap the number of characters our authors can enter about each cat.
- Click “New Field” again;
- In the Name put “Cat’s Description”;
- Choose the “Plain Text” field type again;
- Create a limit by adding “2000” in the Field Limit box;
- Click Save.
Setting Up The Cat’s Photo
We’re going to want to add photos to each of our cat posts, and there may be multiple photos per cat — not a problem. But before creating a field, we need to tell Craft where we want the photos to be stored on our server. (Craft also has the option of uploading to Cloud storage solutions as well.)
- Head to “Settings” in the left hand menu;
- Click “Assets”;
- Click “New Volume”;
- In the Name put “Cat’s Photo”;
- Enable “Assets in this volume have public URLs”;
- In “Base URL” put
@web/uploads/; - In “File System Path” put
@webroot/uploads/; - Save.
The above properties are telling Craft where we would like our uploaded files to be stored. You can change these to whatever you wish. You can also read more into setting environment variables for these in the documentation.
Matching Field to Sections
Now we’ve got our fields and sections set up and running, we’re going to need to combine the two together by assigning what fields we’d like our sections to have. This is as easy as dragging and dropping in Craft.
- Head to Settings;
- Click “Sections”;
- Now click “Edit Section Type”;
- Now click our “Cats” Section;
- Select “Fields” tab in the right hand menu;
- Drag over the “Cats” fields we previously created to the content pane;
- Once dragged across, Save the Cats Section.
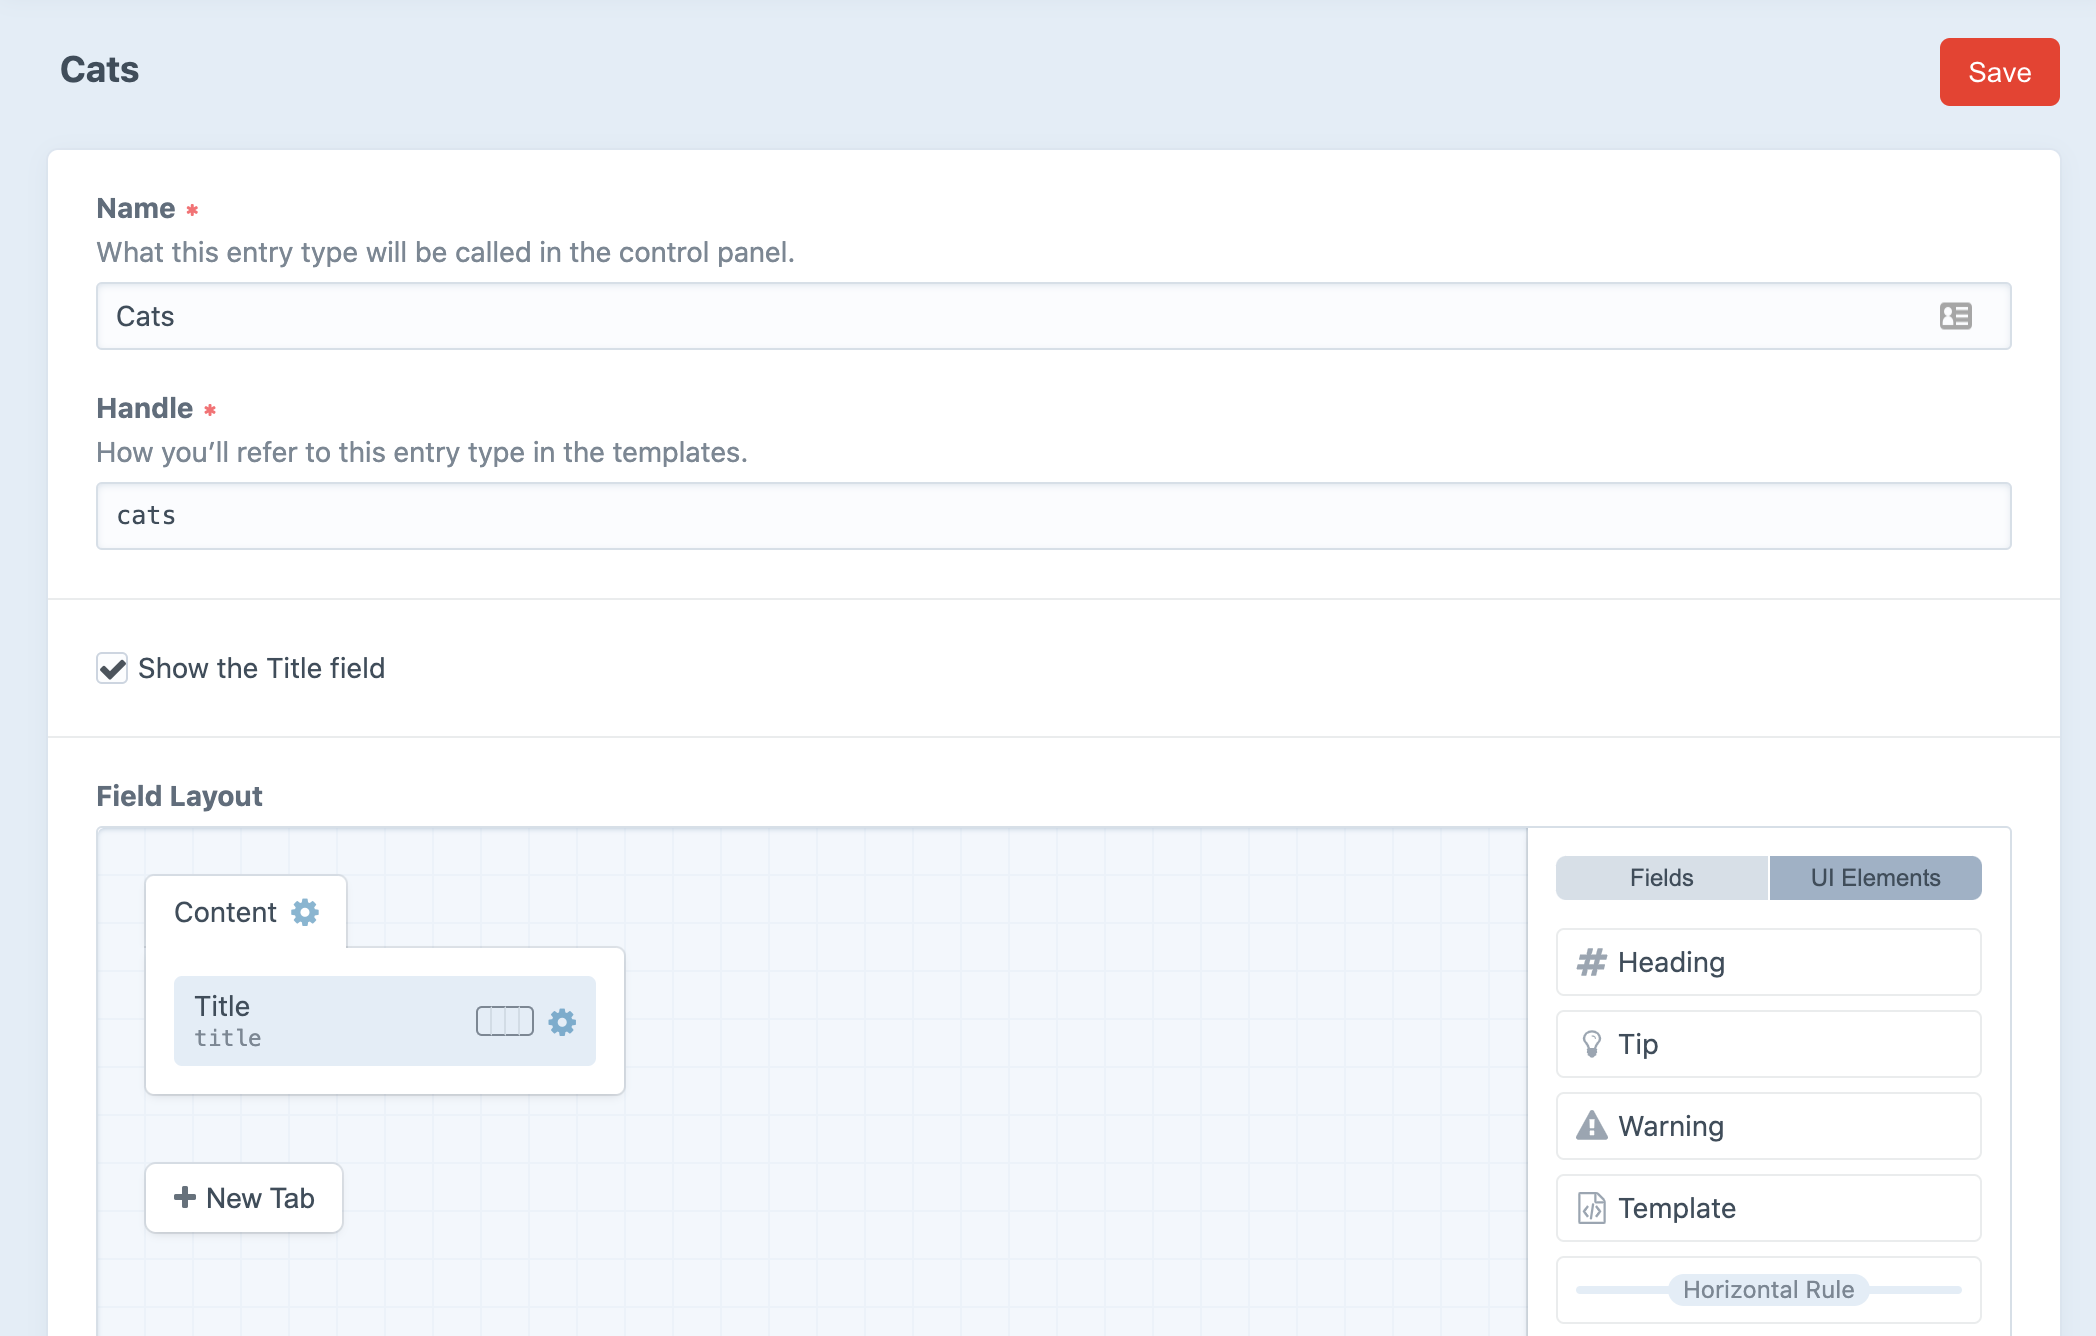
Tip: You can remove the “Title” field from our posts by disabling the “Show the Title Field” option. You may want the cat’s name as the title for instance.
How To Create A Cat Post
Now it’s time for us to actually create a fluffy cat post. Head over to the “Entries” in the left hand admin menu.
- Click “New Entry”;
- In the dropdown select “Cats”;
- Create your post! (The fluffier the better.)
Listing Our Cat Articles
Now we have our content model done, we can start building the basic interface for our cat blog. Craft is written in the Twig/Liquid language. If you’ve ever dabbled in Shopify development this should be familiar to you; if not, it’s fairly easy to pick up. But first, we need to open our Craft install folder in our favourite code editor (where you unzipped the Craft install).
- Open Craft Install in your code editor;
- Create a new file in Templates called
index.twig
(Craft may have installed a default index. Open this instead and wipe it.) - Add the following code:
<!DOCTYPE html>
<html xmlns="http://www.w3.org/1999/xhtml" lang="en-US">
<head>
  <link rel="stylesheet" href="https://stackpath.bootstrapcdn.com/bootstrap/4.5.2/css/bootstrap.min.css" integrity="sha384-JcKb8q3iqJ61gNV9KGb8thSsNjpSL0n8PARn9HuZOnIxN0hoP+VmmDGMN5t9UJ0Z" crossorigin="anonymous">
</head>

<body>
{# Create an entry query with the 'section' and 'limit' parameters #}
{% set myEntryQuery = craft.entries()
    .section('cats')
    .limit(10) %}

{# Fetch the entries #}
{% set entries = myEntryQuery.all() %}

{# Display the entries #}

<div class="container">
  <div class="row">
    {% for entry in entries %}
      <div class="col">
          <article class="card">

              {% set catImage = entry.catsPhoto.one() %}
              {% if catImage %}
                <img src="{{ rel.url }}" class="card-img-top" alt="...">
              {% endif %}

              <div class="card-body">
                <h1><a href="{{ entry.url }}">{{ entry.title }}</a></h1>
                <h2>{{ entry.catsName }}</h2>
                <p>{{ entry.catsDescription }}</p>
                <a class="btn btn-primary" href="{{ entry.url }}">View {{ entry.catsName }}</a>
              </div>

          </article>
      </div>
    {% endfor %}
  </div>
</div>

</body>
</html>
In the code above, we tell Craft about our section “Cats” and put a limit on the posts to 10. Then we fetch the entries from that section, and continue to loop over each of the cats within the fetch entries in the following code. Images are a bit different in Craft: they’re stored as an array, so we do another loop within our code to get the images of the cats.
Let’s Test
Open up your test development URL that we created during setup. (Make sure your nitro server is running using nitro start). We should now see the posts we created displayed on our index page. Clicking through to see more information gives us a 404 error, so let’s fix that next!

Tip: We included Bootstrap to make it look a bit fancier, but feel free to include any framework you’d like.
Cat Post Page
We’re going to do the same as we did with the index page. Let’s create the cat template by creating a new file within the Templates folder called cat.twig. As we’re already within the Entry context, we don’t have to re-query it.
<html>
  <body>
    {% block content %}

      {% set catImage = entry.catsPhoto.one() %}
      {% if catImage %}
        <img src="{{ rel.url }}" class="card-img-top" alt="...">
      {% endif %}

      {{ entry.title }}
      {{ entry.catsName }}
      {{ entry.catsDescription }}

    {% endblock %}
  </body>
</html>
Save this, and refresh our test development website. We should now be able to browse to our cats entry page! Voila!
Going Headless
If you fancy going more technical with Craft and using it as your content management system to feed into your web app, you can do this by using Craft CMS’s Pro package which adds user accounts and GraphQL to your config. The Pro version of Craft is free to trial and test against, which means you can give it a thorough test before committing. Now we’ll go into how to set up a basic GraphQL API using Craft’s built-in GraphQL editor.
Start Pro Trial
Once you’ve installed Craft CMS, head over to the "Plugin Store" and look for "Upgrade" in the left-hand menu options. Click "Trial" on the "Pro" section and run through the upgrade process.
The Basic Setup
Once you’ve started your Pro Craft CMS trial, you should now notice a new menu option in your admin side panel: GraphQL. Before we jump straight in, we need some content models which can form the output. When you’ve created your content models, Craft CMS will automatically create you a GraphQL API out of the box. No need to define the schemas either!
Create Your Cat API Endpoint
We’ve got our content sorted; now we want to create the endpoint so we can fetch all our cute cat content. Let’s do that now:
- Open your Craft CMS project routes.php in your IDE.
- Adding the following rule will make your API endpoint available at
http://yourprojecturl.test/api:return [ 'api' => 'graphql/api', // ... ]; - Save and close.
- Test by pinging the endpoint:
curl -H "Content-Type: application/graphql" -d '{ping}' http://yourprojecturl.test/api - You should receive “pong” in response.
Enable Your Content
We’ve set up our endpoint to receive requests. It’s now time for us to enable/disable the certain parts of our site we’d like to be available via our API. For example, you may want to turn off certain entries that contain sensitive information. Craft makes this process extremely easy; it’s a case of ticking/unticking. (You can get more complex by writing your own schemas as well.) For now, we’ll be creating a public schema that’s publicly available. You can create private schemas which require a secret key, but this is out of scope for this guide.
- Head over to the GraphQL section via your admin panel sidebar;
- Click “Public Schema”;
- Enable the “Cats” section.
(This will make our content available through your endpoint.) - Save.

Testing Our Endpoint
Now that we’ve chosen the data we’d like to make available via our endpoint, it’s now time to give it a test. In the GraphQL dropdown in your left-hand admin panel, you’ll notice an item called "GraphiQL". GraphiQL allows us to explore our API and query it within our dashboard.
- Open GraphiQL;
- Change "Full Schema" to "Public Schema";
- Write the following GraphQL query in the left-hand pane:
query ($section: [String], $orderBy: String) { entries(section: $section, orderBy: $orderBy) { title slug id } } - Click the "Play" button.
Tip: If you’re not 100% on GraphQL queries, that’s not a problem; Craft comes with a handy guide to help you.
Wrapping Up
We’ve now done a fairly light dive into the world of Craft CMS. Let’s sum up what we’ve accomplished in the following guide:
- Set up a local development environment with Multipass;
- Created and set up a brand new Craft install;
- Added a test domain in which we can access our install;
- Created a cute cat blog;
- Gone headless;
- Created an API endpoint to access our cats.
If you’re interested in getting more involved with Craft CMS and being part of the community, you should join the very active Craft Discord server and read more via the official documentation.