How to Unpublish WordPress Site: Step-by-Step Guide
No matter what kind of blog you run, it sometimes happens that you want to close it. In this case, you may wonder how to unpublish a WordPress.com site. If you are not impressed with the idea that your blog will be hanging out on the internet, deleting it will be a great idea. Further, you may find a detailed guide on how to remove your blog based on a WordPress theme.

- Easy Guide on How to Unpublish a WordPress Site
- How to Make WordPress Database Backups?
- Wrap Up
Note: Even though the site will not appear under its URL or in search results after removal, it still remains on the third-party archives, which makes it accessible somewhere on the web.
Easy Guide on How to Unpublish a WordPress Site
To begin with unpublishing your WordPress site, log into your hosting account on WordPress.com. On the admin page, scroll down. Locate the ‘Settings’ button and click it to access the page with settings.

Find ‘Delete your site permanently’ at the bottom of the Settings page and click the button to launch the process. Be advised that this action will not lead to complete removal. Ahead, there are a few more steps to getting rid of your blog.

Although this step is optional, we recommend not missing a chance to export your content in order to save all the hard work you’ve done for developing your blog. Downloading content will require hitting the ‘Export Content’ button.

After choosing ‘Export Content’, you’ll be redirected to the page with two sections: content and media library.
Starting with content, you’ll be able to export blog posts and pages on your site. Choose ‘Export All’ to begin the process. As soon as it is done, you’ll get a download link to your email box (the one you’ve specified in file).
Now, export media library hosted on WP. Choose to download and get the files downloaded to your computer. Make sure to save them.
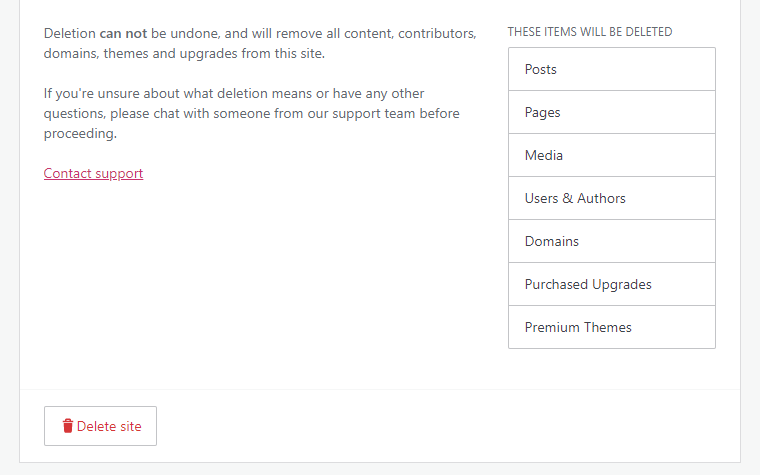
When done with exporting content, go back to continue the removal. As soon as you get to the previous page, scroll down until you see the red button ‘Delete Site’. Hit the button to start the final stage of the removal and delete the WordPress account. On this page, you can also learn about the types of data that will be permanently deleted.
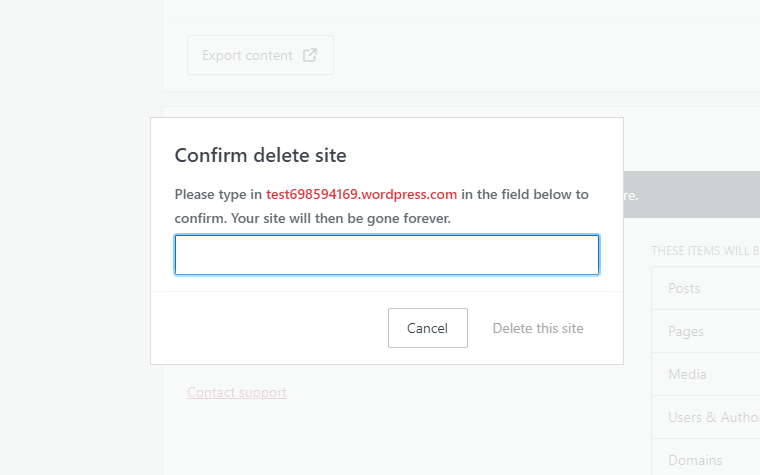
After that, WordPress will request that you insert your website name (this is done to prevent it from removing the site by mistake so you have to confirm it). Enter the entire URL and then click ‘Delete this Site’ button to unpublish the WordPress site.
Extra Step: In the event that you decide to keep your domain name and WordPress theme, but remove the files, you can refer to this optional step. When getting to a ‘Settings’ page, find ‘Delete your Content’ button and click on it to begin the process. After being redirected to the next page, you’ll face two options: either get the site deleted by the support team or remove it on your own by following the instructions. If you choose to contact the support line, WP will delete your content.
How to Make WordPress Database Backups?
We don’t want to dramatize things, although vulnerability is common for most WordPress websites. You’re not protected from losing access to your account. And the reasons are quite different — starting from hardware failure through your hosting service to harmful cyber-attack and plugin failure. This is why knowing how to backup your WordPress database (DB) is crucial and will prevent data loss.
Regardless of the fact that there are many helpful methods to make a copy of your WordPress database, we’ve opted for a manual guide of how to do that. Let’s consider it.
Open cPanel of your hosting server and log in. Navigate to ‘Database’ and choose ‘phpMyAdmin’ (which is a database manager that lets you monitor MySQL database and WordPress data stored on it).

Once logged in, go to a sidebar with all available databases and choose the proper one (consider DB with ‘wp’ in the name). Click the database to see its internal folder architecture in the sidebar and central page section.
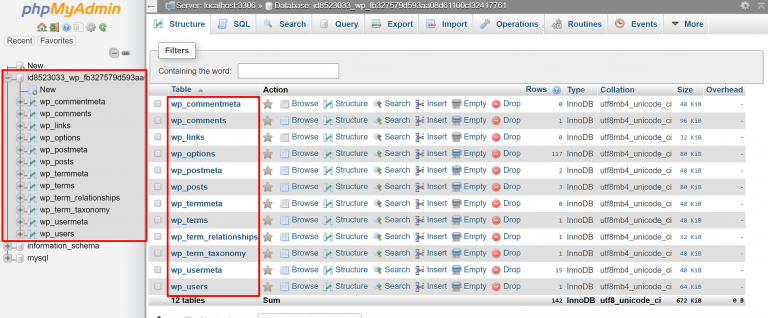
Those possessing multiple WordPress databases are going to have their hands full while searching for the correct database. We recommend opening ‘wp_post’ and compare post names with the ones you want to backup.
If you are confident about the database you’ve chosen, click on the ‘Export’ button on the top of the page.

After hitting the button, you’ll be redirected to a page with several options. Here, you have to select between ‘Quick’ or ‘Custom’ export and choose what file format you want to download your database in.
In the majority of cases, WordPress users opt for ‘Quick’ export and save the file in the ‘SQL’ format. This type of combination saves the WordPress site in its actual form resulting in easy restoring to different servers in the future.
Once you are ready with your choice, push the ‘Go’ button to save the files.

Extra Step: In the event that you don’t intend to create a copy of your entire WordPress site, you can go ahead with ‘Custom’ export. You’ll be taken to a list of various sections of the site so that you can deselect those you don’t want to include in the backup file.
If you are not sure whether custom export is right for you, please consider the following reasons you may want it:
- There is no need to save plugins since they can be reinstalled on the other site with no hassle.
- It is not mandatory to create a copy for comments on your website, especially if you can’t boast with high activity.
No matter the reason you’ll choose, make sure that the unnecessary sections have been deselected.

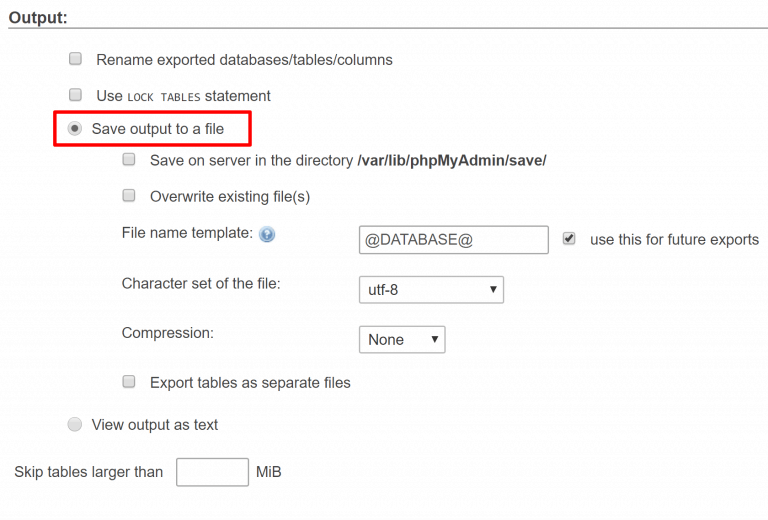
When done with the custom option, you’ll be redirected to the ‘Output’ page. Here, you have to choose ‘Save output to a file’ before proceeding to database download. Make sure to not miss this step, otherwise, phpMyAdmin will command to save the WordPress database in a form that is not suitable for restoring the site later.
Wrap Up
When you face the time when you no longer want to run your blog, you have to know that there are a few options you can choose from: unpublish WordPress site or back it up (leaving yourself a chance to restore it in the future). No matter which option you prefer, it is better to know how to unpublish a WordPress site or create a copy of its database.
This guide is meant to give you all the necessary information to make the process smooth. If you still have any questions, feel free to communicate them to our support line or leave them in the comments below. We’ll get back to you as soon as possible.
Read Also
- How to Create a Website [Ultimate Guide]
- How To Build A Website? Ultimate Step-By-Step Guide for Newbies
- 25+ Tutorials On How To Build A WordPress Theme
- How to Create a PrestaShop Store